.svg)


Since Stripe's start they have made it easy for any website owner to start accepting B2B payments.
As long as you adhere to their terms of service you can start making money online.
But the question lingers, how do you add Stripe to your website?
Do you need a plugin? Do you need to know how to code? Or better yet can you even add Stripe to your website?
In this article we will discuss the answers to these questions.
Including the best Stripe payment form builder and how to use the payment form builder.
We give you detailed instructions so you can find success taking payments with Stripe.
How To Take Payments With Stripe
Let's start with the basics...
How do you take payments with Stripe?
Well, you will first need to create a Stripe account.
Go to Stripe.com and then click sign up.
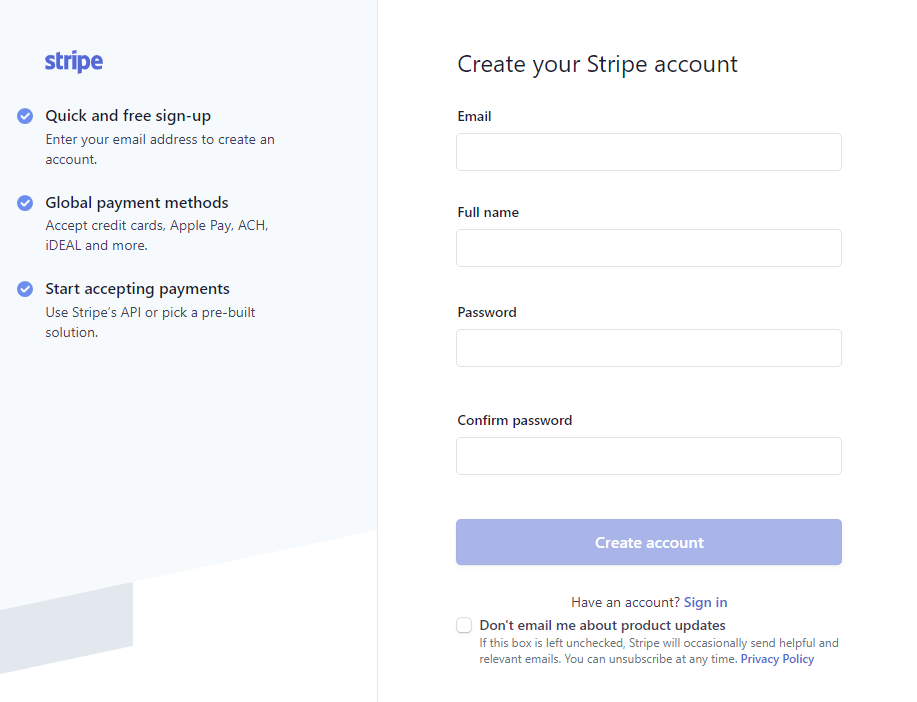
You will then continue to fill in the remaining data about your business.
Stripe needs to verify you are a real person so no fraud occurs.
Then you can connect your bank account so that Stripe can submit payments to you when you sell.
Once you fill in the requested information you will be able to start accepting payments.
There are different ways to accept payments on your website using Stripe.
Depending on your website or platform you are using, they may have the option for you to add payments.
But many online platforms lack the functionality that business owners need.
Most business owners want to be able to accept payments using their same branding...
Which is why most business owners look to use a payment form builder that gives them what they need.
Simple Stripe HTML Payment Form
There are different payment form builders that work with Stripe.
The most notable being ThriveCart, PayKickStart, Cartfuel, and Cartflows.
Unfortunately ThriveCart, PayKickStart, and Cartflows lack key needed features for most business owners.
Those features being the ability to embed a customized payment form on ANY website or platform.
That is a huge disadvantage for business owners who want a specific look on a specific platform.
For example if you wanted to embed your payment form on Webflow or Wix (both are website builders) you would not be able to...
Cartflows only works for Wordpress and both ThriveCart and PayKickStart make you use their site to sell your products.
That's no good for someone who wants full control of their payment form.
Cartfuel is different.
Cartufel has a lot of customization features and is embeddable anywhere.
To get started using Cartfuel go to Cartfuel.io
Sign up for your free account, no credit card required.

Connect to your Stripe account.

Once you've connected your Stripe account, you'll want to create a product sequence.
Click the 'New Product Sequence' Menu Item on the left hand side.
A sequence of products is what we call our payment forms and upsells.
Click to add a new product sequence.
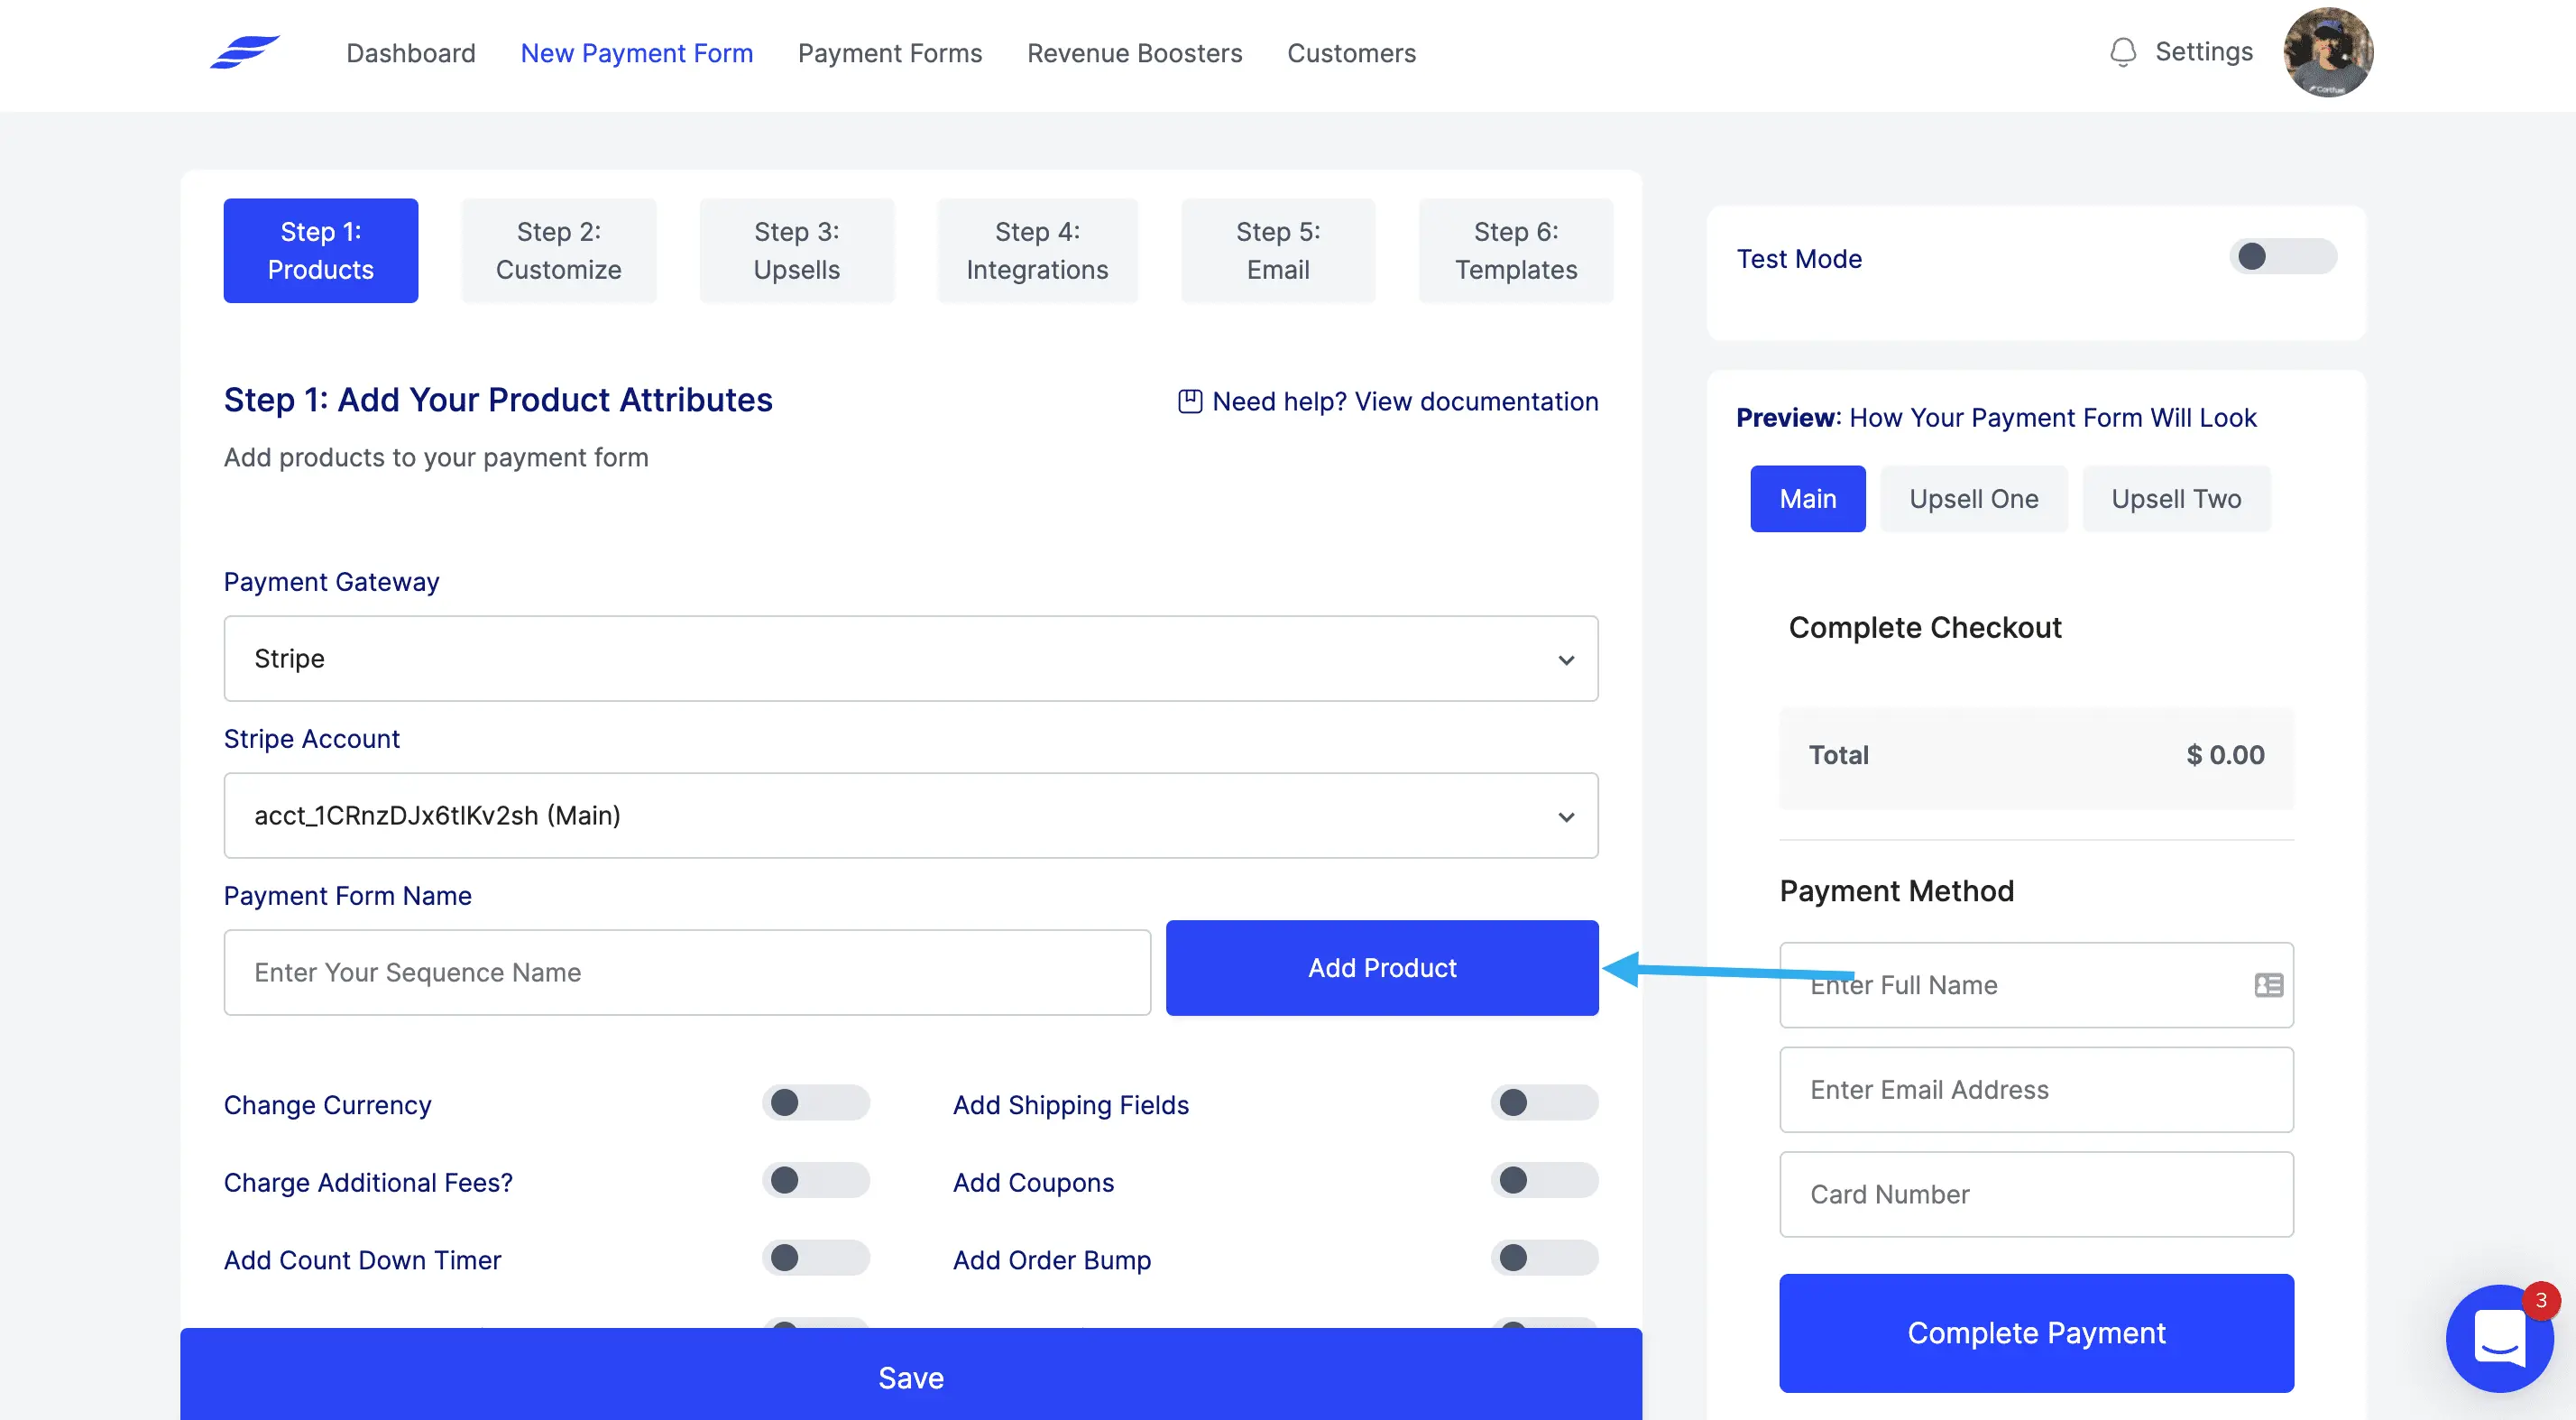
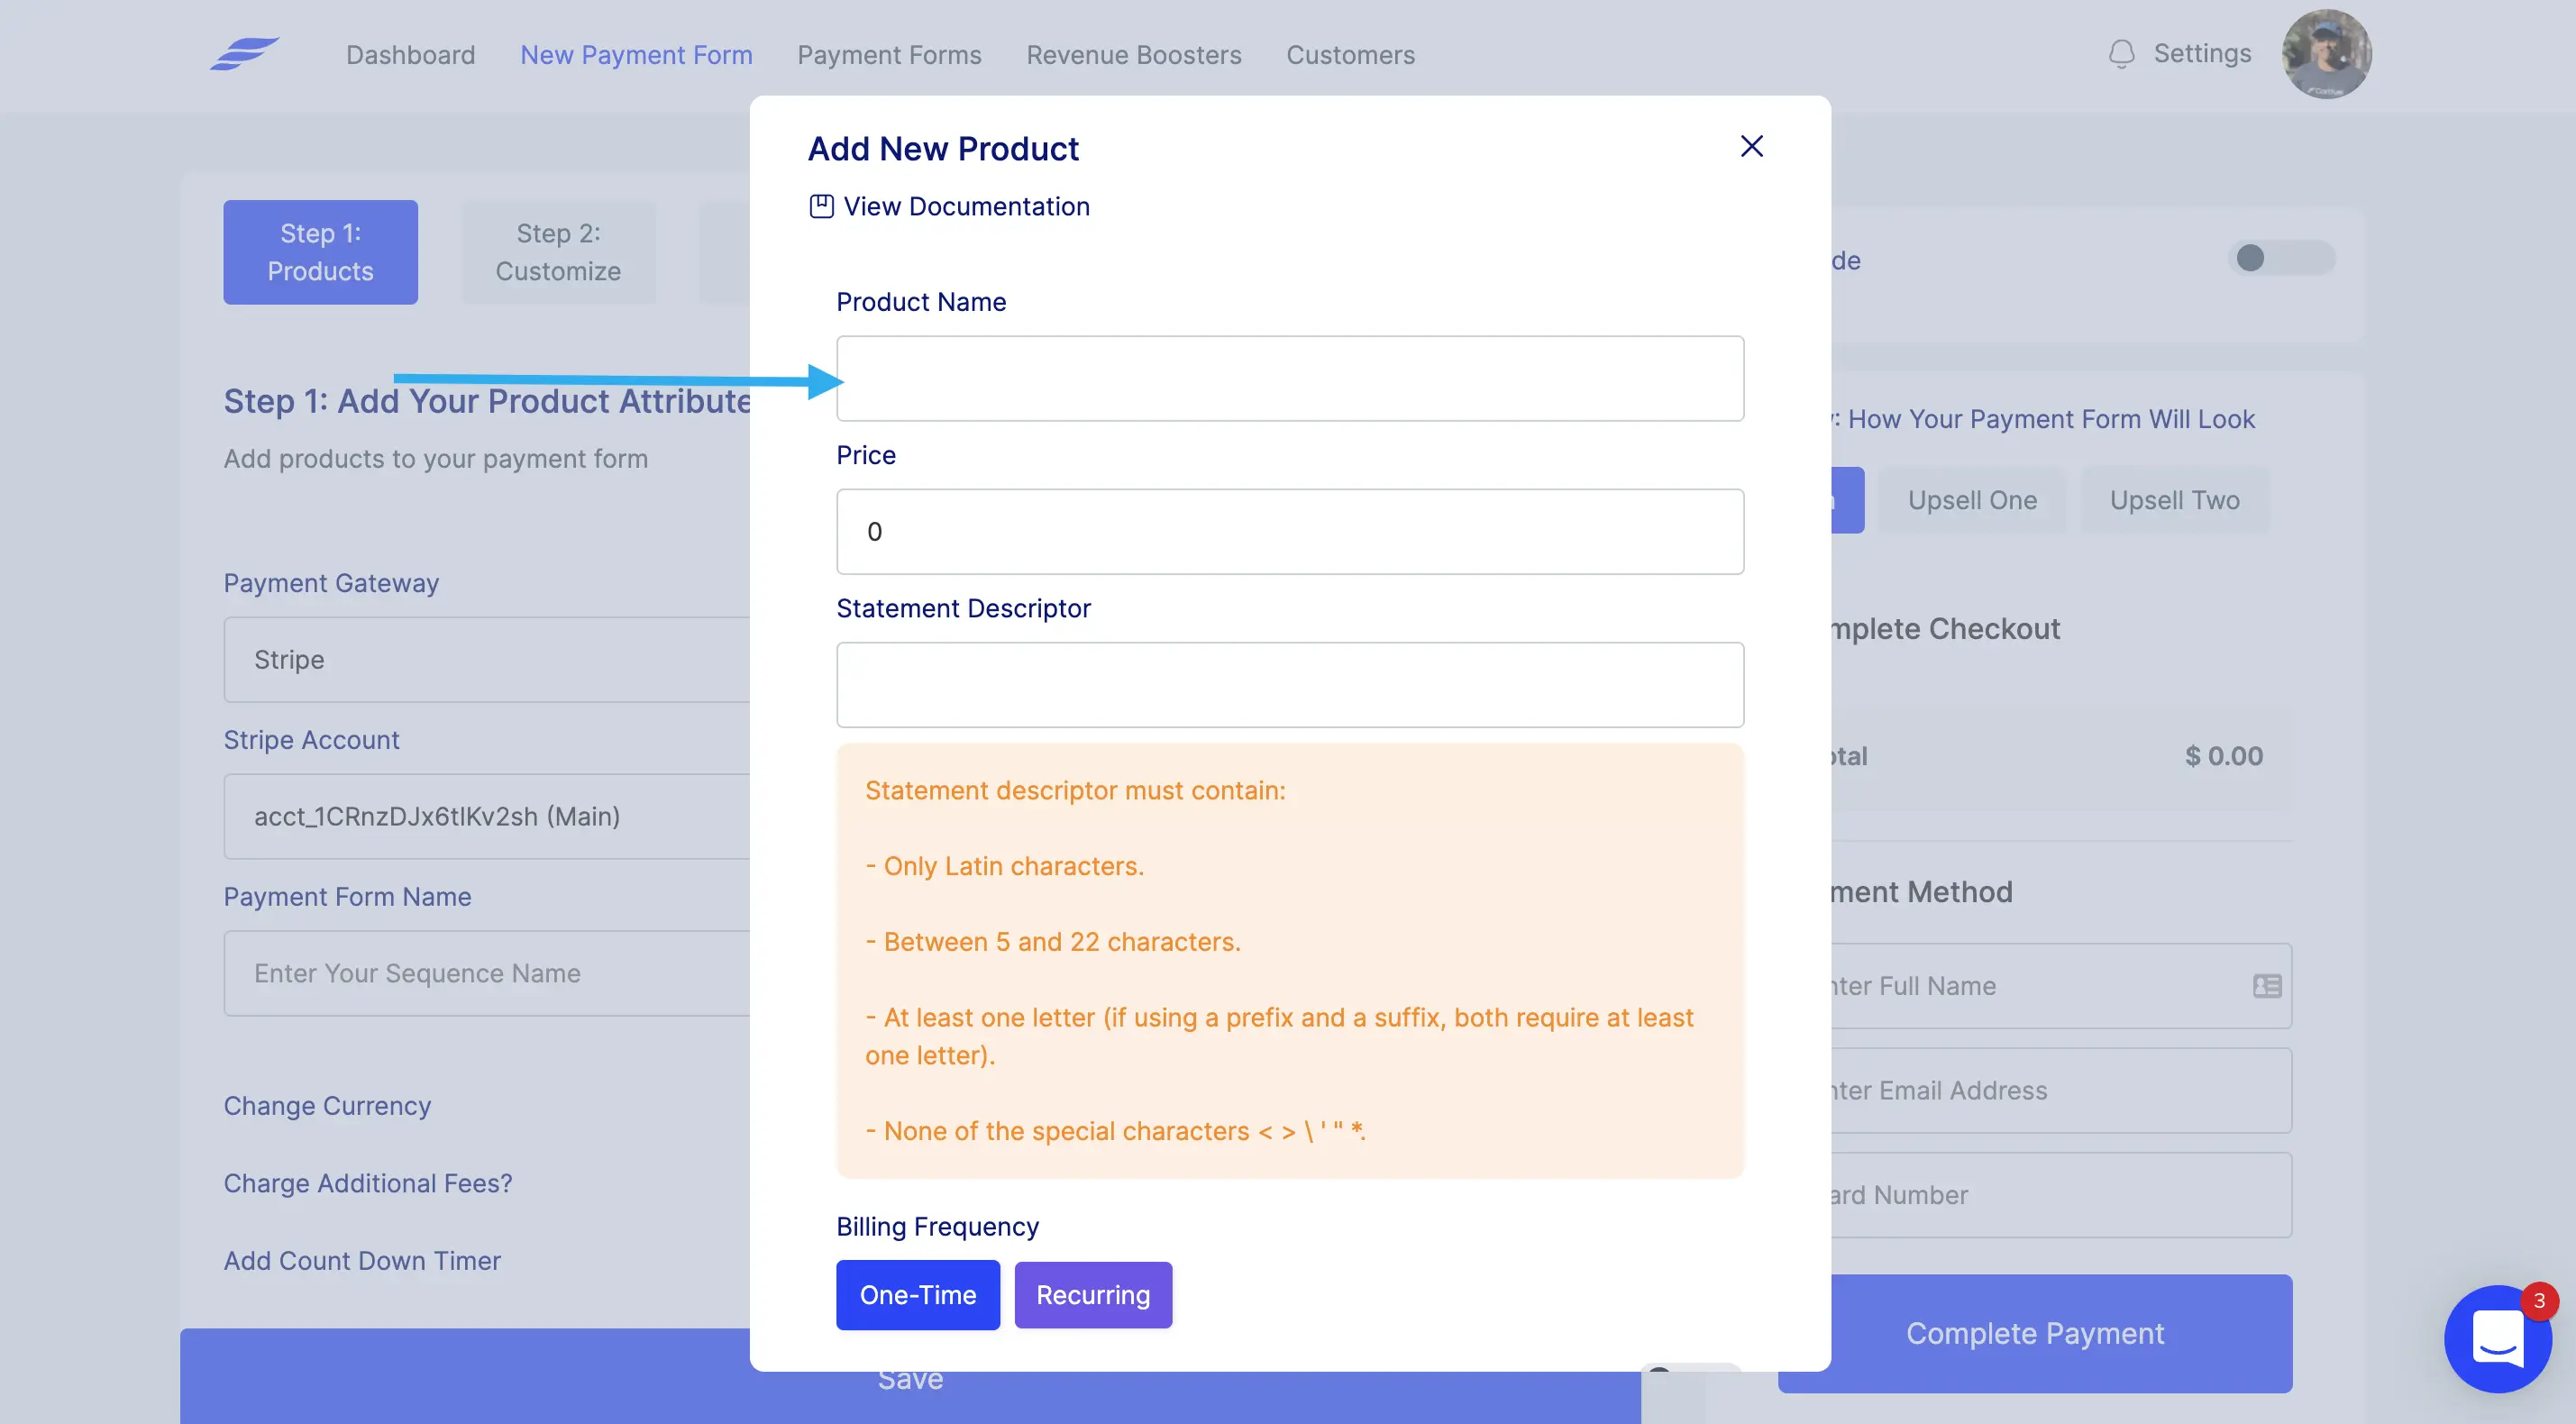
Give a name to your product.
Give a price to your product.
If you want to sell recurring products, see this article to learn how to do it.
Choose if you want to charge extra fees, if you want to add a quantity field, if you charge taxes, add a coupon, add an order bump, or countdown timer.
You will then proceed to the next step, which you can customize your payment form.
Stripe Custom HTML Payment Form
Having a custom payment form that connects with Stripe is easier than it sounds.
If you use Cartfuel you can customize your payment form before embedding it on your website.
This means that you can change the font of your payment form, the colors, and style.
To customize your payment form you will want to be on Step 2 when creating a product sequence in Cartfuel.
This second step is where you will start customizing.
.webp)
Start with choosing which font you want your payment form to have.
There are over 200 fonts you can select from.
All fonts available are from Google, so there is wide assortment.
Next you will want to select which payment form style you want.
Cartfuel gives you two options.
1. Class form style
2. 2-step form style
The classic form style is a clean linear style form.
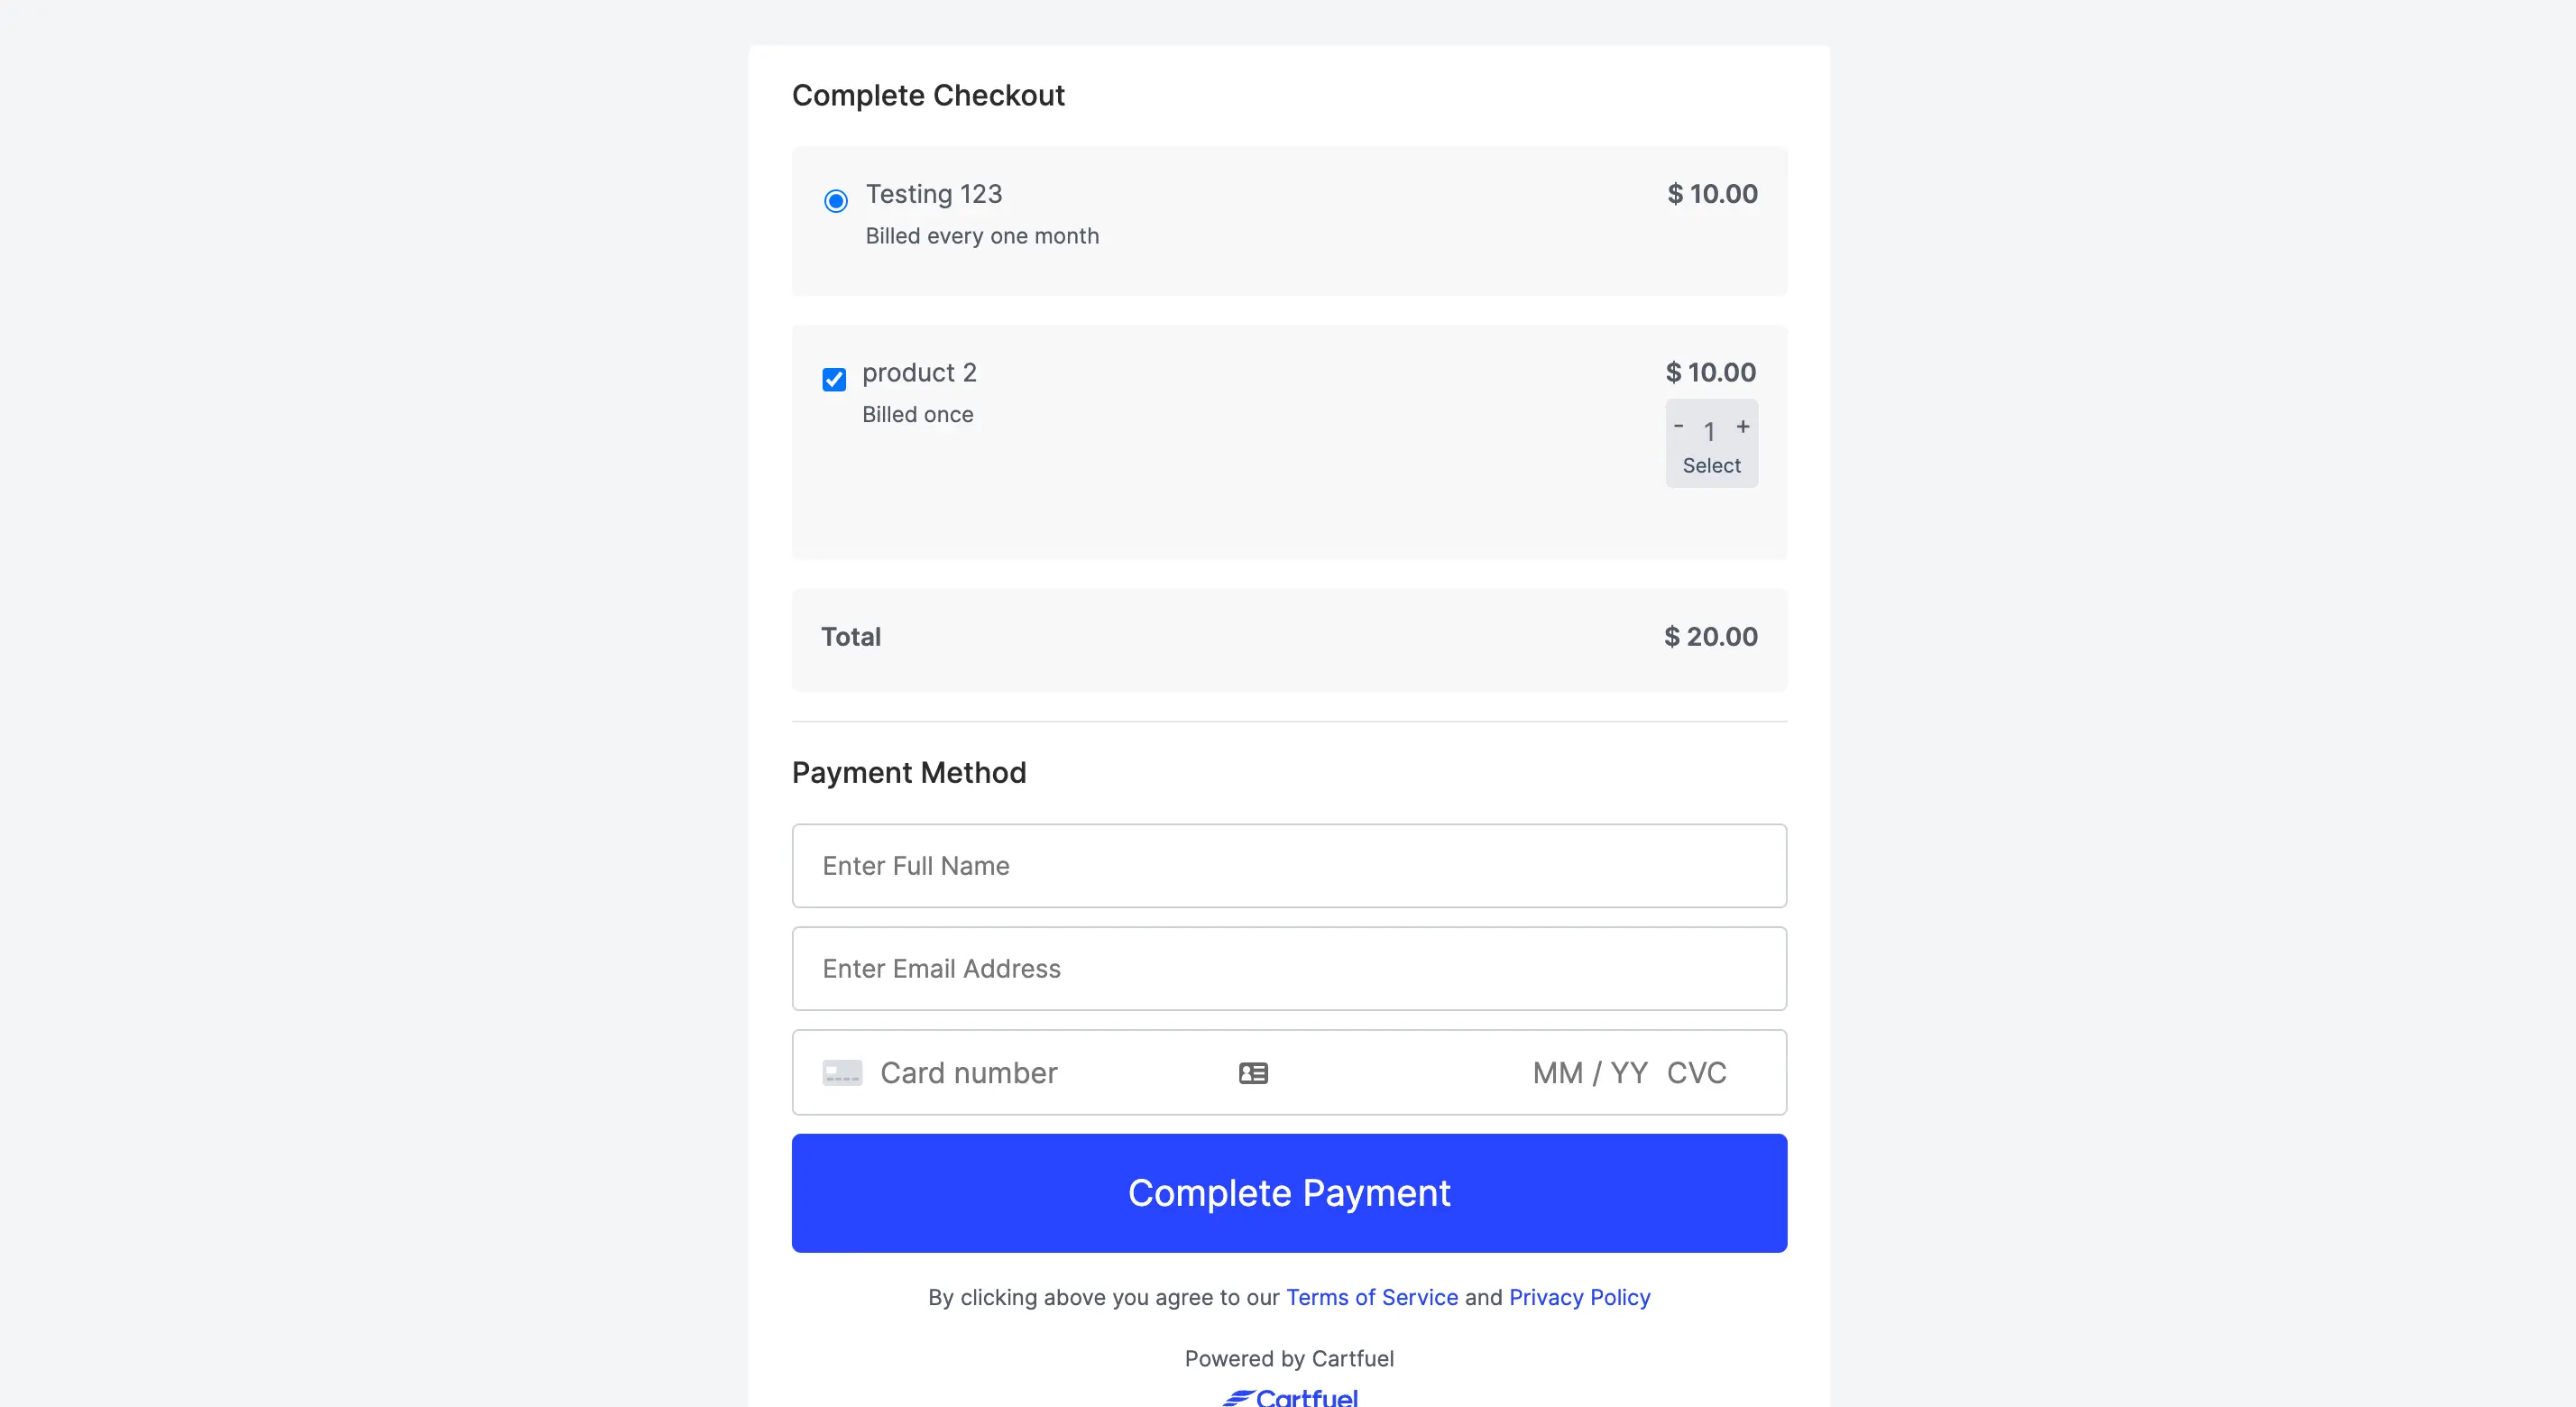
At the top you have the product name and product price.
At the bottom we have the area where customers can enter their debit/credit card information.
The two step form is horizontal. It starts with the first step being where the customer enter the full name and email address.
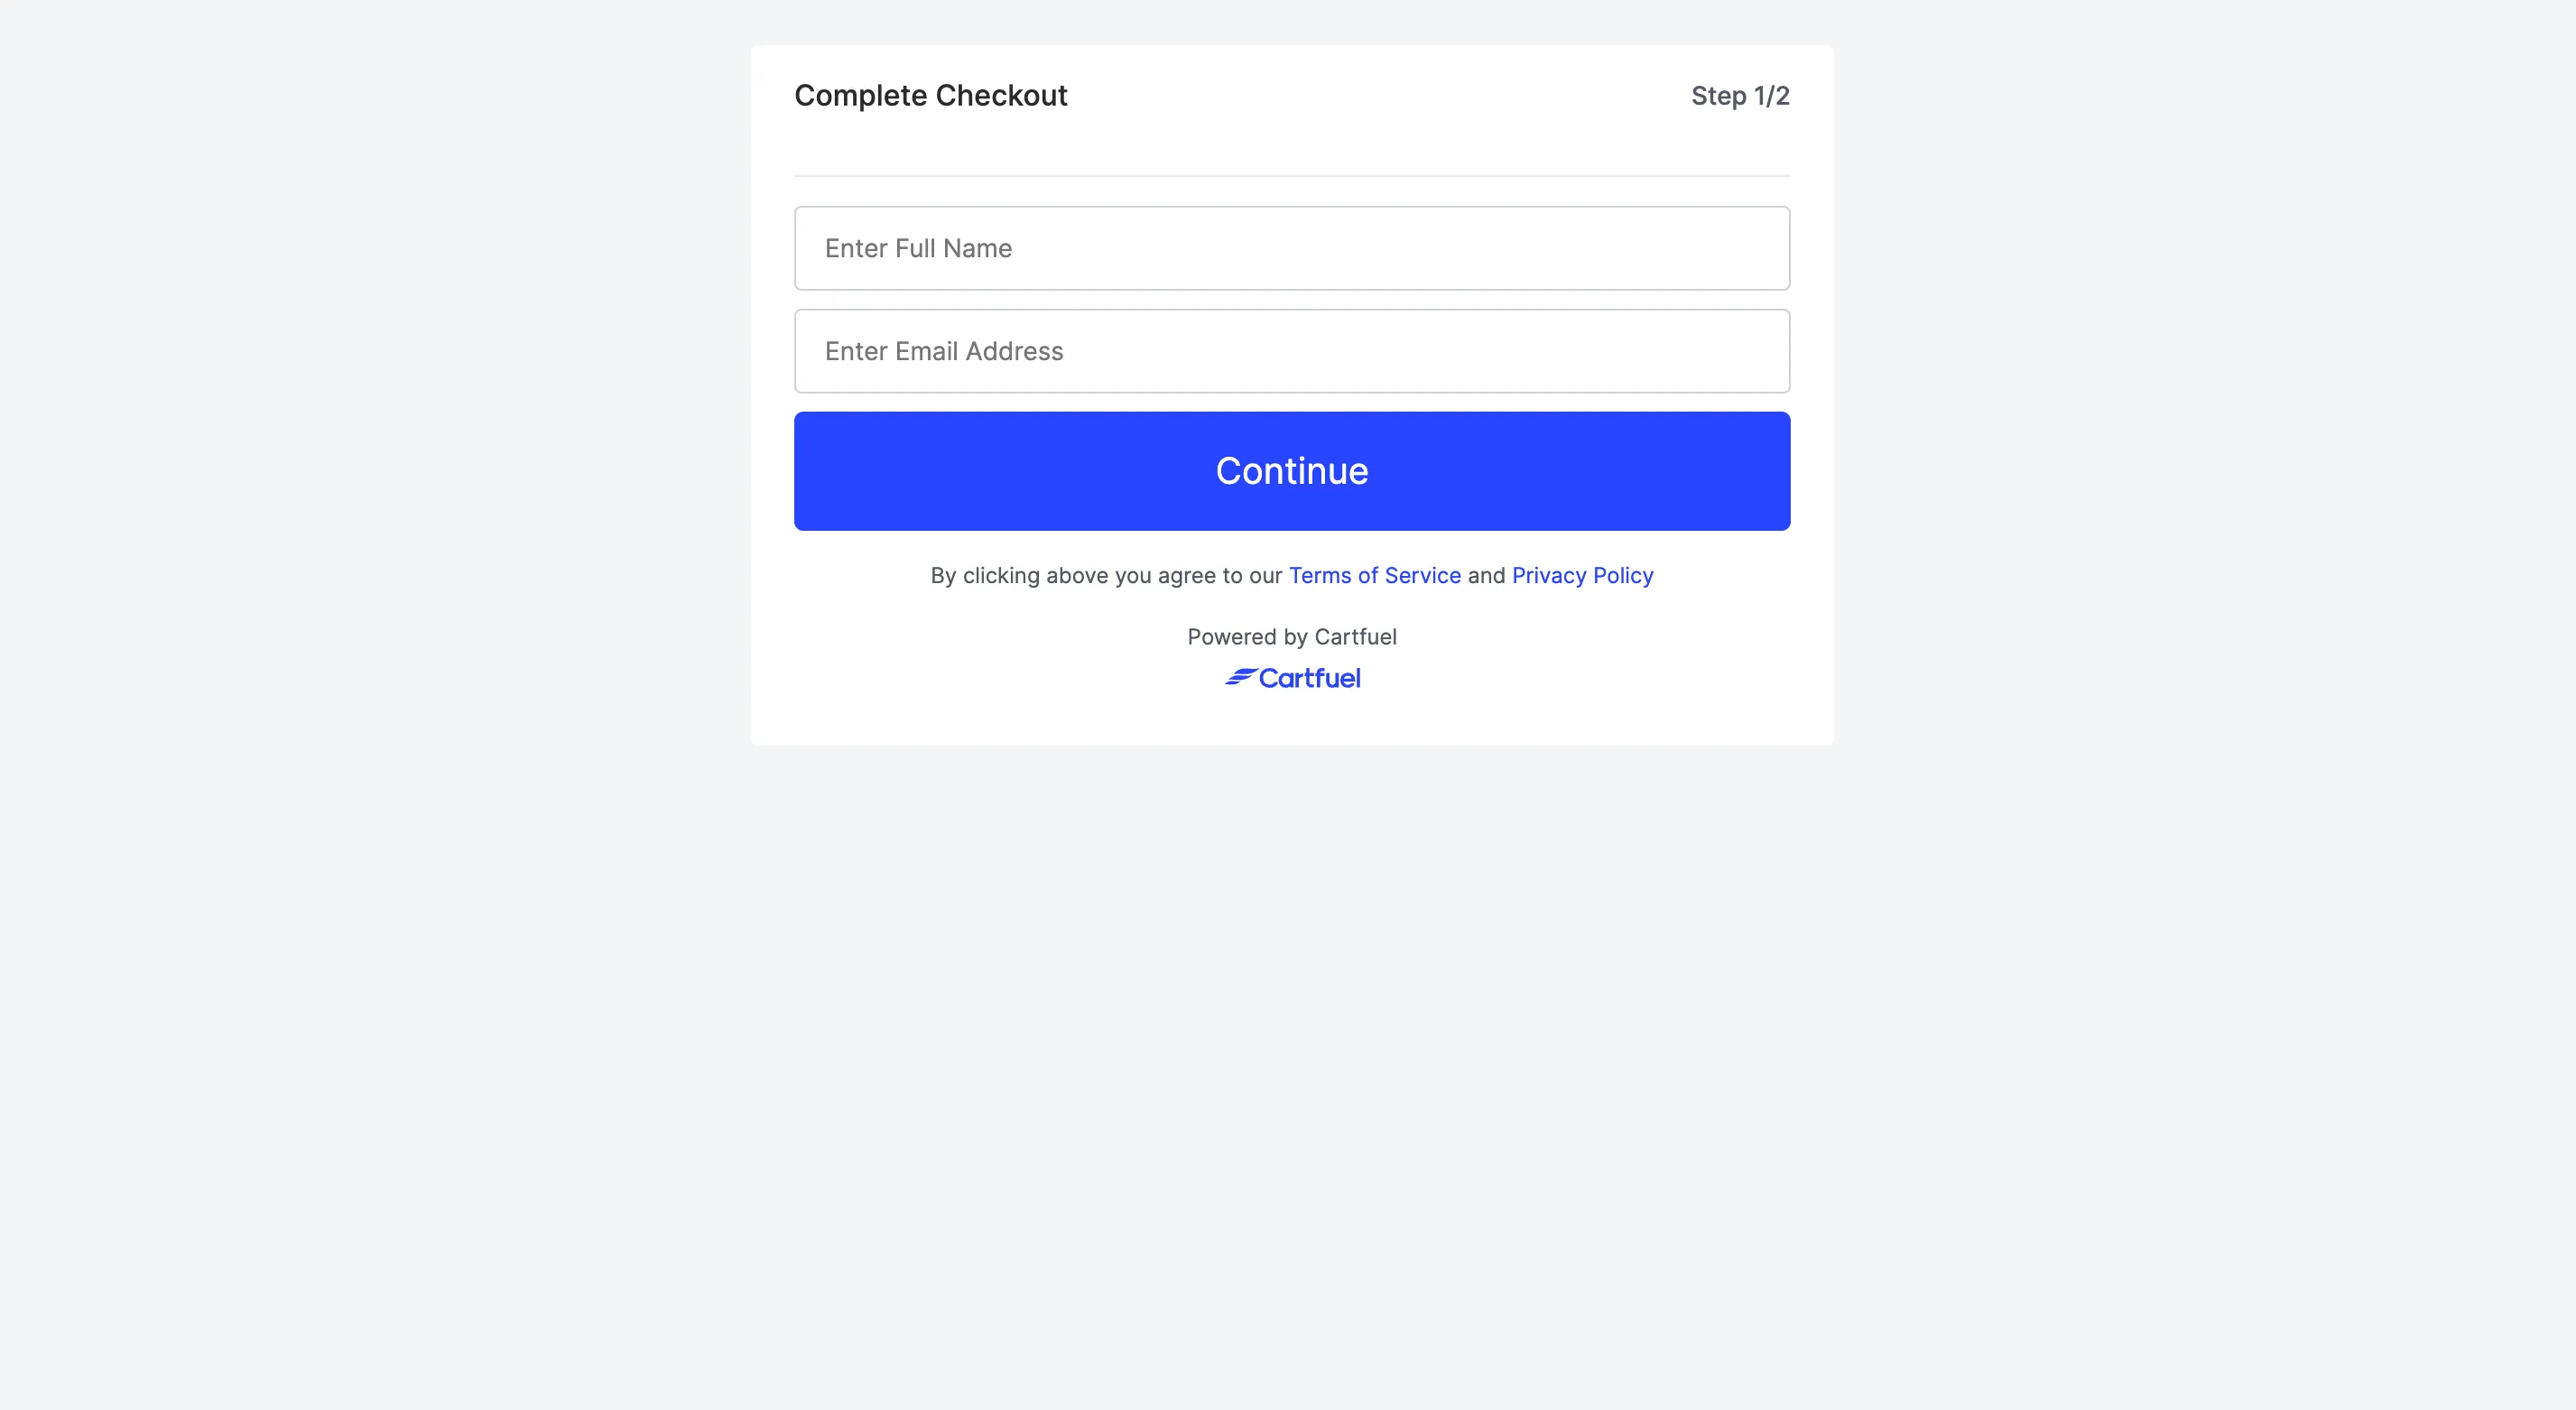
Once complete the customer can proceed to enter their credit/debit card.
From there you can edit the payment form header text as well as the placeholder text.
You can also edit the button text, button color, button size and button radius.
It's your payment form so you can customize it to your liking.
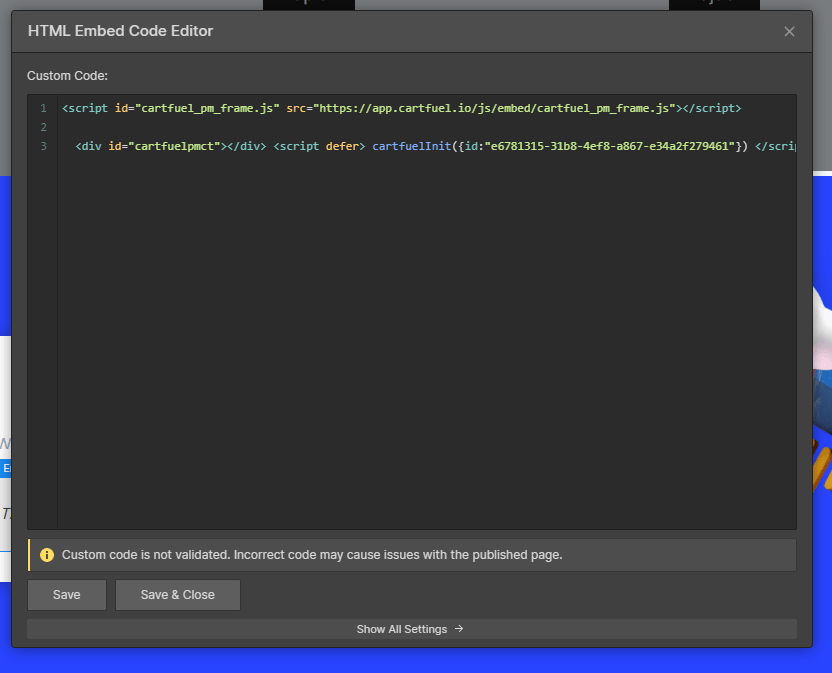
And if you don't see a customize feature you can add custom CSS to change the form.
Please note: You will need coding knowledge to change the form using CSS.
In addition to customizing your payment form you can also add a one-click upsells to increase the average customer value.
Once you done you can proceed to the next steps or click the grey save button.
How To Embed Stripe On Website To Take Payments
Embedding Stripe on your website is simple if you are using Cartfuel.
Other solutions make embedding payment forms more complicated than it needs to be.
Cartfuel is easy to use because its built with non-techies in mind.
Once you have created a new product sequence in Cartfuel and you click save, a popup will appear.
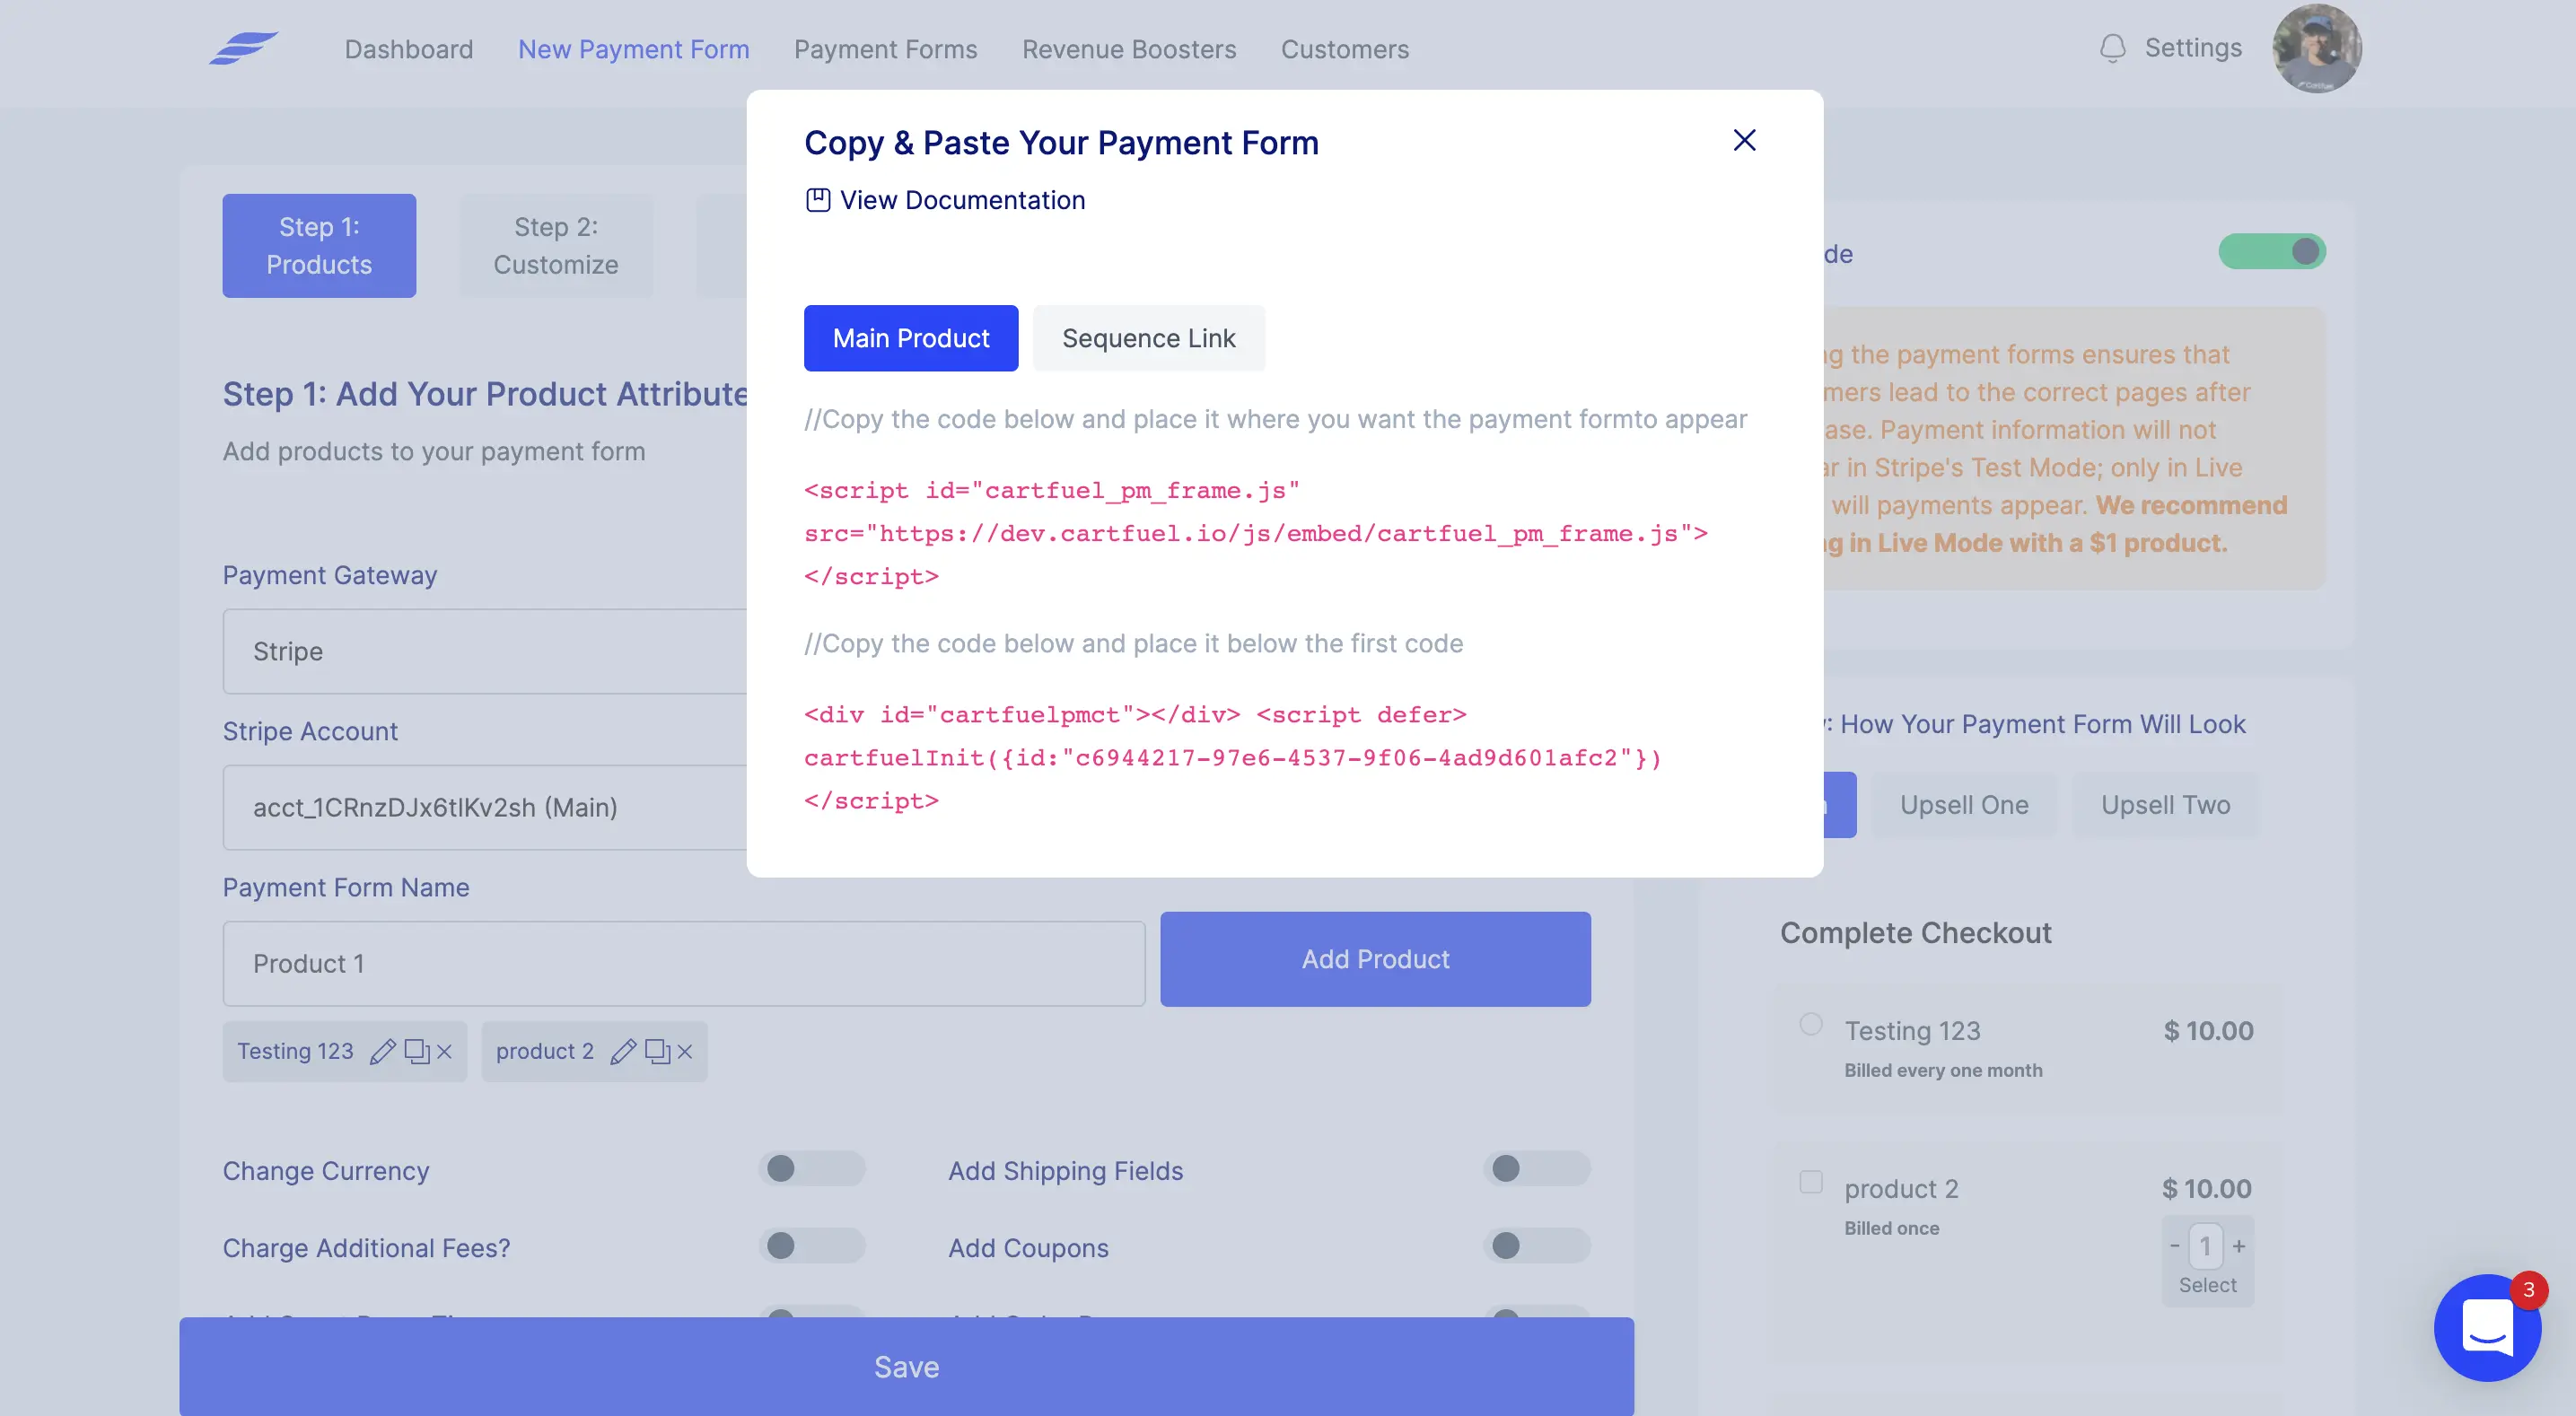
You will see two sets of codes (or more depending on if you added one-click upsells)
You will want to click on the first code snippet. It will copy the code for you.
Don't fret, you don't have to know anything about coding or what the code is doing.
All you need to do is go to your website and add the code to wherever you want your payment form to appear.
So for example if you are using Wordpress or Webflow you will want to first add an HTML or Embed element to your site.
Depending on your theme it may be as easy as dragging and dropping the HTML/Embed element on your site.
In the HTML/embed element you will want to paste the first code snippet.
Then you will head back to Cartfuel and grab the second code snippet.
Go back to your site and then paste the second code snippet into the HTML/embed element.
Then click save on your website.
This process will be the same for any site/platform as long as the site/platform has embeds.
If you choose to use one-click upsells, you will then have to follow the same process on your upsell page.
How Can I Collect Payments Through Stripe On Mobile
To accept payments through Stripe on mobile you can use an assortment of apps.
Since Cartfuel is an embeddable payment form it comes mobile optimized.
This means that the forms that you create will look good on your desktop and your phone.
This is important since a large majority of the traffic on the internet comes from mobile.
43.89% to be exact according to Oberlo
With Cartfuel you can be confident that you can accept payments through Stripe via desktop or mobile...
Without zero issues!
It's the greatest part of using a payment form to accept payments on your website.
Stripe Embed Html Checkout Tutorial
Embedding Stripe via HTML can seem daunting if you don't know code.
But if you use a service like Cartfuel to handle the creation of the form, you don't have to worry about much...
All you need to do is create the product and then embed the checkout form via the HTML code given to you.
We did a more in-depth tutorial on how you can embed HTML checkout via Stripe here:
How To Create A Stripe Payment Form For Your Website Recap
Stripe allows you to accept payments on your website. But they don't give you the ability to create custom payment forms.
With Cartfuel you can connect your Stripe account and customize your payment forms.
Then once done, you can embed the checkout form to your website and it will work on desktop and mobile.
Try Cartfuel out for free for by clicking this link.
FAQ
What is a Stripe HTML payment form, and why should I use one?
A Stripe HTML payment form is a customizable payment interface that allows you to collect payments directly on your website. Using such forms enhances user experience by keeping customers on your site, improving brand consistency, and increasing conversion rates.
Do I need coding skills to set up a Stripe payment form?
No, you don’t need extensive coding skills to set up a Stripe payment form, especially when using a third-party payment platforms like Cartfuel or DepositFix. These tools simplify the process, allowing you to create and embed forms with minimal technical knowledge.
Can I customize the appearance of my Stripe payment form?
Absolutely! Many payment platforms, like Cartfuel or DepositFix, allow you to customize various aspects of your payment form, including colors, fonts, button styles, and overall layout, ensuring that it aligns with your brand’s aesthetics.