.svg)


Which is better for your marketing - HubSpot sequences or workflows? This is a question that many people seem to wonder about, and it's not always an easy decision to make. In this blog post, we're going to break down the differences between sequences and workflows so that you can decide which option is best for your business.
Once you understand the differences, your team will create sales and marketing automation - freeing their time to focus on what matters most; making more revenue!
If you want to view the video version of this article, click play below.
HubSpot Sequences Explained
Despite their similarities in their definitions, workflow and sequence mean very different things in the HubSpot context.
Sequences are best used when a 1:1 relationship has been established between a sales rep and a prospect. Sequences are used when your sales team wants to send targeted and contextual follow-ups.
Compared to automation, where every prospect would get the same email sequence or text message, sequences are often sent manually.
But this is not a bad thing as it allows you to be meaningful with your email.
HubSpot allows you to create pre-made templates so you're not rewriting your messages repeatedly.
Who Can Use Sequences?
To access the Sequences tool, you will need to purchase:
- Sales Hub Starter
- Sales Hub Professional
- Sales Hub Enterprise
How to create sequences in HubSpot?
Creating a sequence in HubSpot is simple.
First, log in to your HubSpot account. Be sure that you have the correct account type before proceeding with the rest of this article.
You will want to hover over the 'Automation' tab in the header menu. You'll see the options for sequences or workflows.
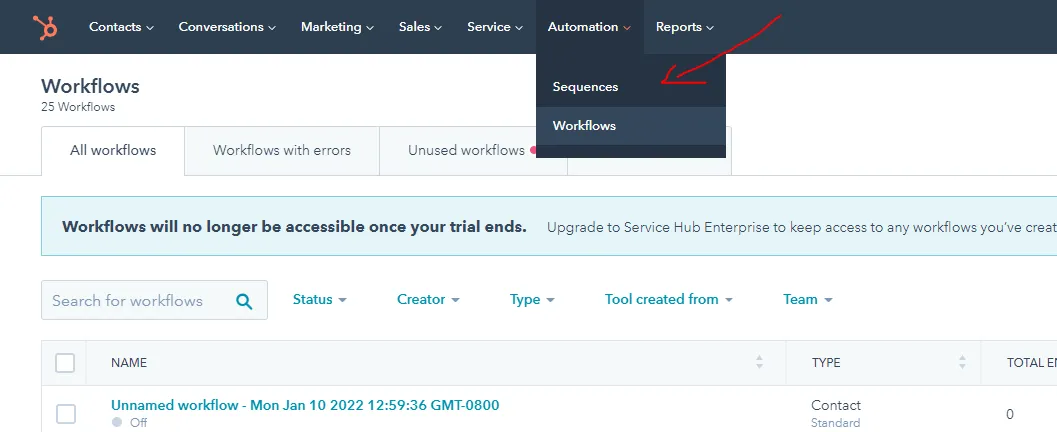
Click on 'Sequences.' We'll discuss workflows in a moment.
Once you click on sequences, you'll see a screen that allows you to review all of your past sequences as well as the ability to create new ones.
Click on the orange 'Create sequence' button located at the top right corner to create a new sequence.
HubSpot gives you eight pre-made templates such as:
- Recent Conversation
- Trade Show or Conference Follow Up
- Product or Demo Request
- Post call/meeting follow up sequence
- Prospecting
- Left voicemail/unable to connect
- Reschedule Meeting Attempt
- Re-engagement/lost contact
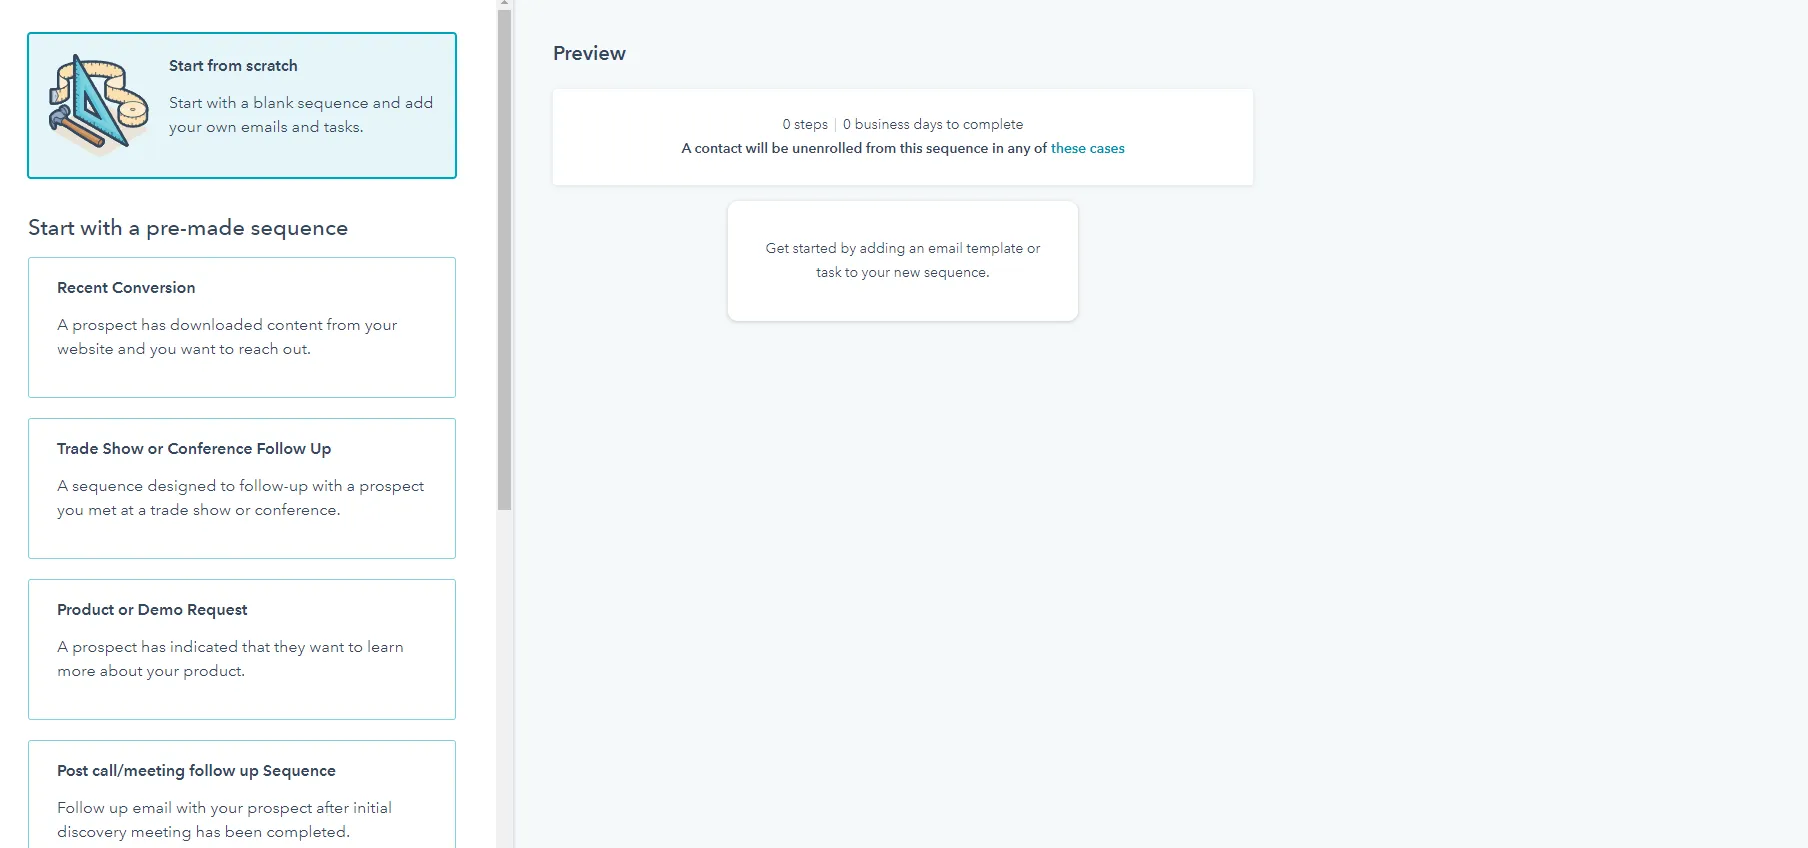
You can preview each sequence by clicking on them and seeing if the template matches what you'd want to say to your prospect. If not, then you can start a sequence from scratch.
In this example, we will start a sequence from scratch by clicking the orange 'Create sequence' button in the top right-hand corner.
Once you've created your sequence, you can name it and add steps. To add a new step click the orange plus icon.
HubSpot will present you with different step options like
- Automated email (send an email automatically)
- Email (create an email to yourself)
- Call (create a task to call a contact)
- To-do (create task reminders for an action item)
If you have the LinkedIn Sales Navigator tool connected, you can send Inmail or a connection request.
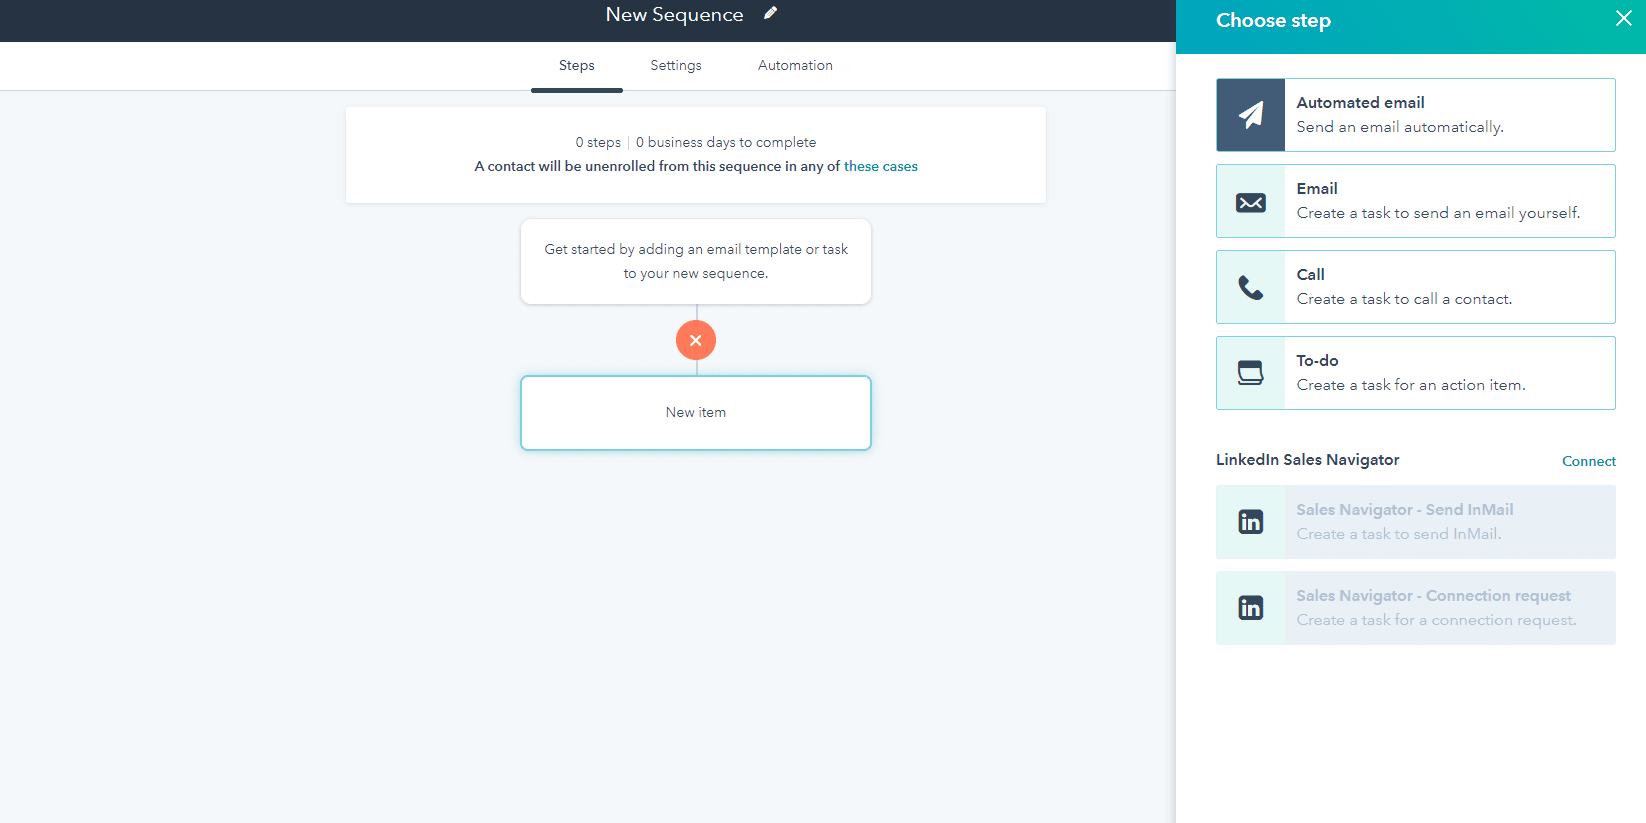
Let's start by adding an automated email.
You can create new templates that can be reused as a part of your sales process. Click on 'Create new email template.'
From there, you can enter the 'From name' and the subject of the email.
Once that information is provided, you can write the templated email for your prospects.
Consider personalizing your email templates with the lead's name and other contextual details that will remind them of who you are.

Once you're done writing the email, you want to click on 'Save template.'
Now that your sequence is created, click on 'Save sequence.'
When doing outbound marketing, your sales team can now use that sequence to send to their prospects.
Go back to the main sequence area and click on the 'Manage' tab to access your sequences.
You'll see you're newly created sequence ready to be used. To enroll contacts into the sequence, click on the sequences name. From there, HubSpot will bring you to the sequence dashboard. You'll see an orange 'Enroll contacts' button in the top right-hand corner. Click the button.
A sidebar menu will appear, allowing you to search for different contacts to add to the sequence enrollment.
Find the contact you want to connect with and click the checkbox to add them to your new sequence.
Select the following button to configure other options like the time zone and when the sequence should be sent.
Click the orange ' Start sequence ' button when you're ready to send your sequence.
Voila, you have set up your first sales sequence using the HubSpot marketing hub.
Up next, we'll discuss workflows!
When To Use A HubSpot Sequence
You want to use a HubSpot sequence to send a personalized message to a prospect or lead. Sequences are not to be used in an automated fashion. That's what workflows are for!
HubSpot Workflows Explained
You may be familiar that most marketing platforms have automation tools. HubSpot is no different. They have workflows that allow your marketing team to create and send automated follow-ups to your contacts.
Unlike sequences, workflows are to be used in an automated sense to help reduce the time it takes to connect with prospects.
Using workflows, your sales and marketing teams can segment contacts based on the different stages of the sales cycle.
For example, let's say you had someone fill out a contact us form on your website. You can set up a workflow that automatically sends an email + notifies your sales team to reach out to that prospect since they are actively looking to learn more about your product.
Who Can Use HubSpot Workflows?
- Marketing Hub Professional, Enterprise
- Sales Hub Professional, Enterprise
- Service Hub Professional, Enterprise
- Operations Hub Professional
How can you create a HubSpot workflow?
HubSpot makes it easy to create a workflow as long as you have the right account level.
In the header, hover over 'Automation.'
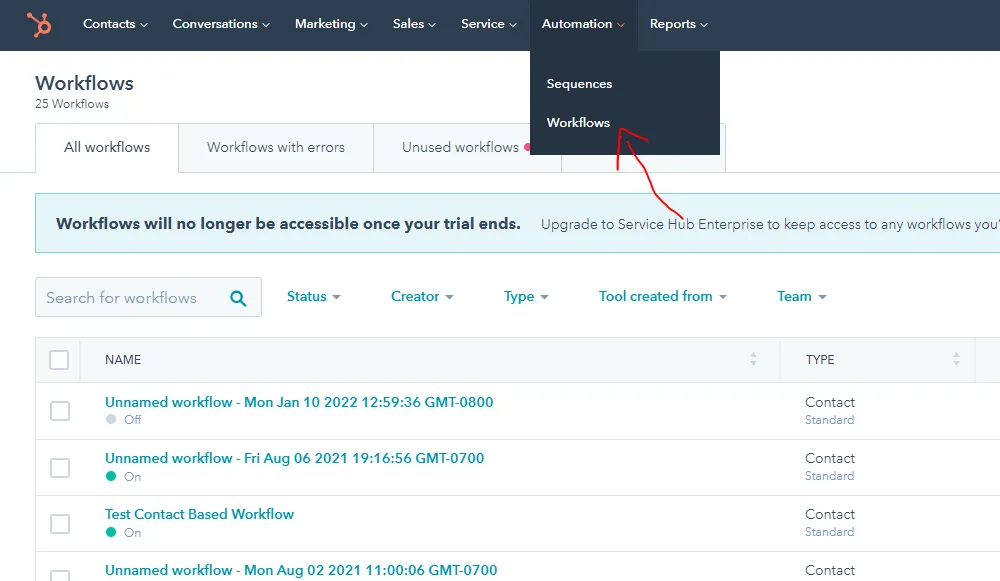
Then click 'Workflows.' Like how we create a sequence, you'll want to click on the orange 'Create workflow' button in the top right-hand corner.
From there, you can start from scratch or choose from 12 pre-made templates, including:
- Nurture first conversions
- Notify your sales reps about a lead
- Send a notification when a meeting is scheduled
- Assign new web leads
- Welcome new contacts
- Welcome new blog subscribers
- Re-engage cold leads and inactive customers
- Get customer feedback
- Promote a new product or service
- Send confirmation emails for events
- Celebrate anniversaries
- Define an ideal customer profile
We'll start from scratch by clicking on the 'Start from the scratch tab in this example.
You'll then be presented with eight different ways that the workflow can start, including:
- Contact-based (start with a workflow that triggers based on contacts)
- Company-based (start with a workflow that triggers based on companies)
- Deal-based (start with a workflow that triggers based on deals)
- Ticket-based (start with a workflow that triggers based on tickets)
- Quote-based (start with a workflow that triggers based on quotes)
- Conversation-based (start with a workflow that triggers based on conversations)
- Feedback submission-based (start with a workflow that triggers based on feedback submissions)
- Subscription-based (start with a workflow that triggers based on subscriptions)
Depending on your objective, you may want a different workflow to start. In most cases, your workflow will be contact-based if you're doing inbound marketing.
But it all depends on the objective of the workflow. So make sure that you give that some thought before creating the workflow.
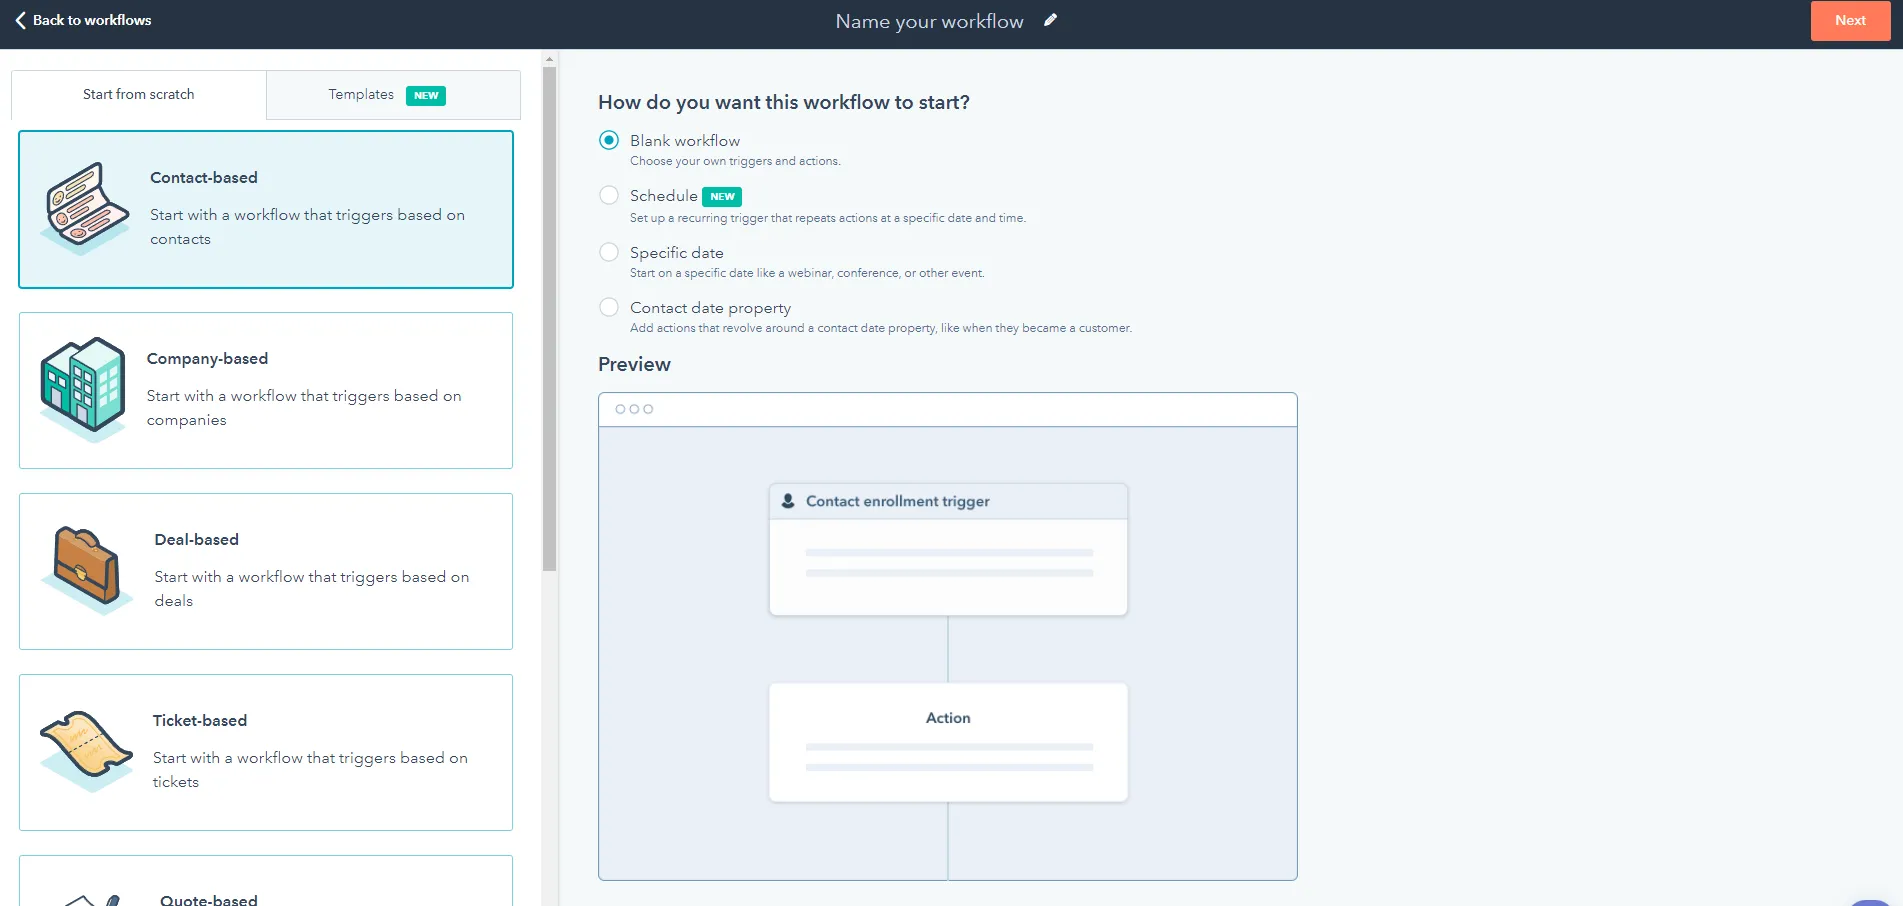
In this case, we'll use a contact-based workflow.
Once you select the workflow type, you can also select how to start the workflow. HubSpot provides four different options including:
- Blank workflow
- Schedule
- Specific date
- Contact date property
In this case, we'll select 'Blank workflow' and click on the 'Next' button in the top right-hand corner.
From there, you'll be brought to the 'Actions' tab. In this tab, you'll be able to create contact enrollment triggers to start the workflow.
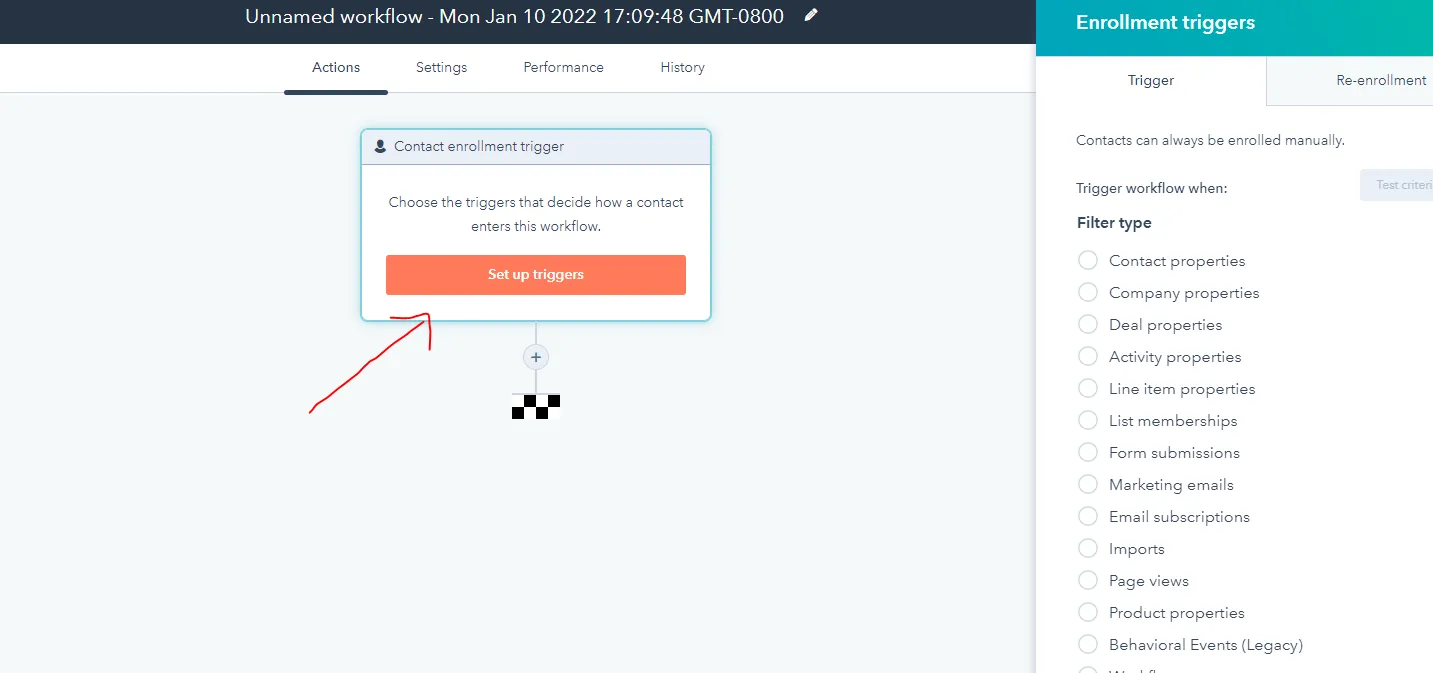
By clicking the 'Set up triggers' button, you'll see the available options.
HubSpot provides many options to start enrolling contacts into your workflow. Some of our favorites include
- Contact properties
- Company properties
- Deal properties
- Form Submissions
- Page Views
- Marketing Emails
- Email subscriptions
- List membership
Again, depending on your objective, you will want to select one of the enrollment triggers that match your end goal.
In this example, we will use form submissions as our trigger. So this workflow will trigger whenever a particular form is submitted. You can select which form you want to trigger the workflow based on your created forms.
You can then select other parameters to refine the filter condition. You can also add additional requirements using the 'And' or 'Or' criteria.
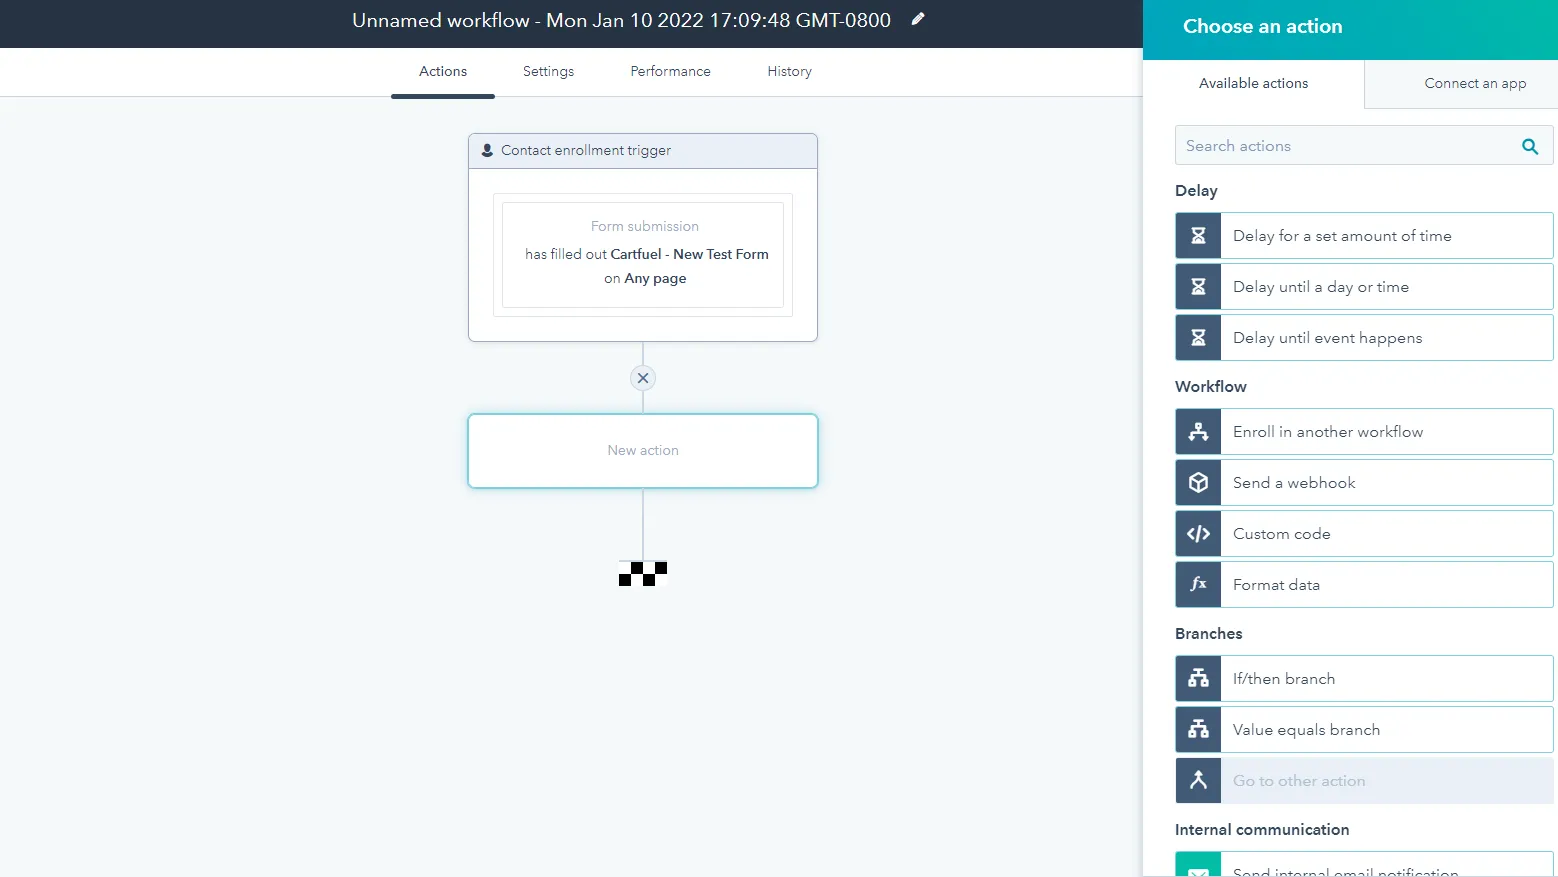
Following the selection of your trigger, you then need to define a response. You can choose different actions like:
- Delay (used for when you want to stop the workflow from proceeding for a set period)
- Workflows (used to enroll contacts into other workflows)
- Branches (used to create conditional if/then statements)
- Internal Communication (used to send internal notifications)
- External Communication (used to send emails or enroll contacts into sequences)
- Assignment (used to send contacts to specific owners)
- Create (used to create records or new tasks)
- List management (used to send contacts to new marketing lists)
- Ads management (used to send contacts to contacts to ad audiences - e.g., Facebook)
- Property management (used to set different values of deal properties)
To keep this tutorial simple, we'll select 'Add to static list' under list management.
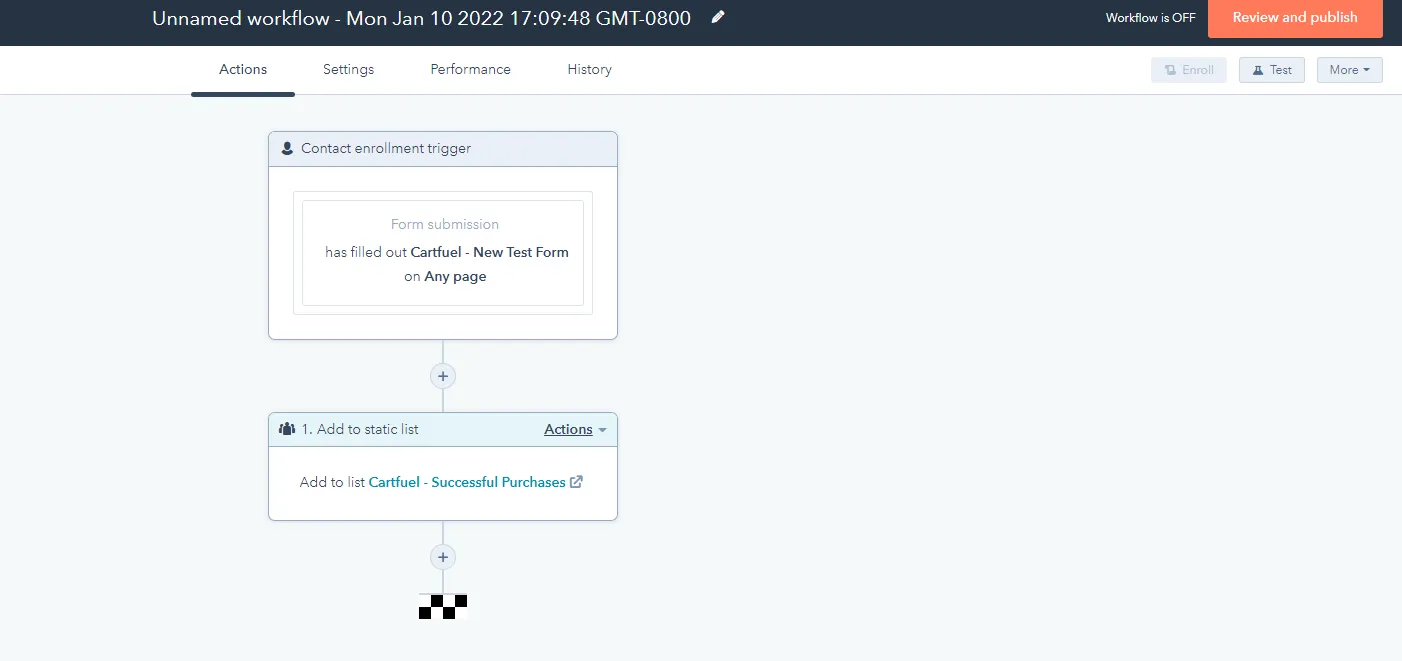
This way, when someone submits the form, the next step in the workflow will automatically add them to a static list.
You can add as many actions as you'd like to your workflow. There is no set number of steps required for a workflow to complete. It's only complete when you think it's finished.
Once done, you can click on the 'Settings,' 'Performance,' and 'History' tabs to view additional information.
Then click on the orange 'Review and publish' button to set your workflow live.
Best Practices for Implementing HubSpot Sequences and Workflows
While understanding the differences between HubSpot Sequences and Workflows is crucial, effectively implementing these tools can significantly enhance your marketing and sales strategies. Here are some best practices to consider:
1. Define Your Goals
Before you create Sequences or Workflows, clearly outline your objectives. Are you aiming to nurture leads, increase conversions, or automate repetitive tasks? Having specific goals will help you tailor your strategies effectively.
2. Segment Your Audience
Utilize HubSpot's segmentation features to target the right audience for your Sequences and Workflows. This ensures that your messages resonate with recipients and increases engagement rates. According to a study by Mailchimp, segmented campaigns can result in a 14.32% higher open rate.
3. Personalize Your Content
Personalization is key to effective communication. Use dynamic content and personalization tokens in your Sequences and Workflows to make your emails more relevant to each recipient. Research shows that personalized emails improve click-through rates by 14% and conversion rates by 10%.
4. Monitor and Analyze Performance
Regularly review the performance of your Sequences and Workflows through HubSpot's analytics tools. Look at metrics like open rates, click-through rates, and conversion rates to identify what’s working and what isn’t. This data-driven approach allows you to refine your strategies over time .
5. Test and Optimize
A/B testing different subject lines, email content, and sending times can provide insights into what resonates best with your audience. Use the results to optimize your future Sequences and Workflows for better performance .
6. Integrate with Other Tools
Explore integrations with other tools and platforms that enhance your marketing and sales processes. For example, integrating CRM systems with HubSpot can help you manage customer interactions more effectively, ensuring a seamless experience across all touchpoints .
By incorporating these best practices into your use of HubSpot Sequences and Workflows, you can maximize their effectiveness and drive better results for your business.
When To Use A HubSpot Workflow
You want to use a HubSpot workflow to automate parts of your sales process. When you're looking to send the same message or perform the same action to multiple prospects, workflows are what you should use.
If you want to try Cartfuel checkout our Free Trial.
FAQ
What is the primary difference between HubSpot Sequences and Workflows?
HubSpot Sequences is primarily designed for individual outreach, enabling users to send personalized emails in a series to leads or contacts. In contrast, Workflows are more comprehensive automation tools that can manage multiple actions, such as sending emails, updating contact properties, or triggering tasks based on specific criteria.
Can I use Sequences and Workflows together?
Yes, using Sequences and Workflows in tandem can enhance your marketing and sales processes. For example, you can set up a Workflow to automatically enroll contacts into a Sequence once they meet certain criteria, ensuring timely and relevant follow-ups.
What types of businesses benefit most from using HubSpot Sequences and Workflows?
Both tools are beneficial for any business that relies on marketing and sales automation, particularly those in B2B environments. Companies looking to improve lead nurturing, streamline outreach processes, and automate follow-ups will find these tools especially useful.