.svg)


If you want to sell tickets to your upcoming event using HubSpot...
And you want the sales data to show up in the HubSpot CRM...
Then this article is for you.
We'll discuss how you can sell tickets to an event using HubSpot, how to confirm customers purchased a ticket, and how to upsell ticket holders to bigger packages.
Additionally, we'll determine if HubSpot's payments platform is best for your needs. Or if a third-party solution is better for your needs.
You'll need an active HubSpot account (that allows third-party HubSpot integration(s)) and a Stripe account to follow along with this article.
Ready? Okay, let's go!
Let's start by asking a simple question...
Should you use HubSpot payments for your event registration payment processing?
There are a few options for selling tickets for an event using HubSpot.
You can use the HubSpot payment platform. Or you can use a third-party HubSpot integration like Cartfuel, Depositfix, or Eventbrite.
(We explained the differences between Cartfuel and Depositfix)
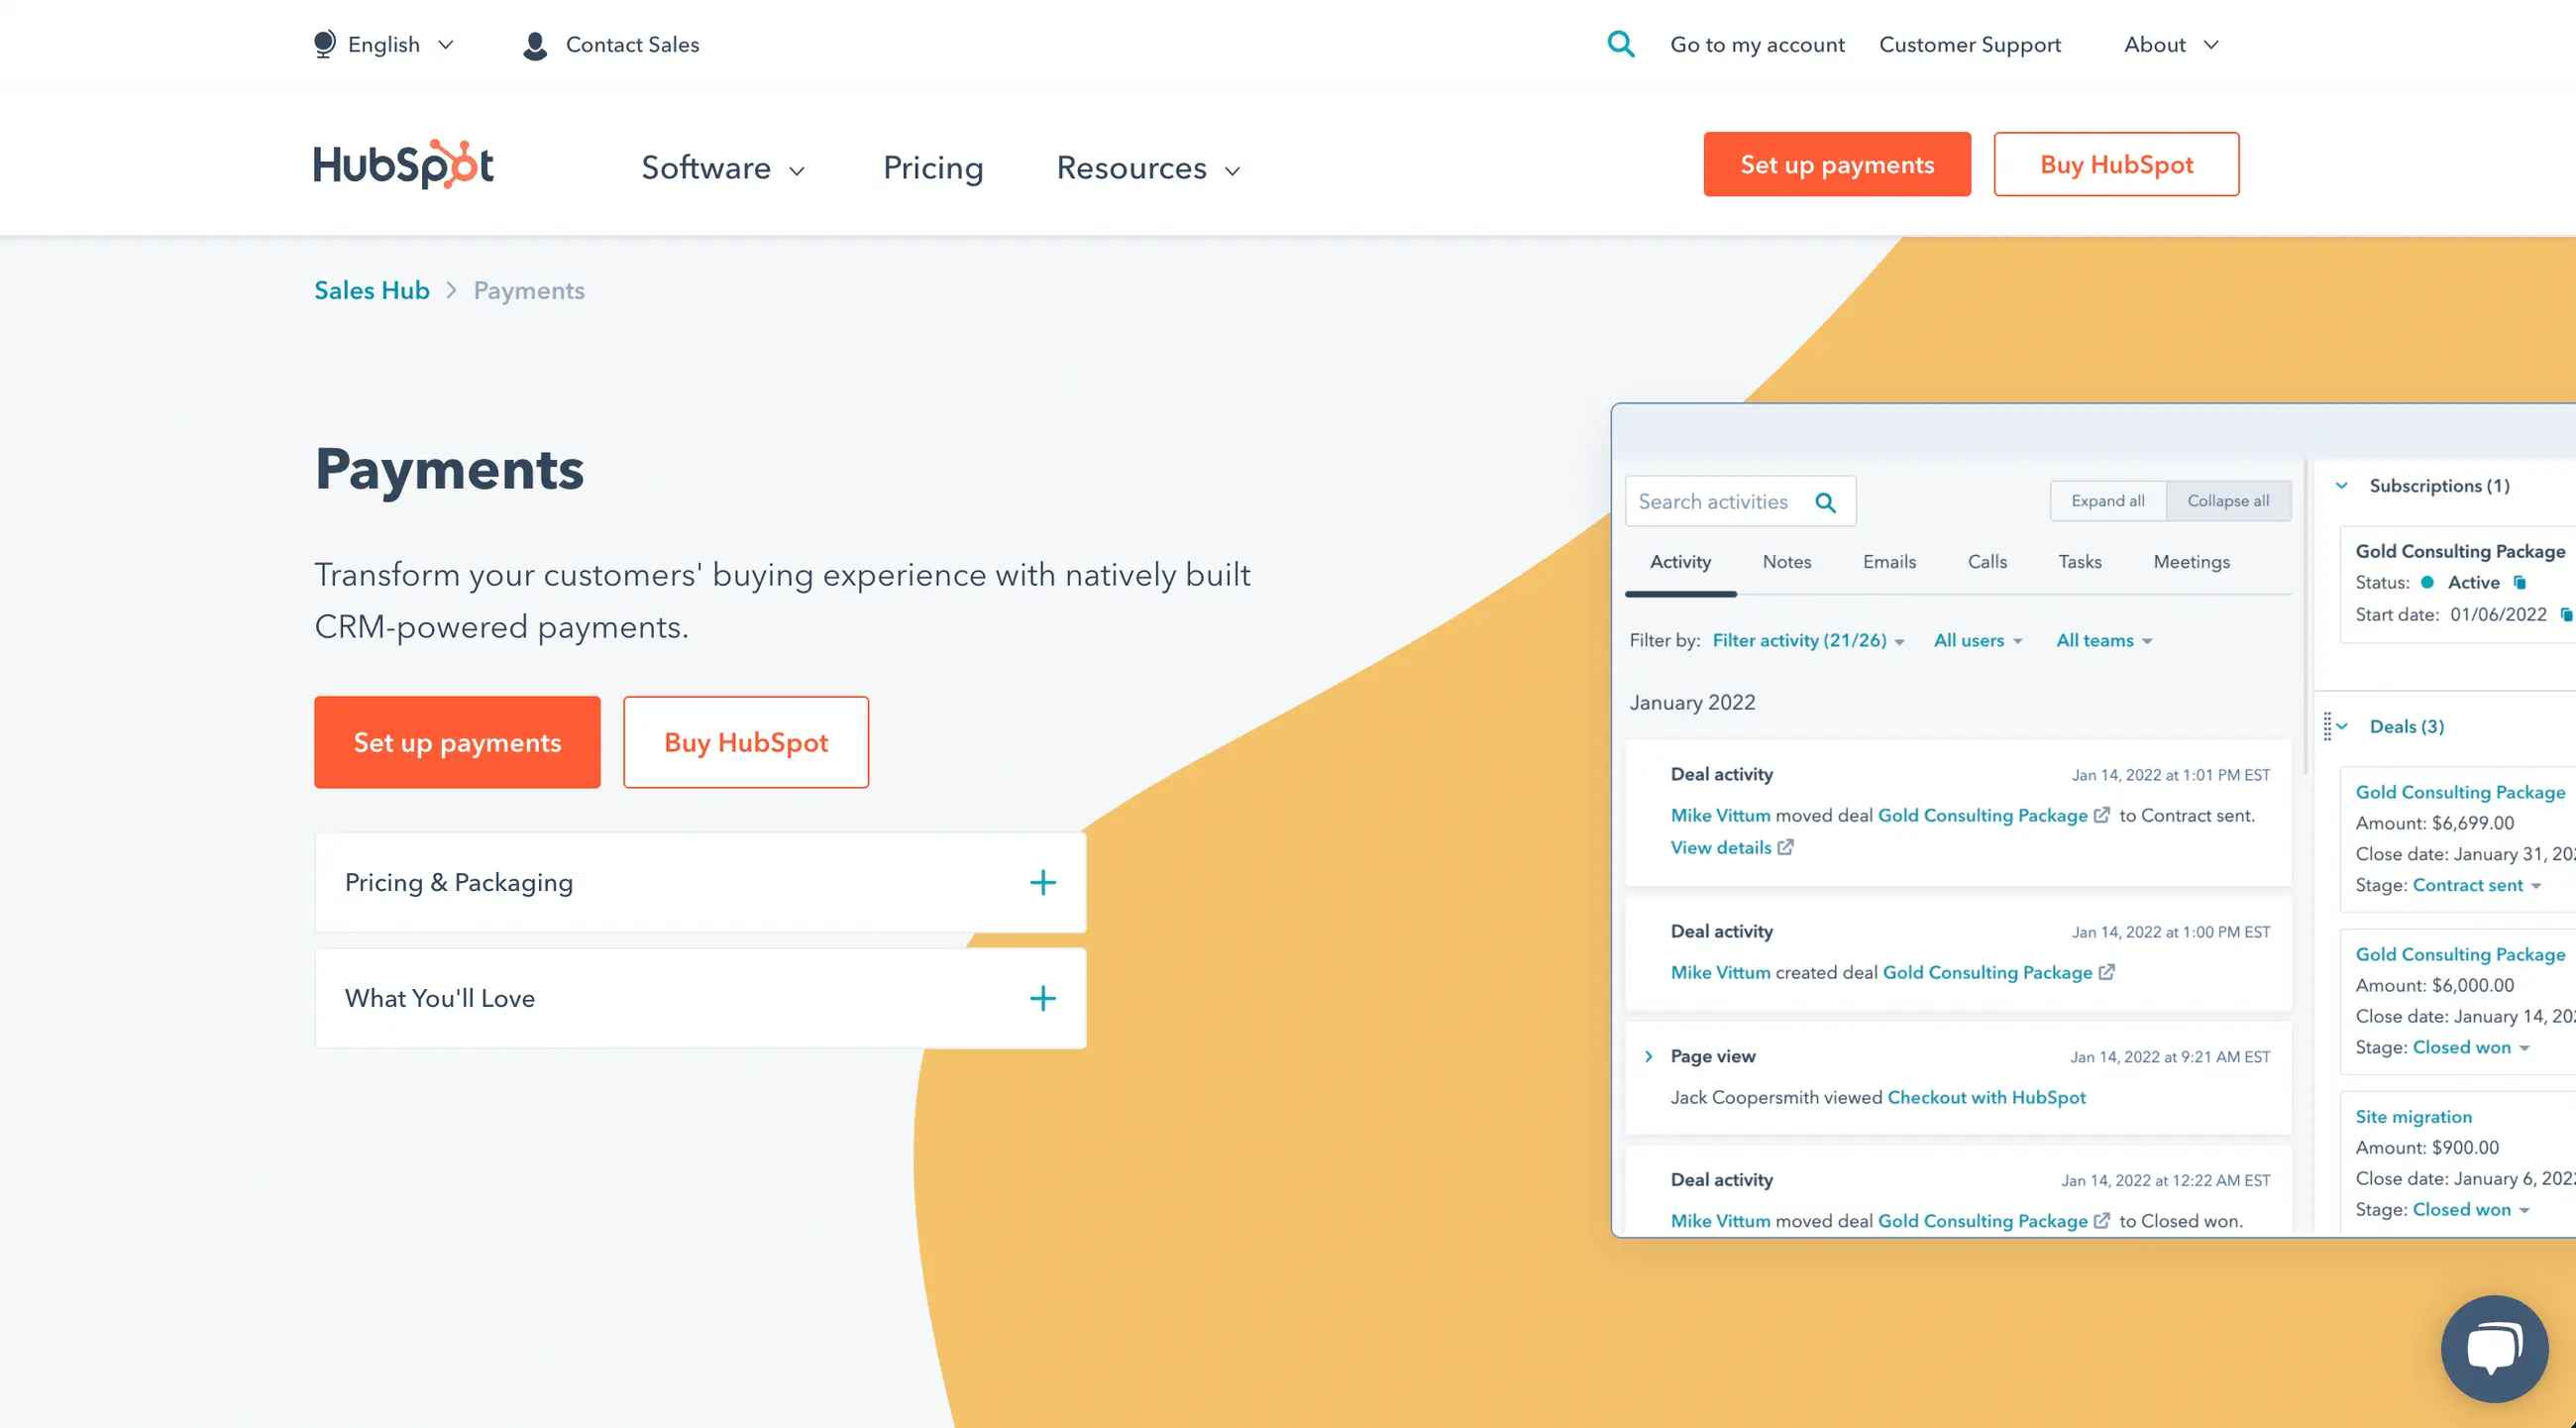
HubSpot launched HubSpot Payments in 2021. With HubSpot's payment platform, users can sell digital products without the help of a third-party solution.
But, there are some caveats to HubSpot's solution. Here's a complete list of reasons why you may not want to use HubSpot payments:
- You can't use your current Stripe account (you have to use HubSpot stripe integration)
- You can't import past Stripe products into HubSpot payments
- You can't use PayPal or other payment processors
- You have to live in the United States to use HubSpot payments
- It doesn't allow for donation creation
- You can't offer discount/coupon codes
- You can't customize the payment forms to match your brand
- You can't offer order bumps
- You can't provide one-click upsells
- The payment forms are not embeddable
- You can't offer add-ons
Besides this list, HubSpot users also have to apply to access HubSpot payments.
HubSpot says the application process takes up to 2-days. And there is no guarantee of acceptance.
Of course, it wouldn't be fair to highlight only the negatives of HubSpot payments. So here are some things you can do with ease if you use HubSpot for your B2B payment processing.
HubSpot Payments Features
- The ability to collect one-time and subscription payments
- Syncing customer sales data in the HubSpot CRM
- Embeddable payment links (not forms)
- Bring the front and back offices together with a single source of truth for customer and commerce data
- Invoice creation
Once a customer buys a ticket to your event, you'll see the customer details in the HubSpot customer timeline with HubSpot payments.
So you'll be able to create marketing workflows based on the data, which is beneficial if you want to upsell down the line.
HubSpot payments may be the best choice for you if you aren't looking to do anything fancy and don't have an active Stripe account.
But suppose you want more functionality for your event payment processing. In that case, a third-party HubSpot integration may be better for your sales process...
We'll discuss how to use a third-party app that allows you to:
- Use your current Stripe account
- You can import past Stripe products into HubSpot payments
- You can use PayPal or other payment processors
- You can live outside of the United States
- You can see customer sale data in the CRM
- Want to use a countdown timer
- Want to use promo codes
- And more
Keep reading to see a step-by-step guide on using third-party software to sell tickets to your event.
But before we dig into the other solutions, let's talk about the HubSpot stripe integration.
What role does Stripe provide for HubSpot payments?
Let's say that you did want to use HubSpot payments. You would need to create a Stripe account through HubSpot.
This is an important distinction.
It's not the same as using the native HubSpot Stripe integration.
HubSpot partnered with Stripe and wants a piece of the transaction volume you generate.
What does this mean? It means that for every sale using HubSpot payments, HubSpot takes a flat 2.9% of the transaction amount if customers use Credit/Debit Cards.
You pay 0.5% of the transaction amount for ACH payments, capped at $10 per transaction.
This will be the same fee if you use Stripe without HubSpot. The difference is that HubSpot is keeping the fee instead of Stripe.
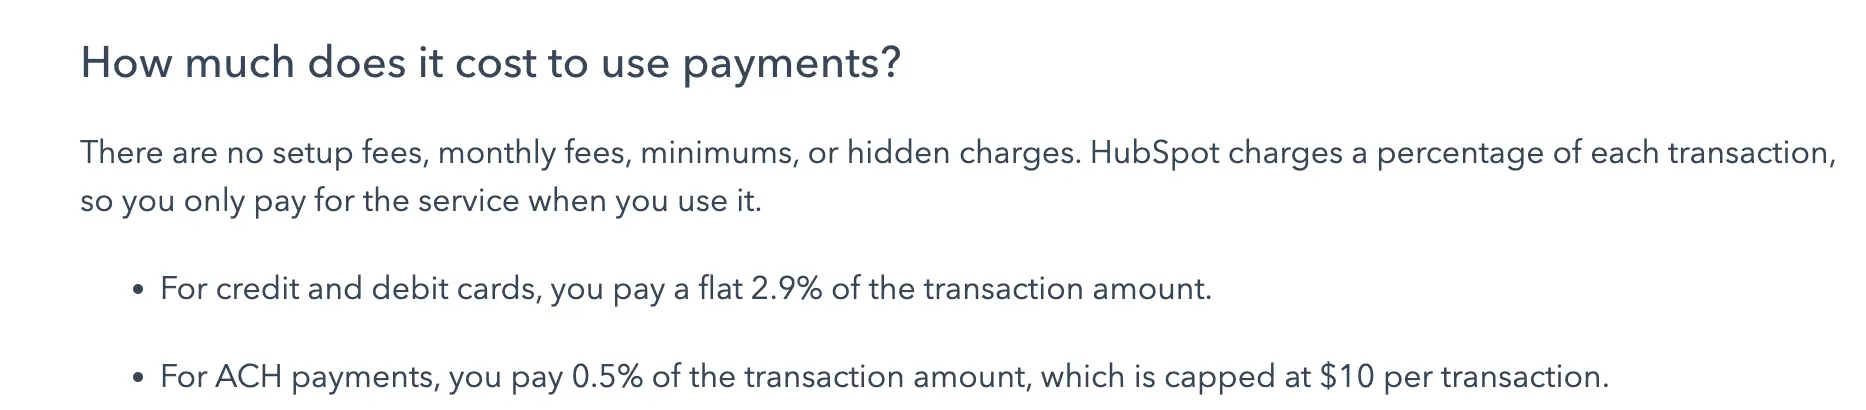
HubSpot has a detailed post about the payment fees. We recommend taking a peek before making your final decision.
How do you set up payment options on your website for event registration?
You researched HubSpot payments, but you don't think it's the best for selling tickets to your event.
Now what?
There are three third-party tools for selling tickets with HubSpot - Cartfuel, Depositfix, and Eventbrite.
These apps connect with Stripe allowing digital payments.
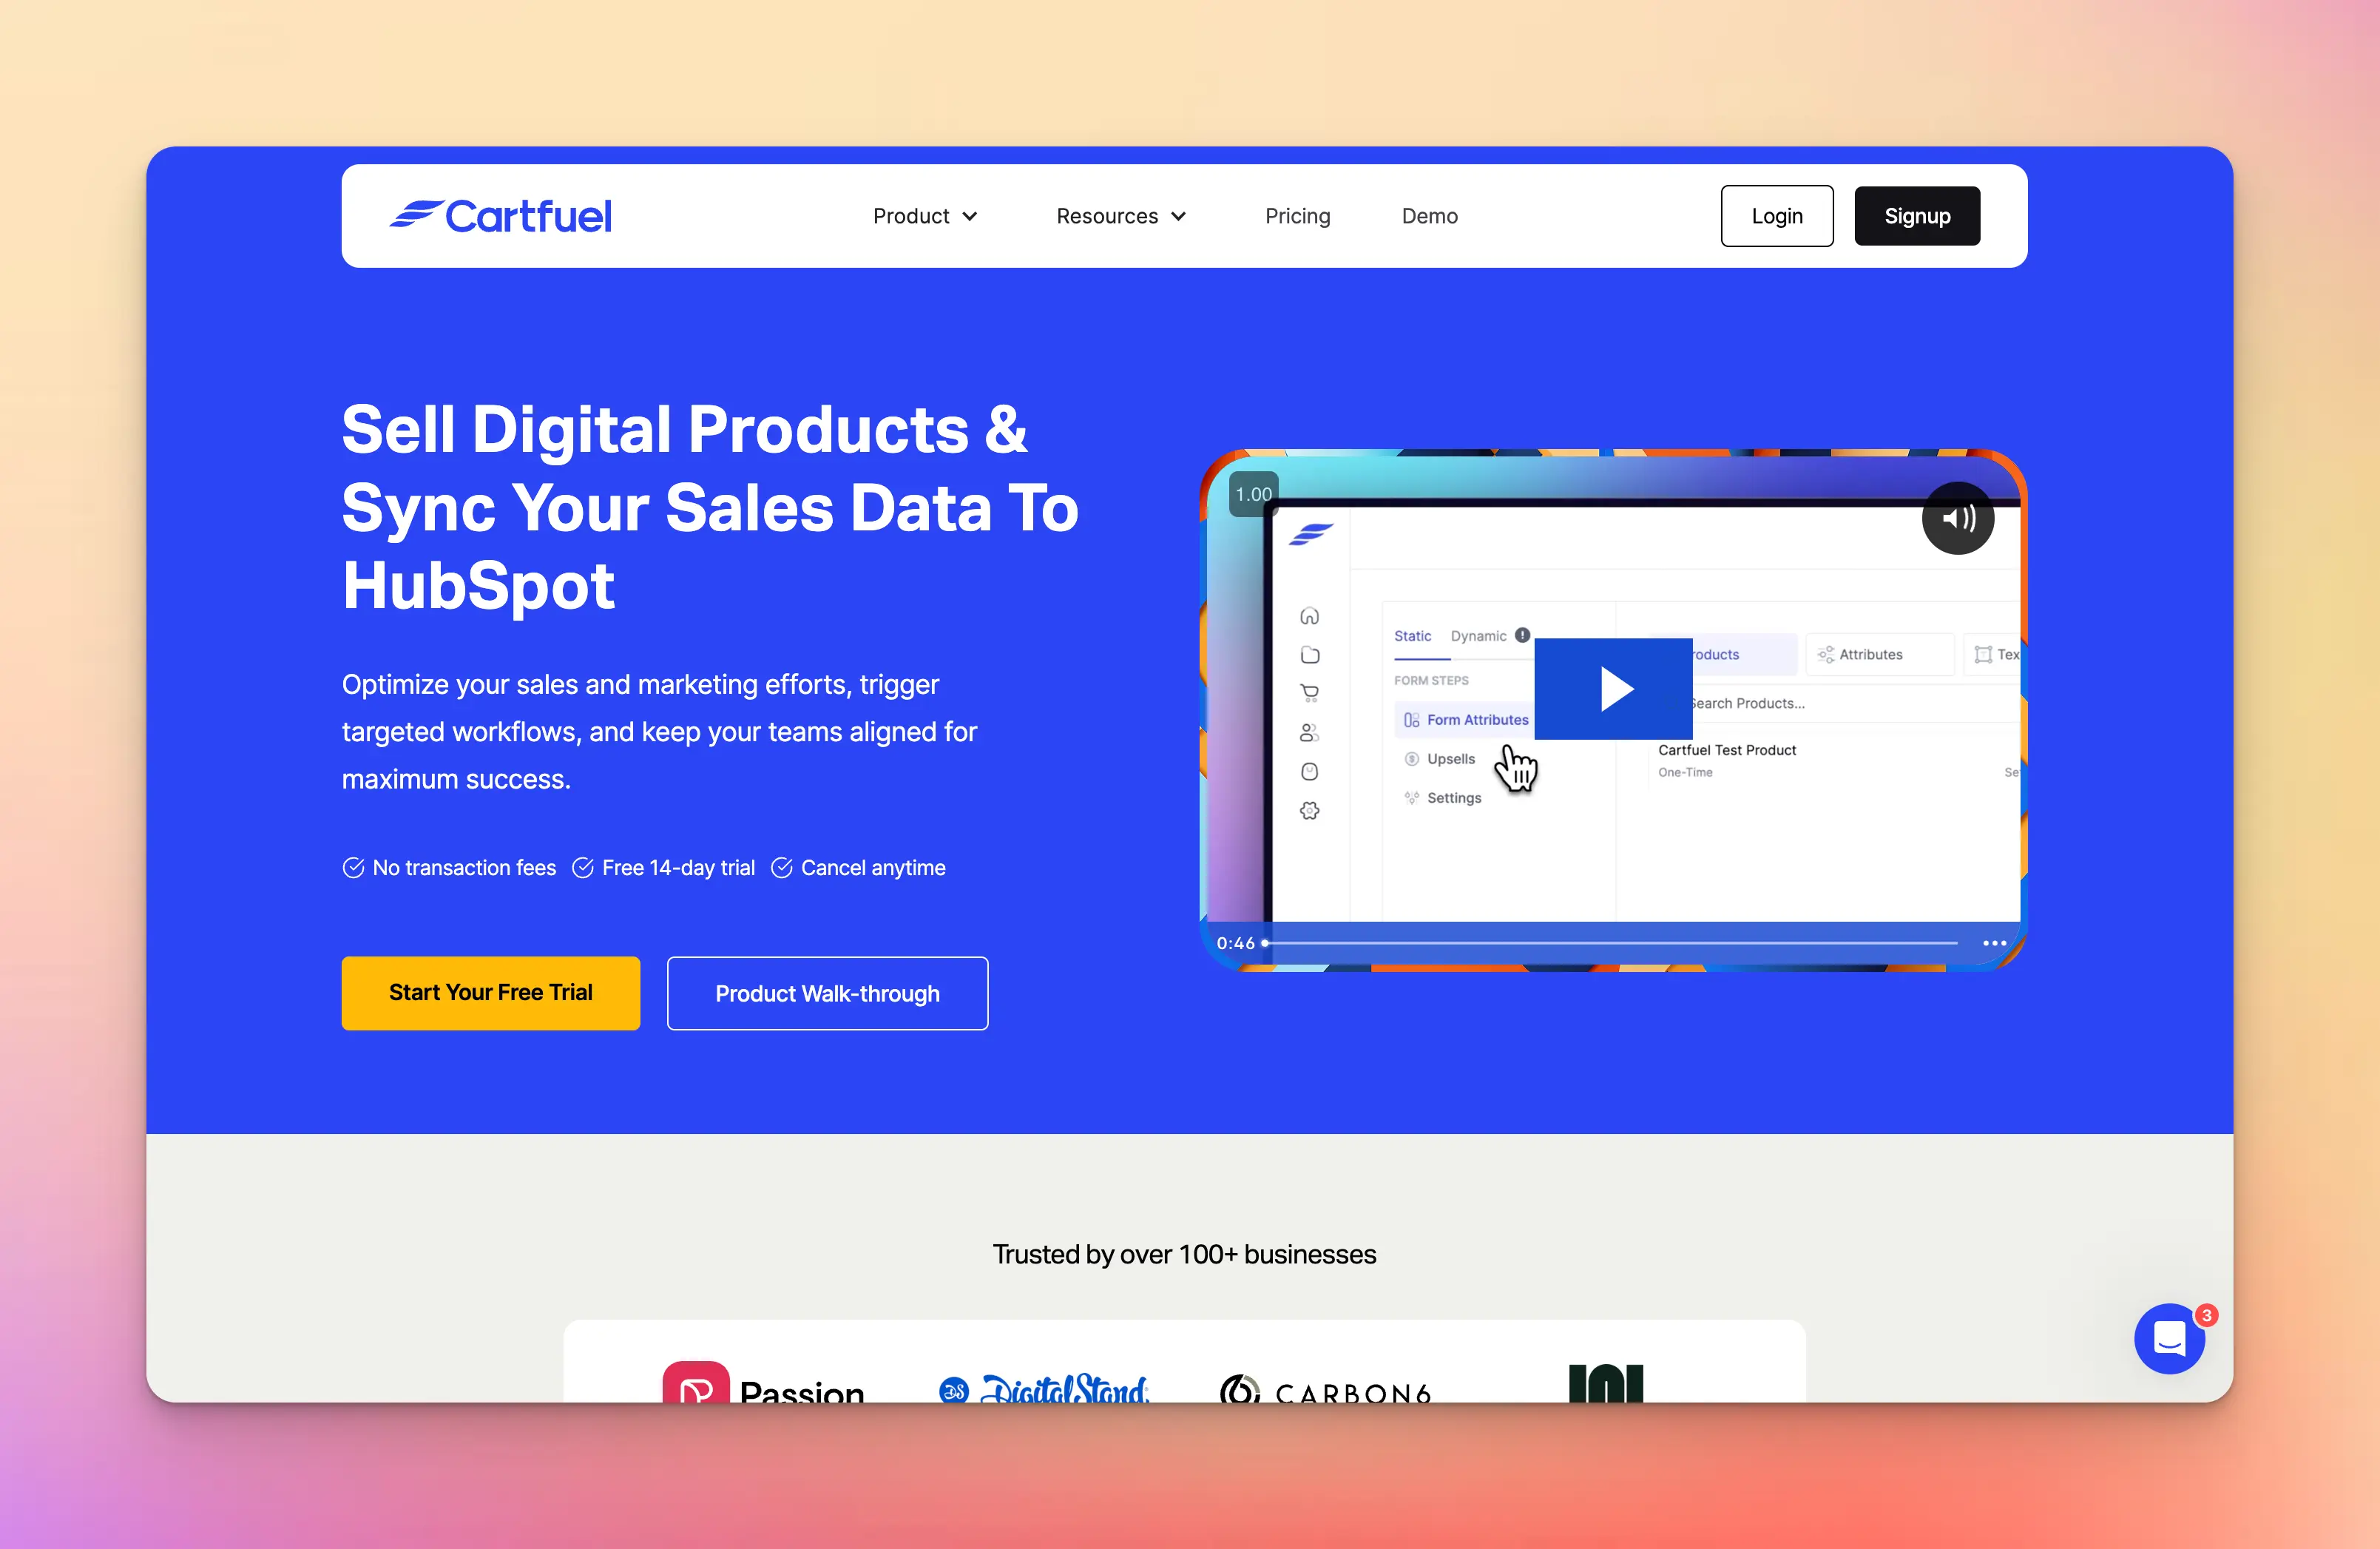
But in this article, we'll discuss how you can use Cartfuel to get the job done.
Why Cartfuel? It's simple. You can get started selling in less than 10-minutes.
There are no transaction fees or limits.
And it has an extensive list of features that allow you the flexibility you need when selling tickets to an event like...
- Countdown timers
- Promo codes
- Order Bumps to increase average order value
- One-click upsell functionality
- Can embed payment forms on your website or landing page
Because it's a third-party app, you have to pay $97/mo to use these features with the HubSpot platform...
But it's more affordable compared to Depositfix, which is $190/mo + $50 for every 50,000 in transactions.
How To Use Cartfuel With HubSpot
If you want to use Cartfuel, you must connect your HubSpot account to Cartfuel.
Here are the steps you need to take:
- Go to HubSpot marketplace and install Cartfuel (it comes with a free 14-day trial)
- Connect your Stripe account to Cartfuel
- Create a payment form with your one-time or recurring product
- Embed the payment form on your website
We'll discuss each of these steps below.
If you want to read a more detailed guide, head to the Cartfuel academy.
Note: You will need to have an active Stripe account or create a new account before continuing with this article.
Install Cartfuel From HubSpot Marketplace
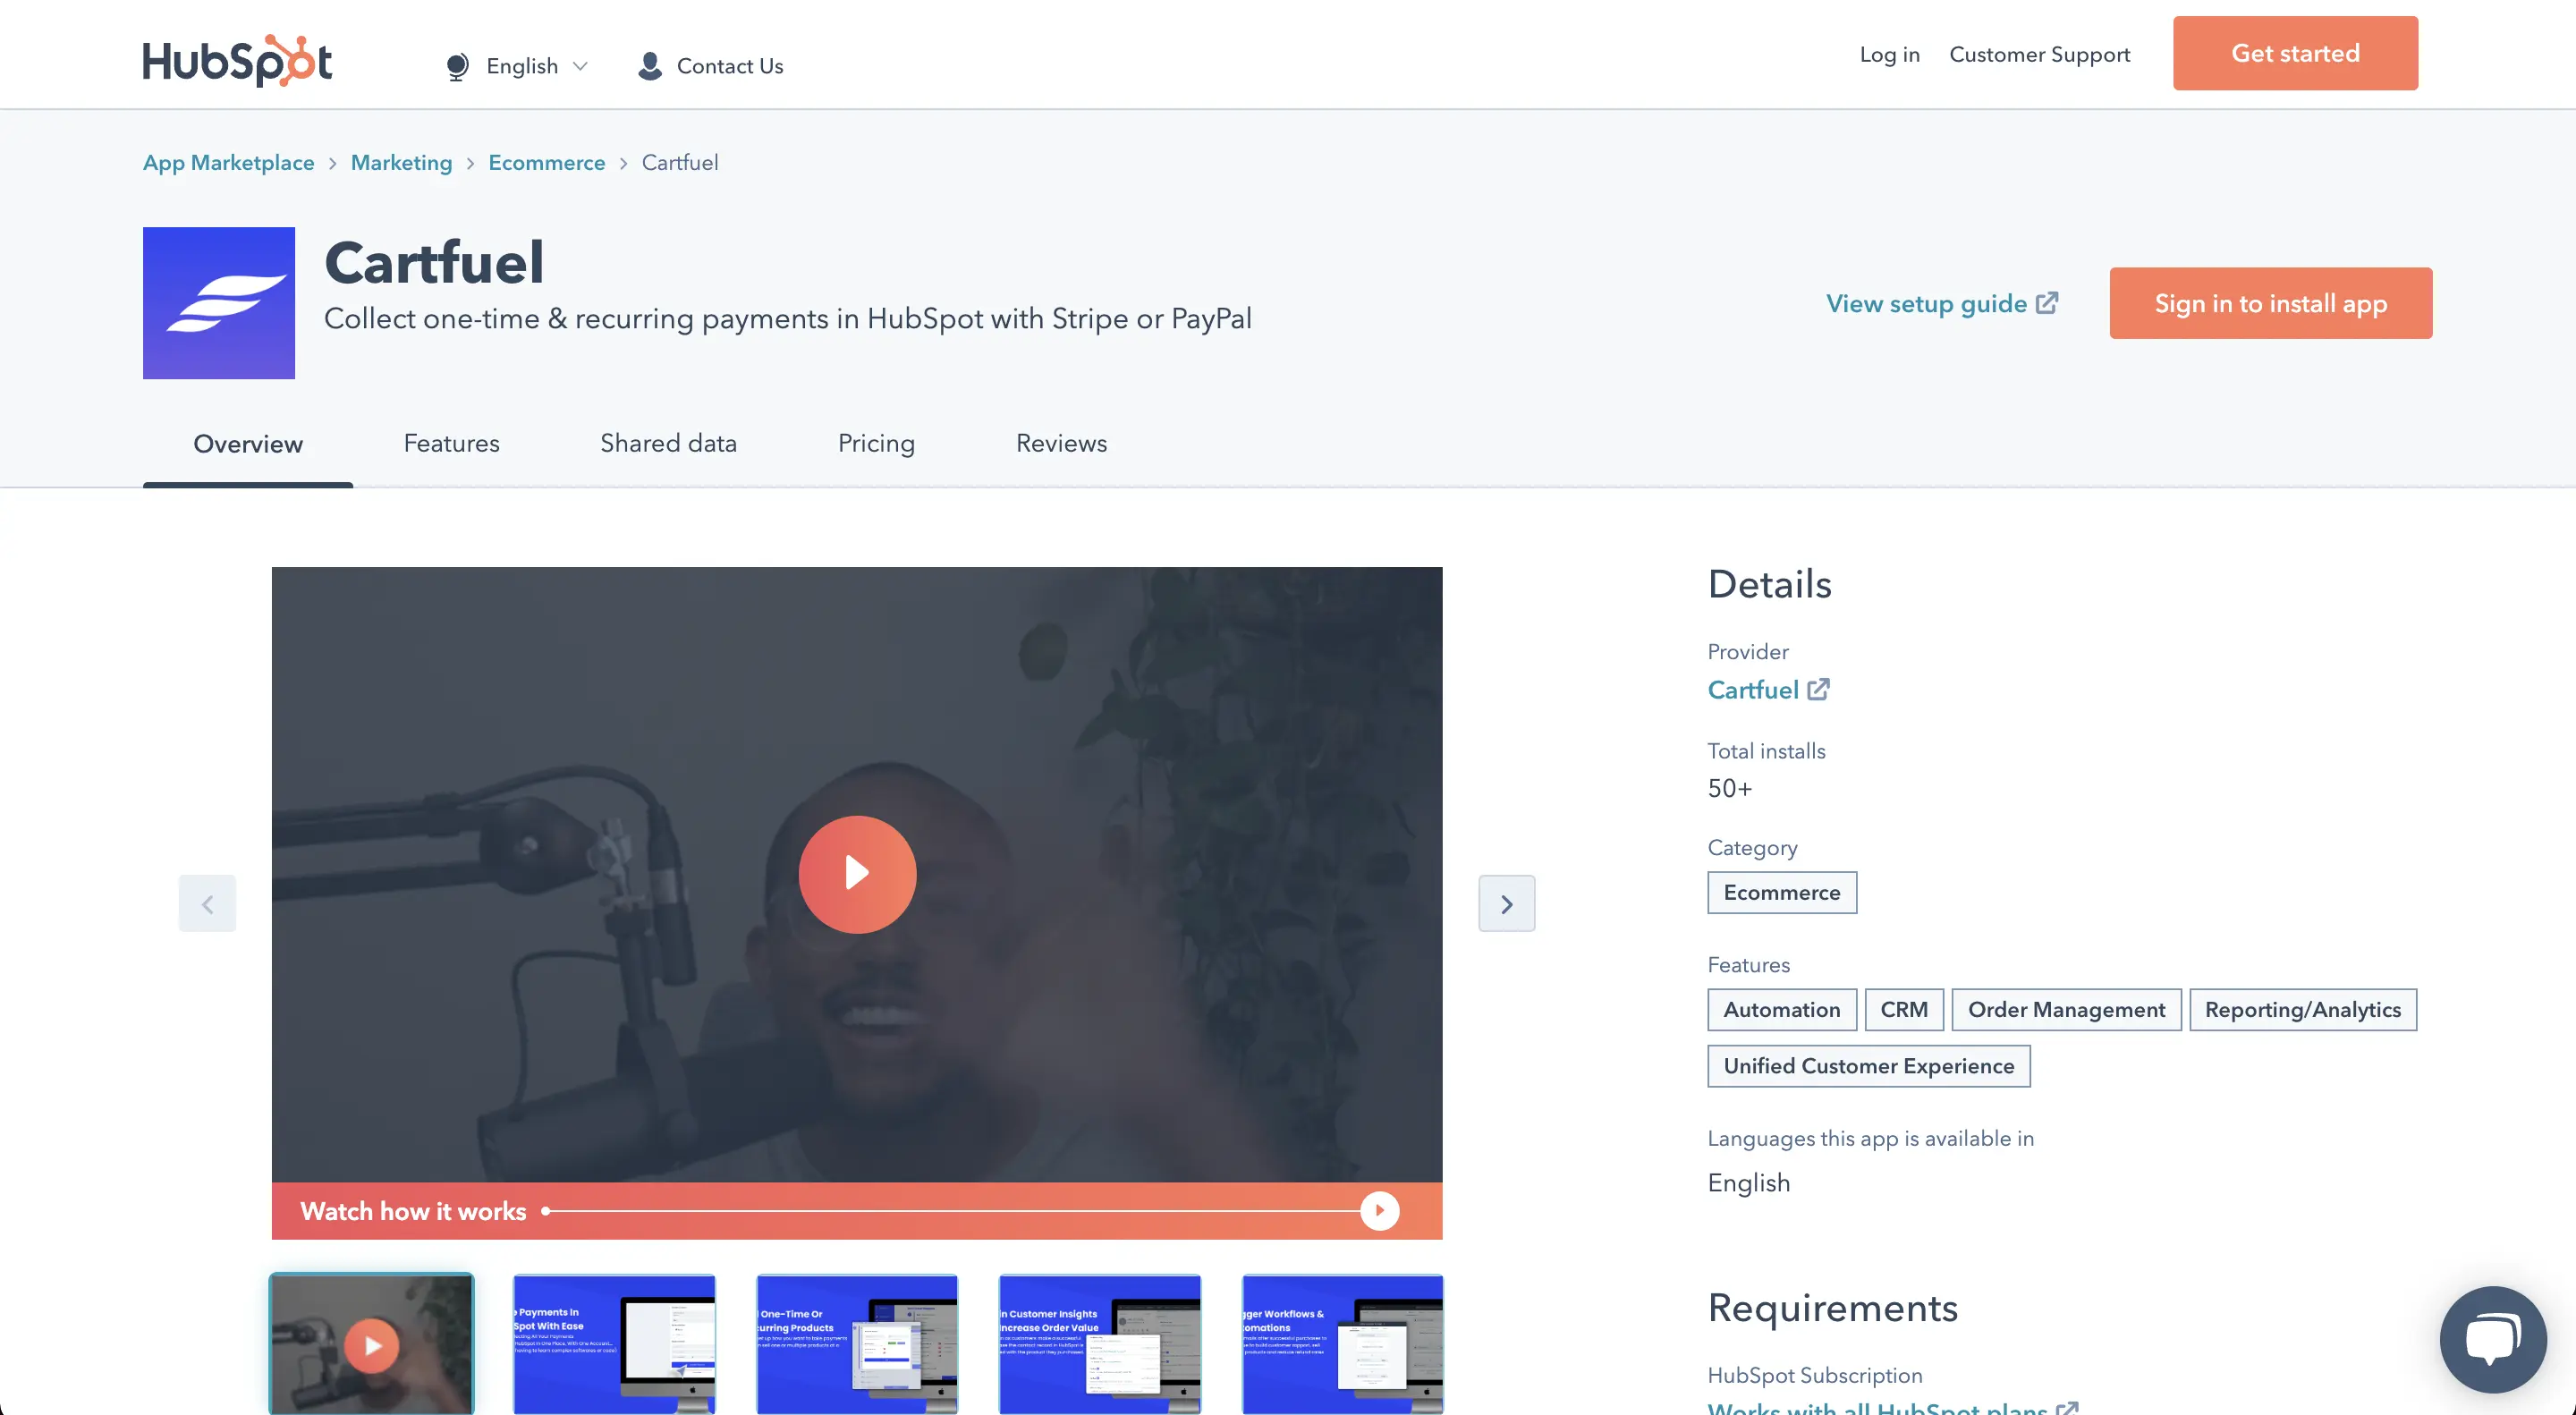
Go to your HubSpot account and log in. Then go to the HubSpot marketplace and search "Cartfuel."
Then click the install app button in the HubSpot app store so that you can install the Cartfuel app.
If you don't have a Cartfuel account, clicking the install app button will create an account for you.
Once you have Cartfuel installed on your HubSpot account, you need to connect your Stripe account to Cartfuel.
How To Create A Payment Form To Sell Tickets To Your Event
Cartfuel will allow you to create a payment form as soon as your Stripe account is connected.
Follow these steps to create your first payment form.
In your Cartfuel account, click on 'New Payment Form' in the top navigation menu.

Then proceed to select if you want to use Stripe or PayPal.
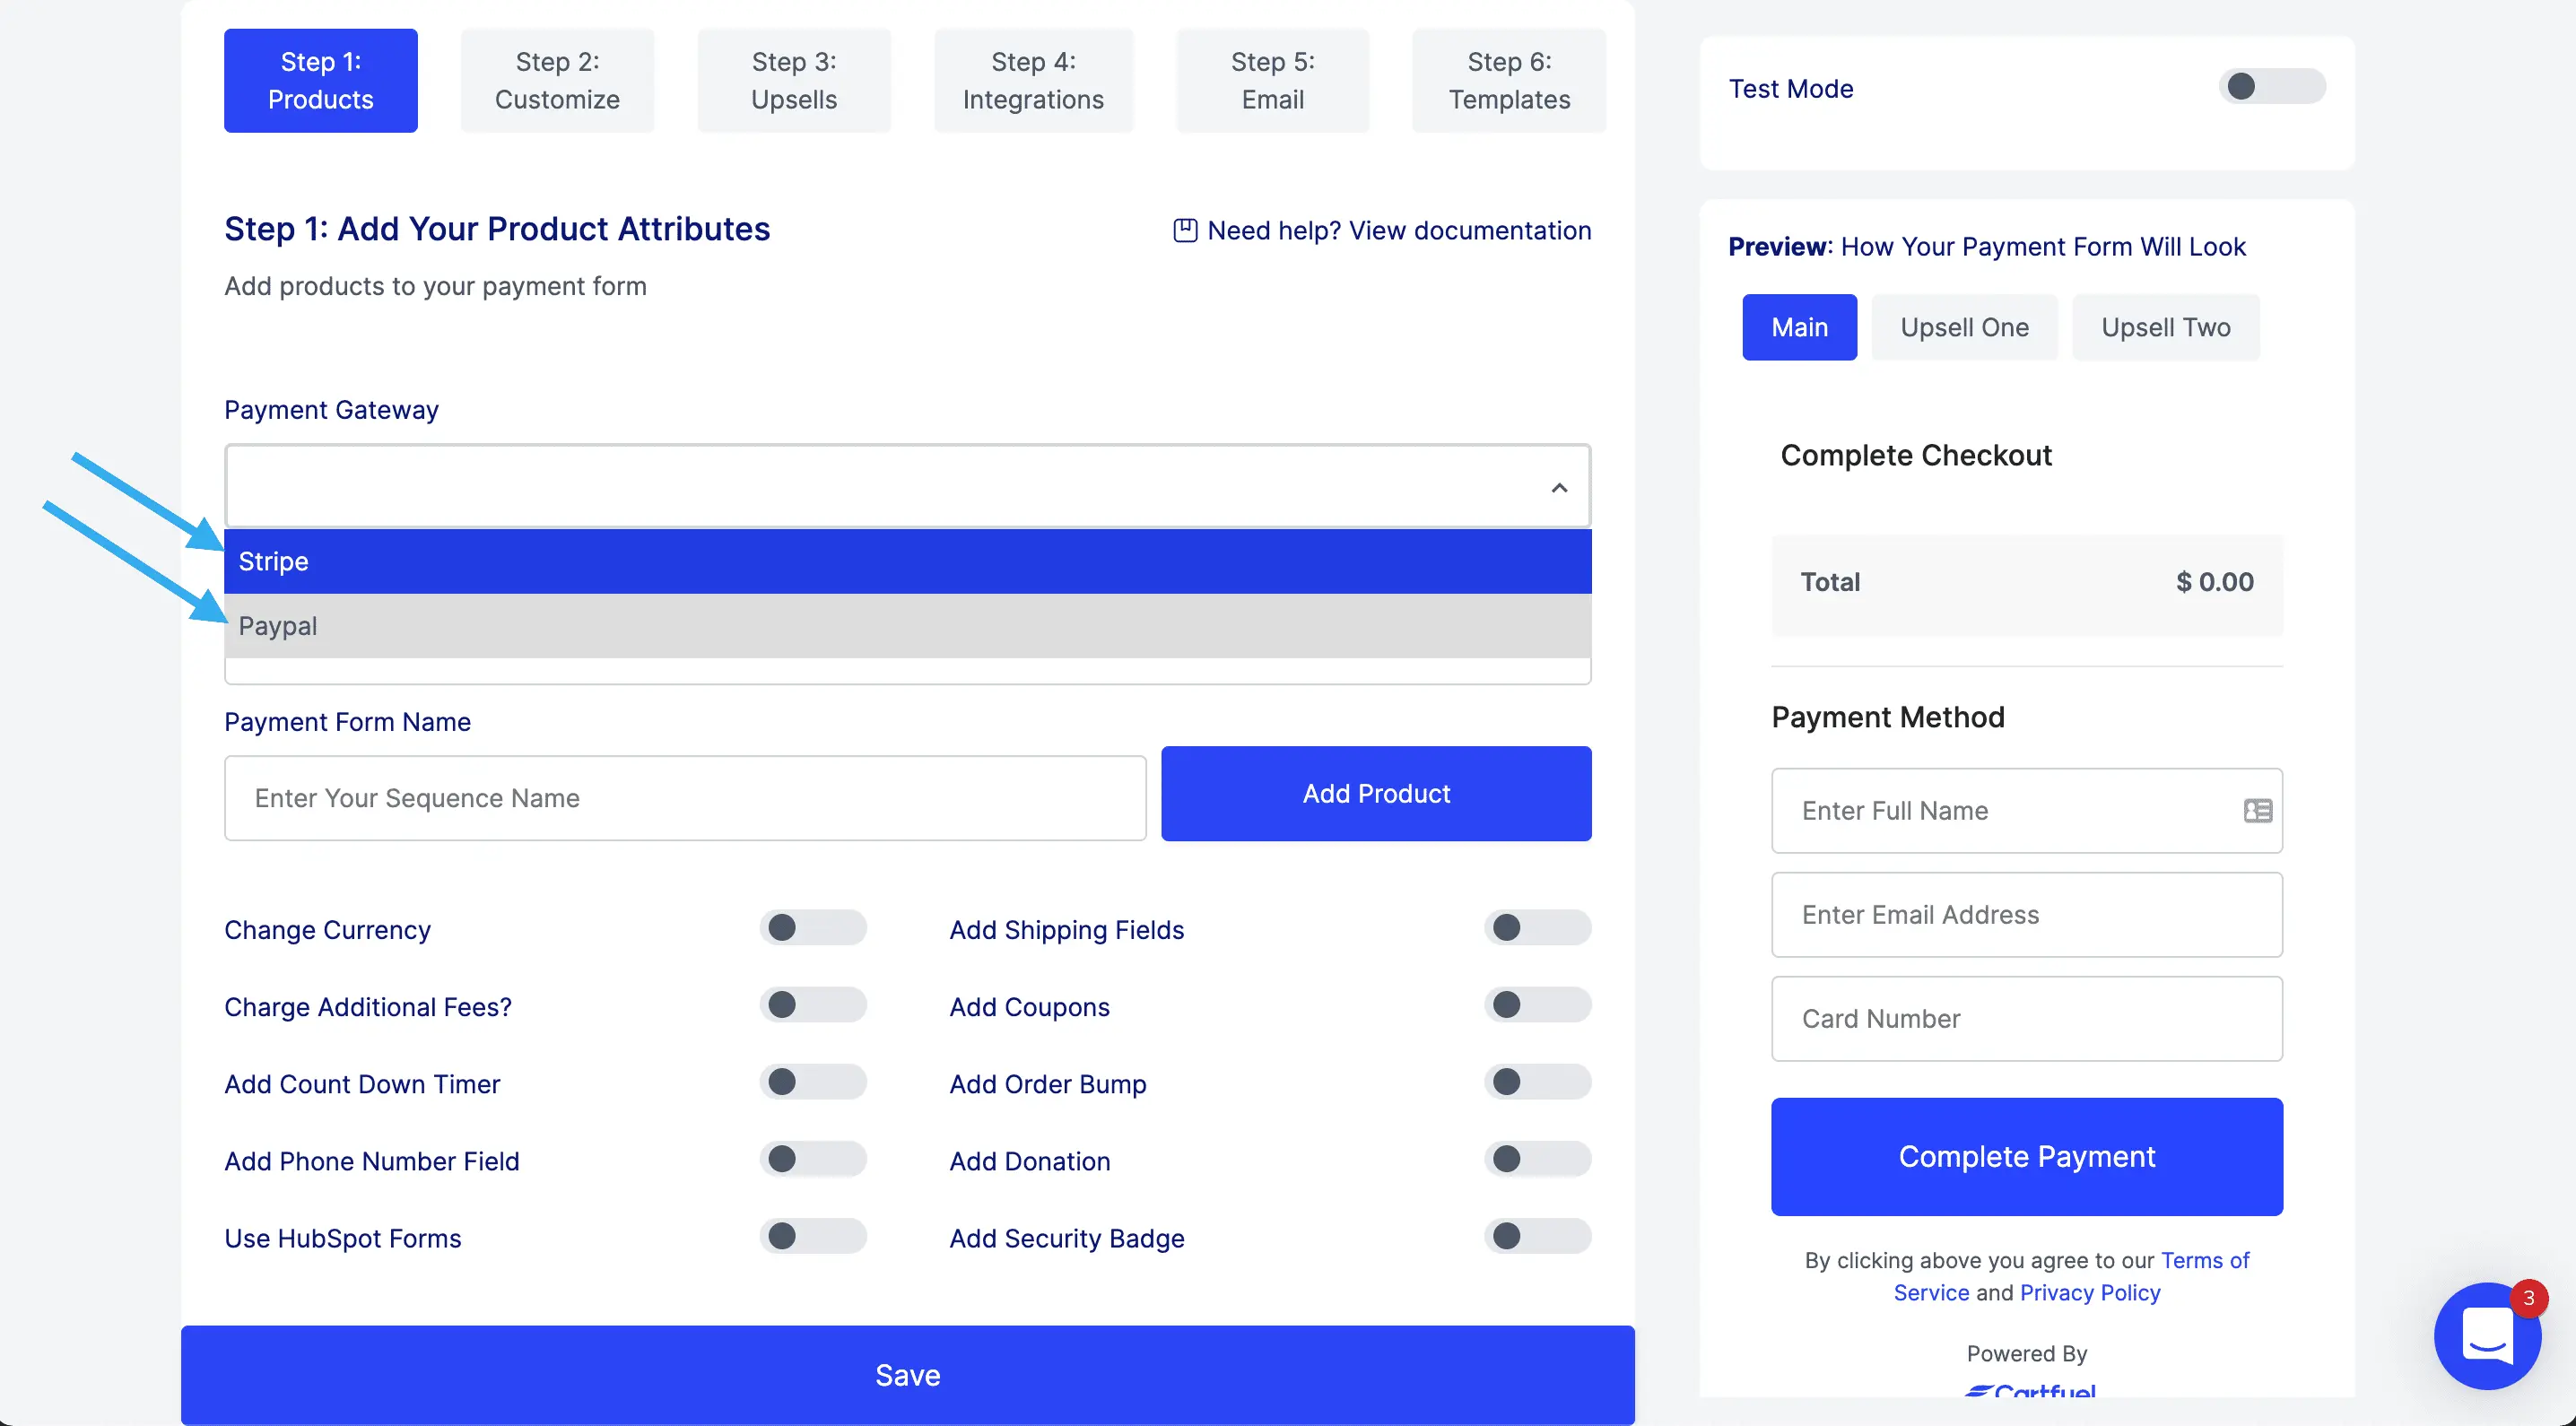
Enter Your payment form name
.png)
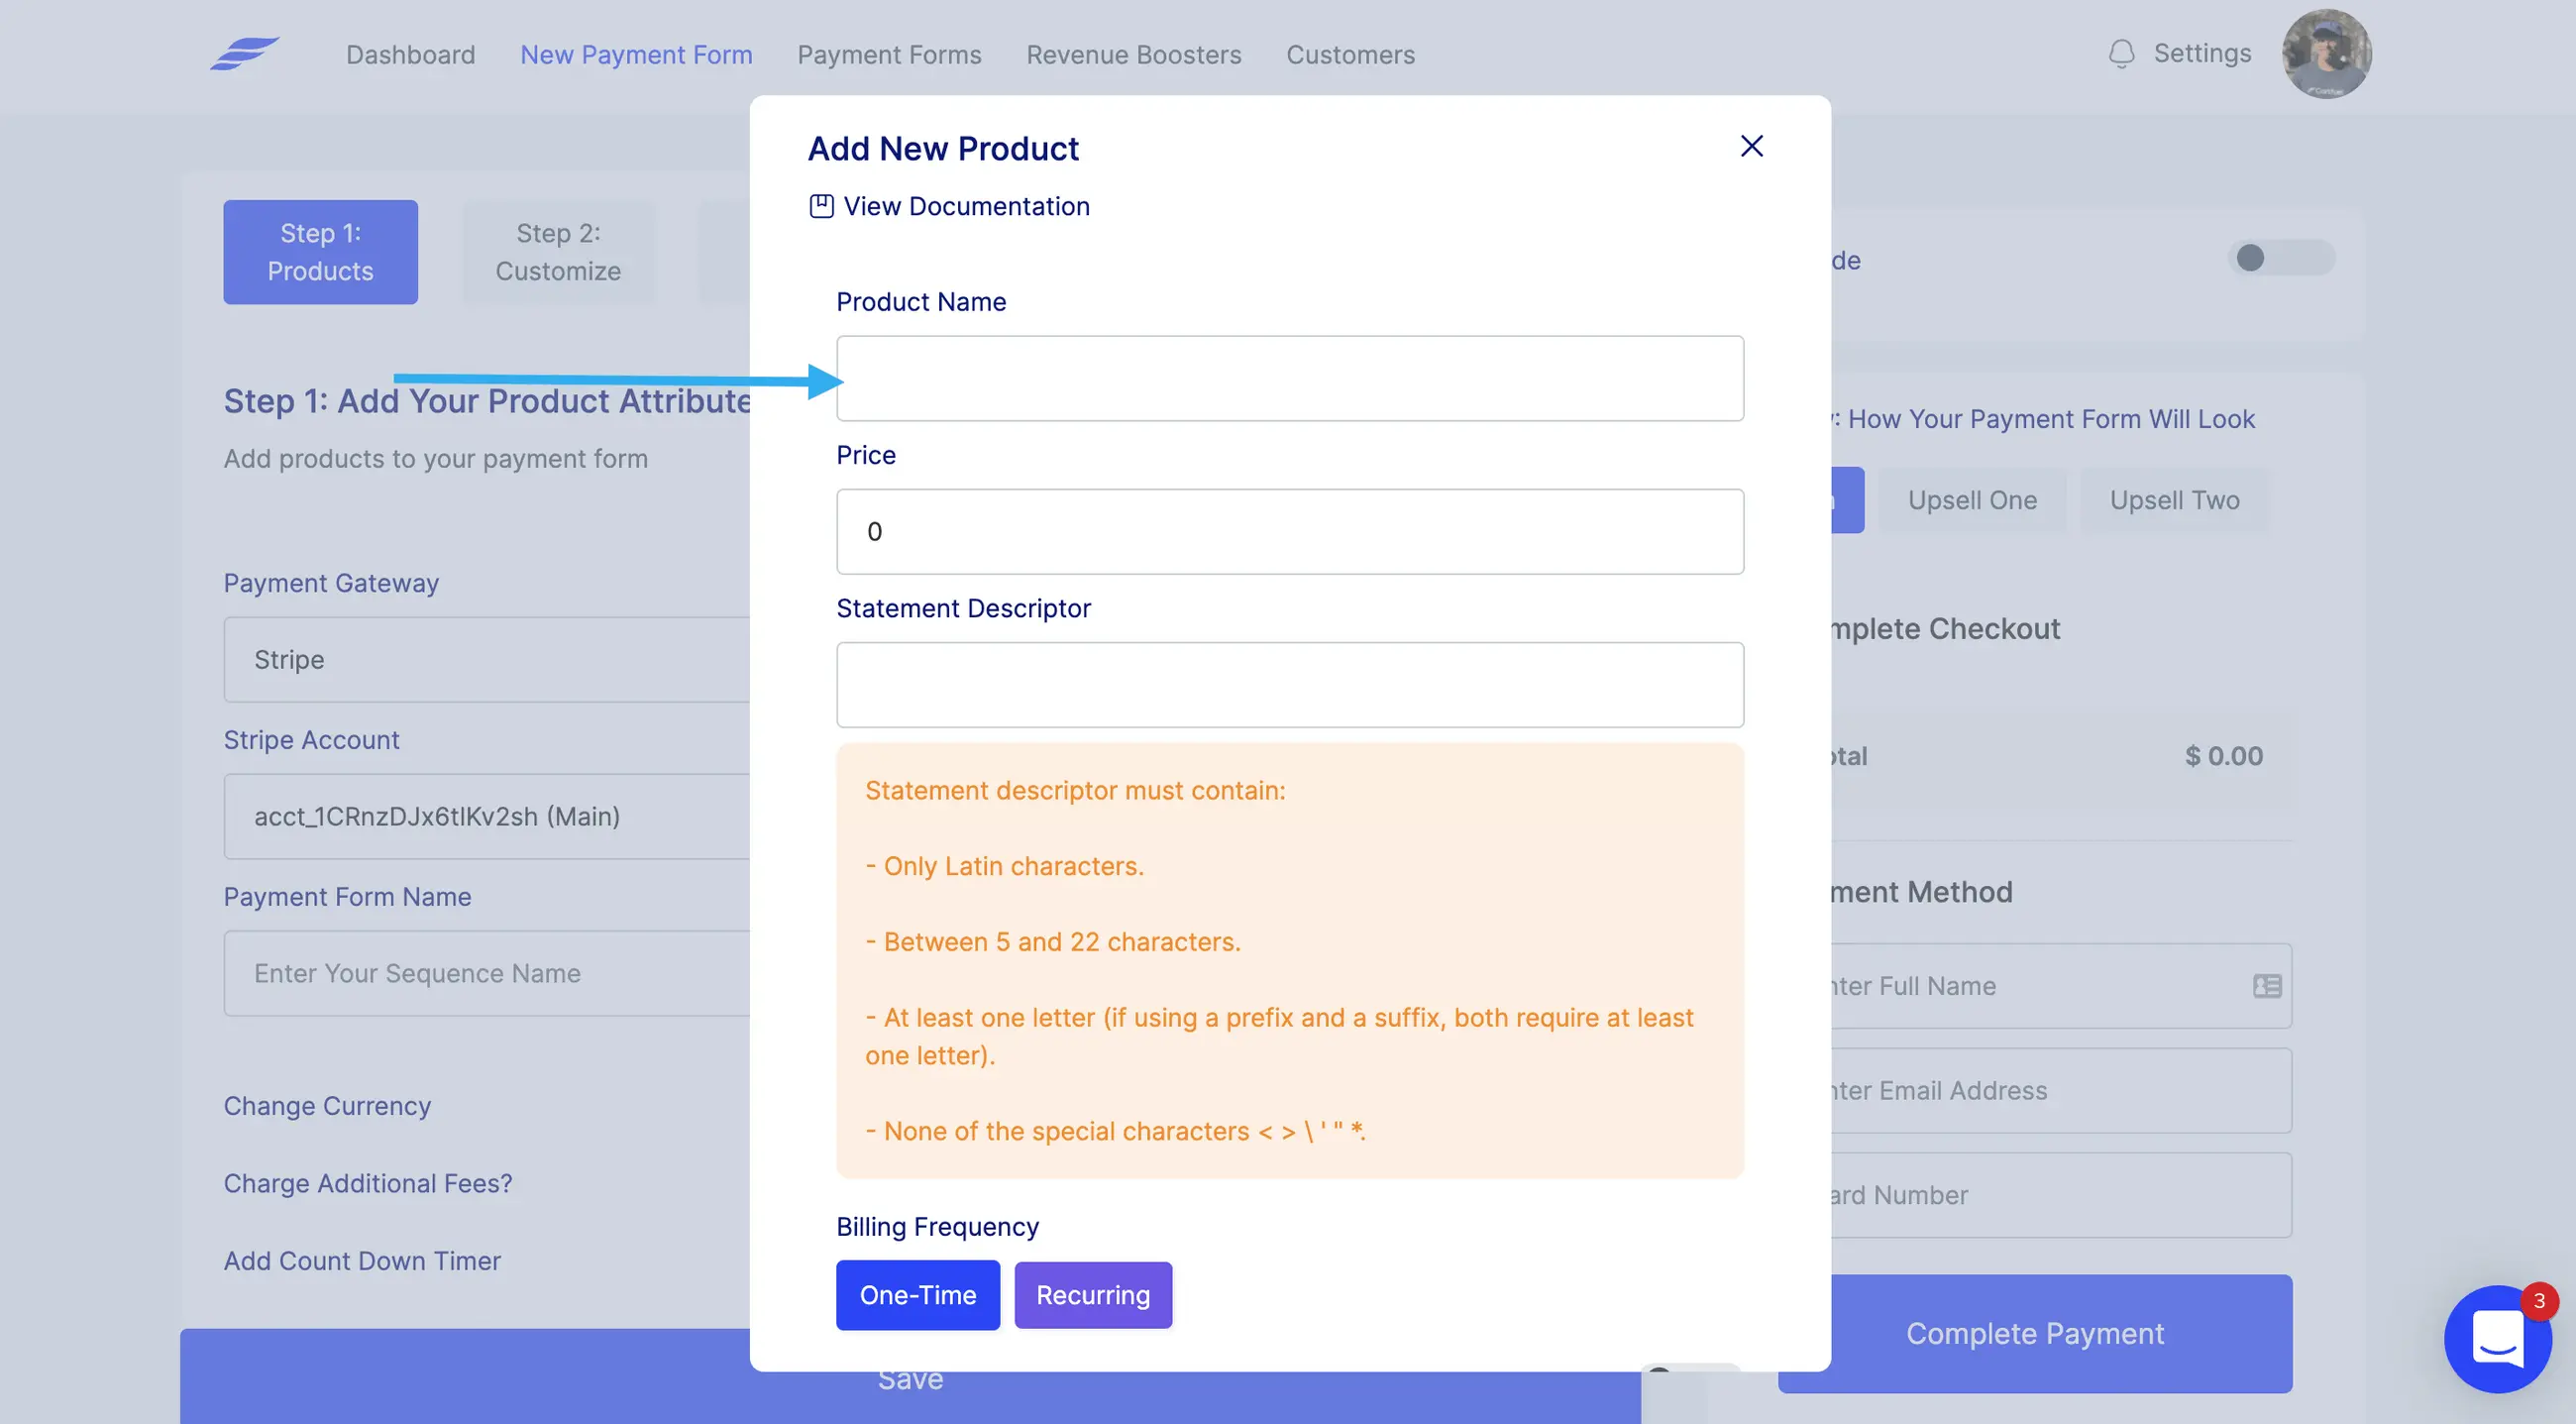
Click on the blue 'Add new product' button.

In the popup, enter your product details, including the product name, price, and if you want to have a one-time or recurring product.

.png)
Add extra features like add-ons, charging taxes, quantity fields, or variants.
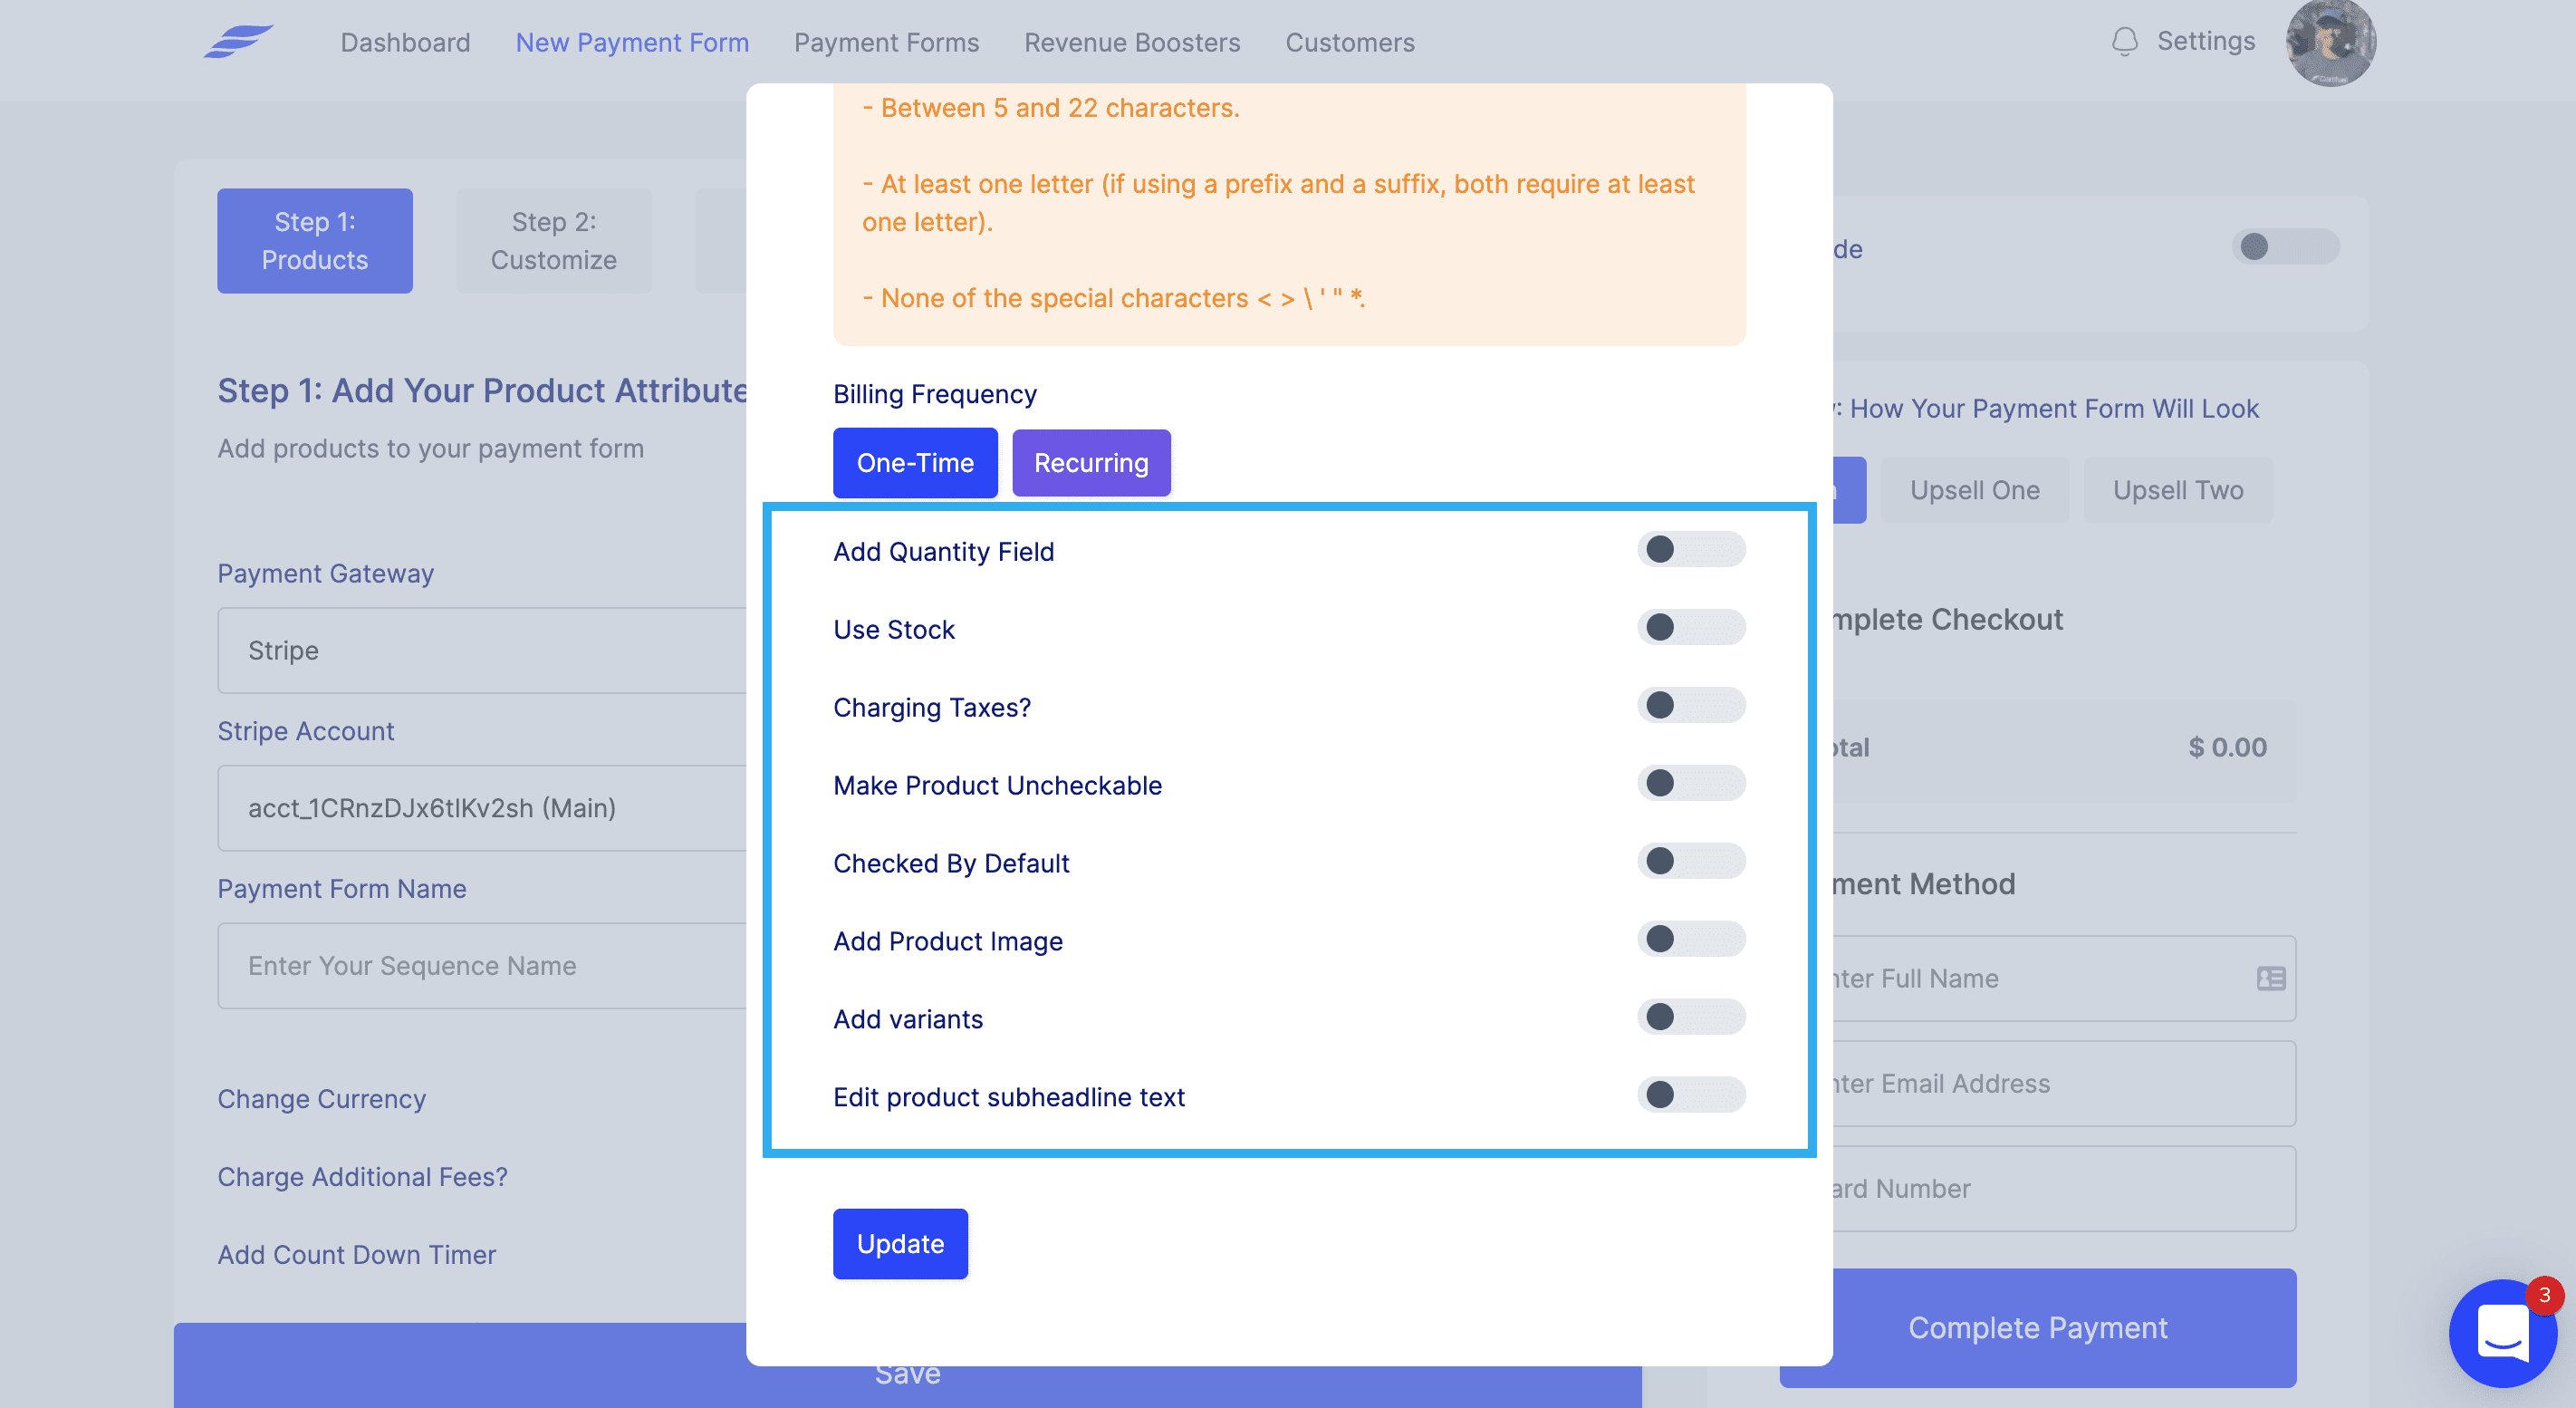
After adding a product, you can decide to add even more features to your payment form. Like adding a countdown timer, charging additional fees, adding coupons, order bumps, and more by clicking the toggle.

If you want to add another product, you can click the "Add new product" button again and repeat the steps.
Because you're selling tickets to an event, we recommend:
- Adding a countdown timer to increase urgency
- Adding a promo code
- Adding a quantity field box
- Adding more than one product (ticket level)
Here's an example of how our payment forms would like with all three features added
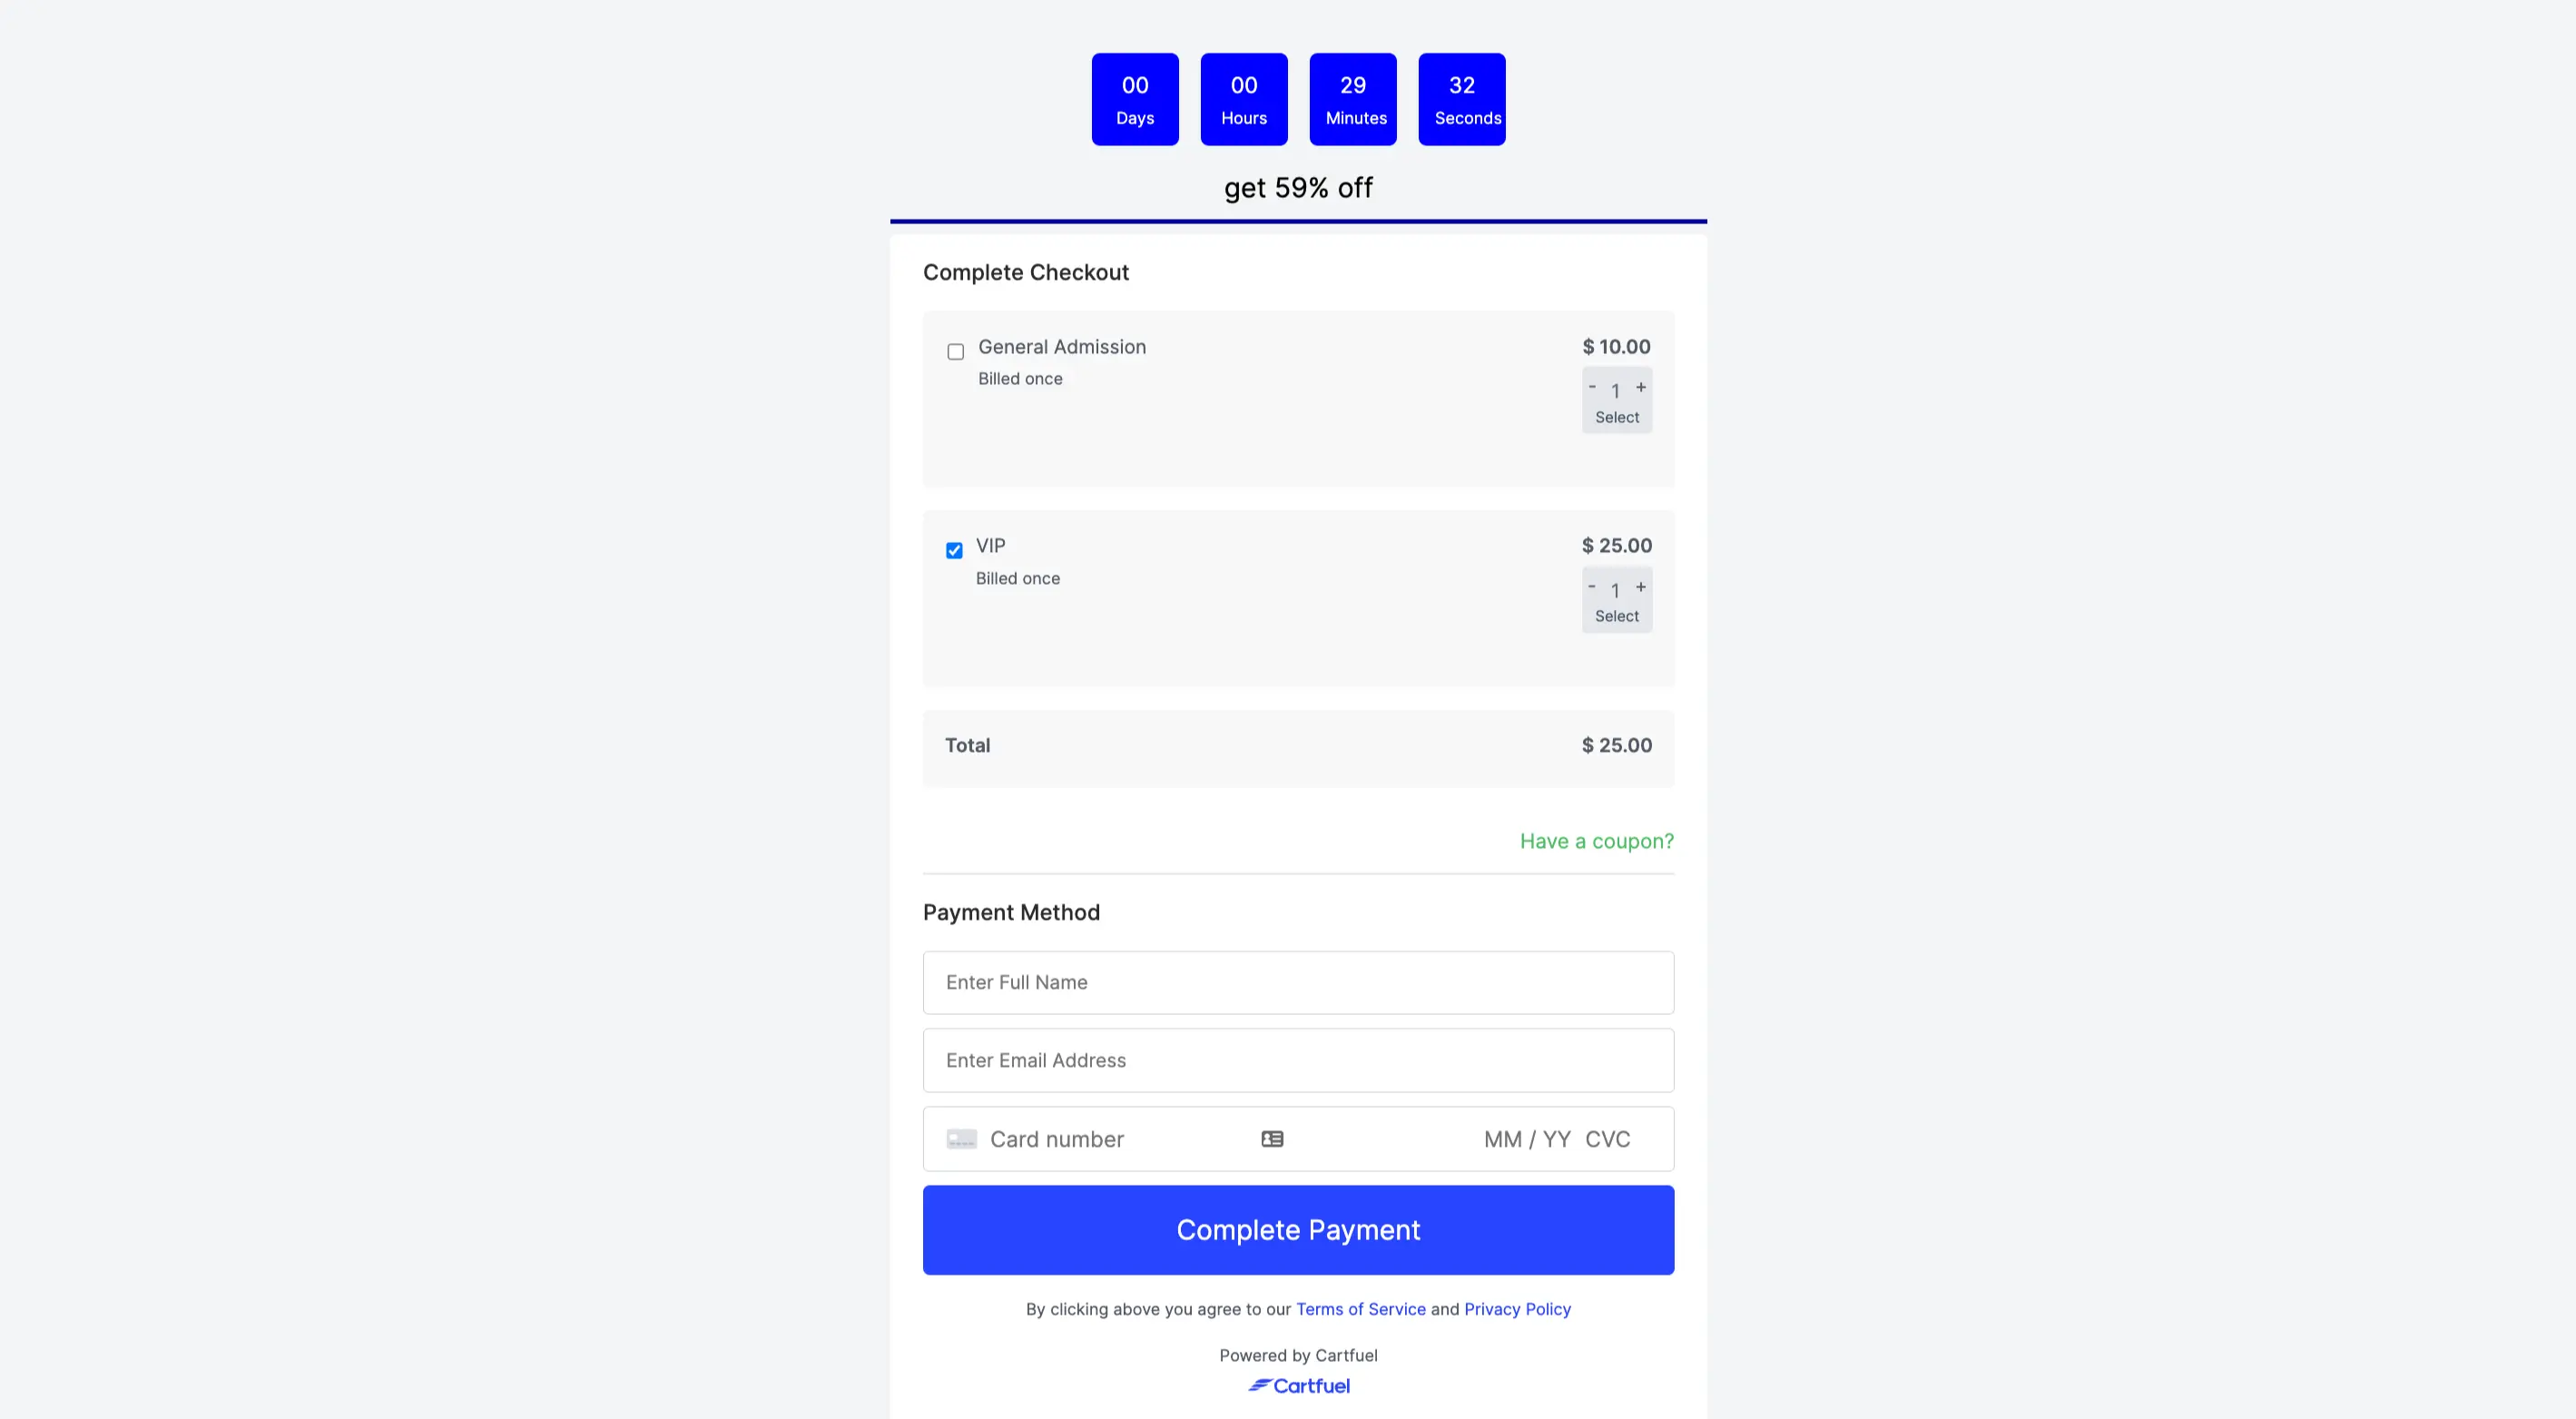
Click here for the live payment form example.
You can set a date for when the timer should end. You can even set the price to increase once the timer runs out.
Once you have created your first payment form, you can customize it further by clicking "Step 2 - Customize".
You can change the text of the header elements, the text color, the button text and color, and more.
Suppose you want to sell more packages to your customer after purchasing their ticket (like a VIP upgrade). In that case, you can do so with Cartfuel's one-click upsell feature.
How To Add A One-Click Upsell
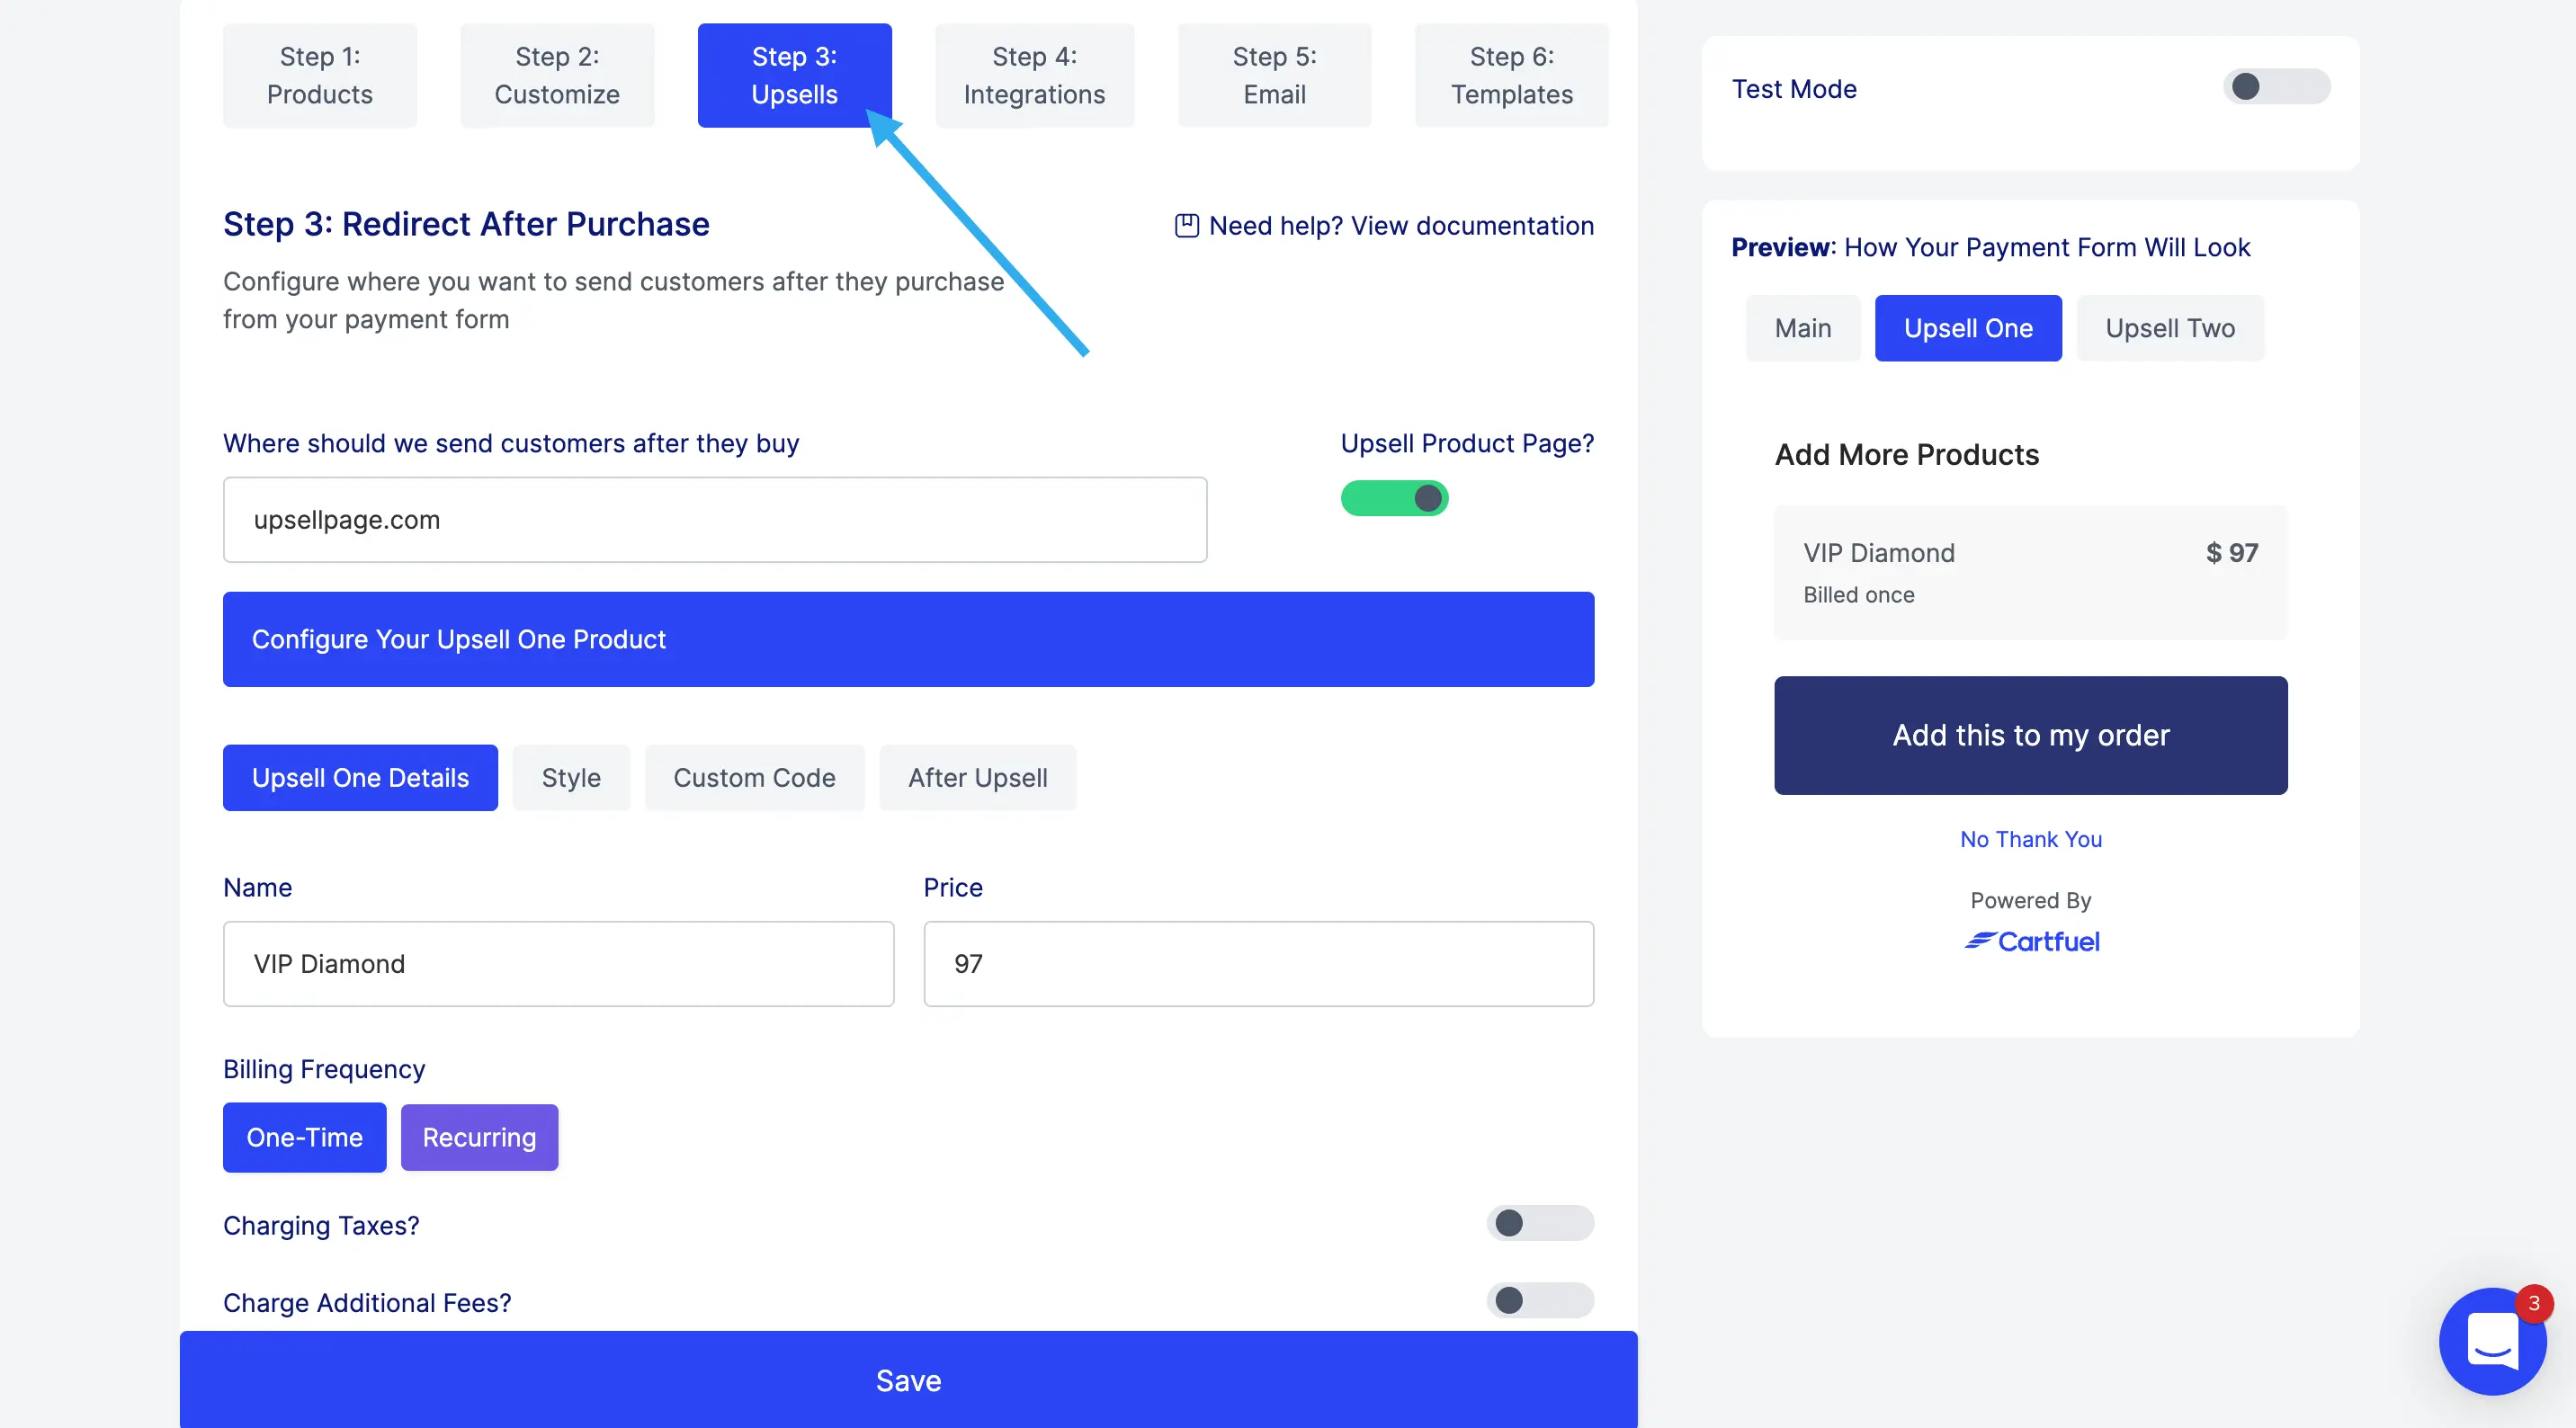
To add a one-click upsell, you can do so by clicking "Step 3 - Upsells".
In this step, you'll want to add the URL of the page where you intend to offer the upsell.
Proceed to enter the upsell details, including the upsell name and price.
You can also customize the upsell by changing the upsell button text, colors, and more.
How To Embed Cartfuel On Your Website
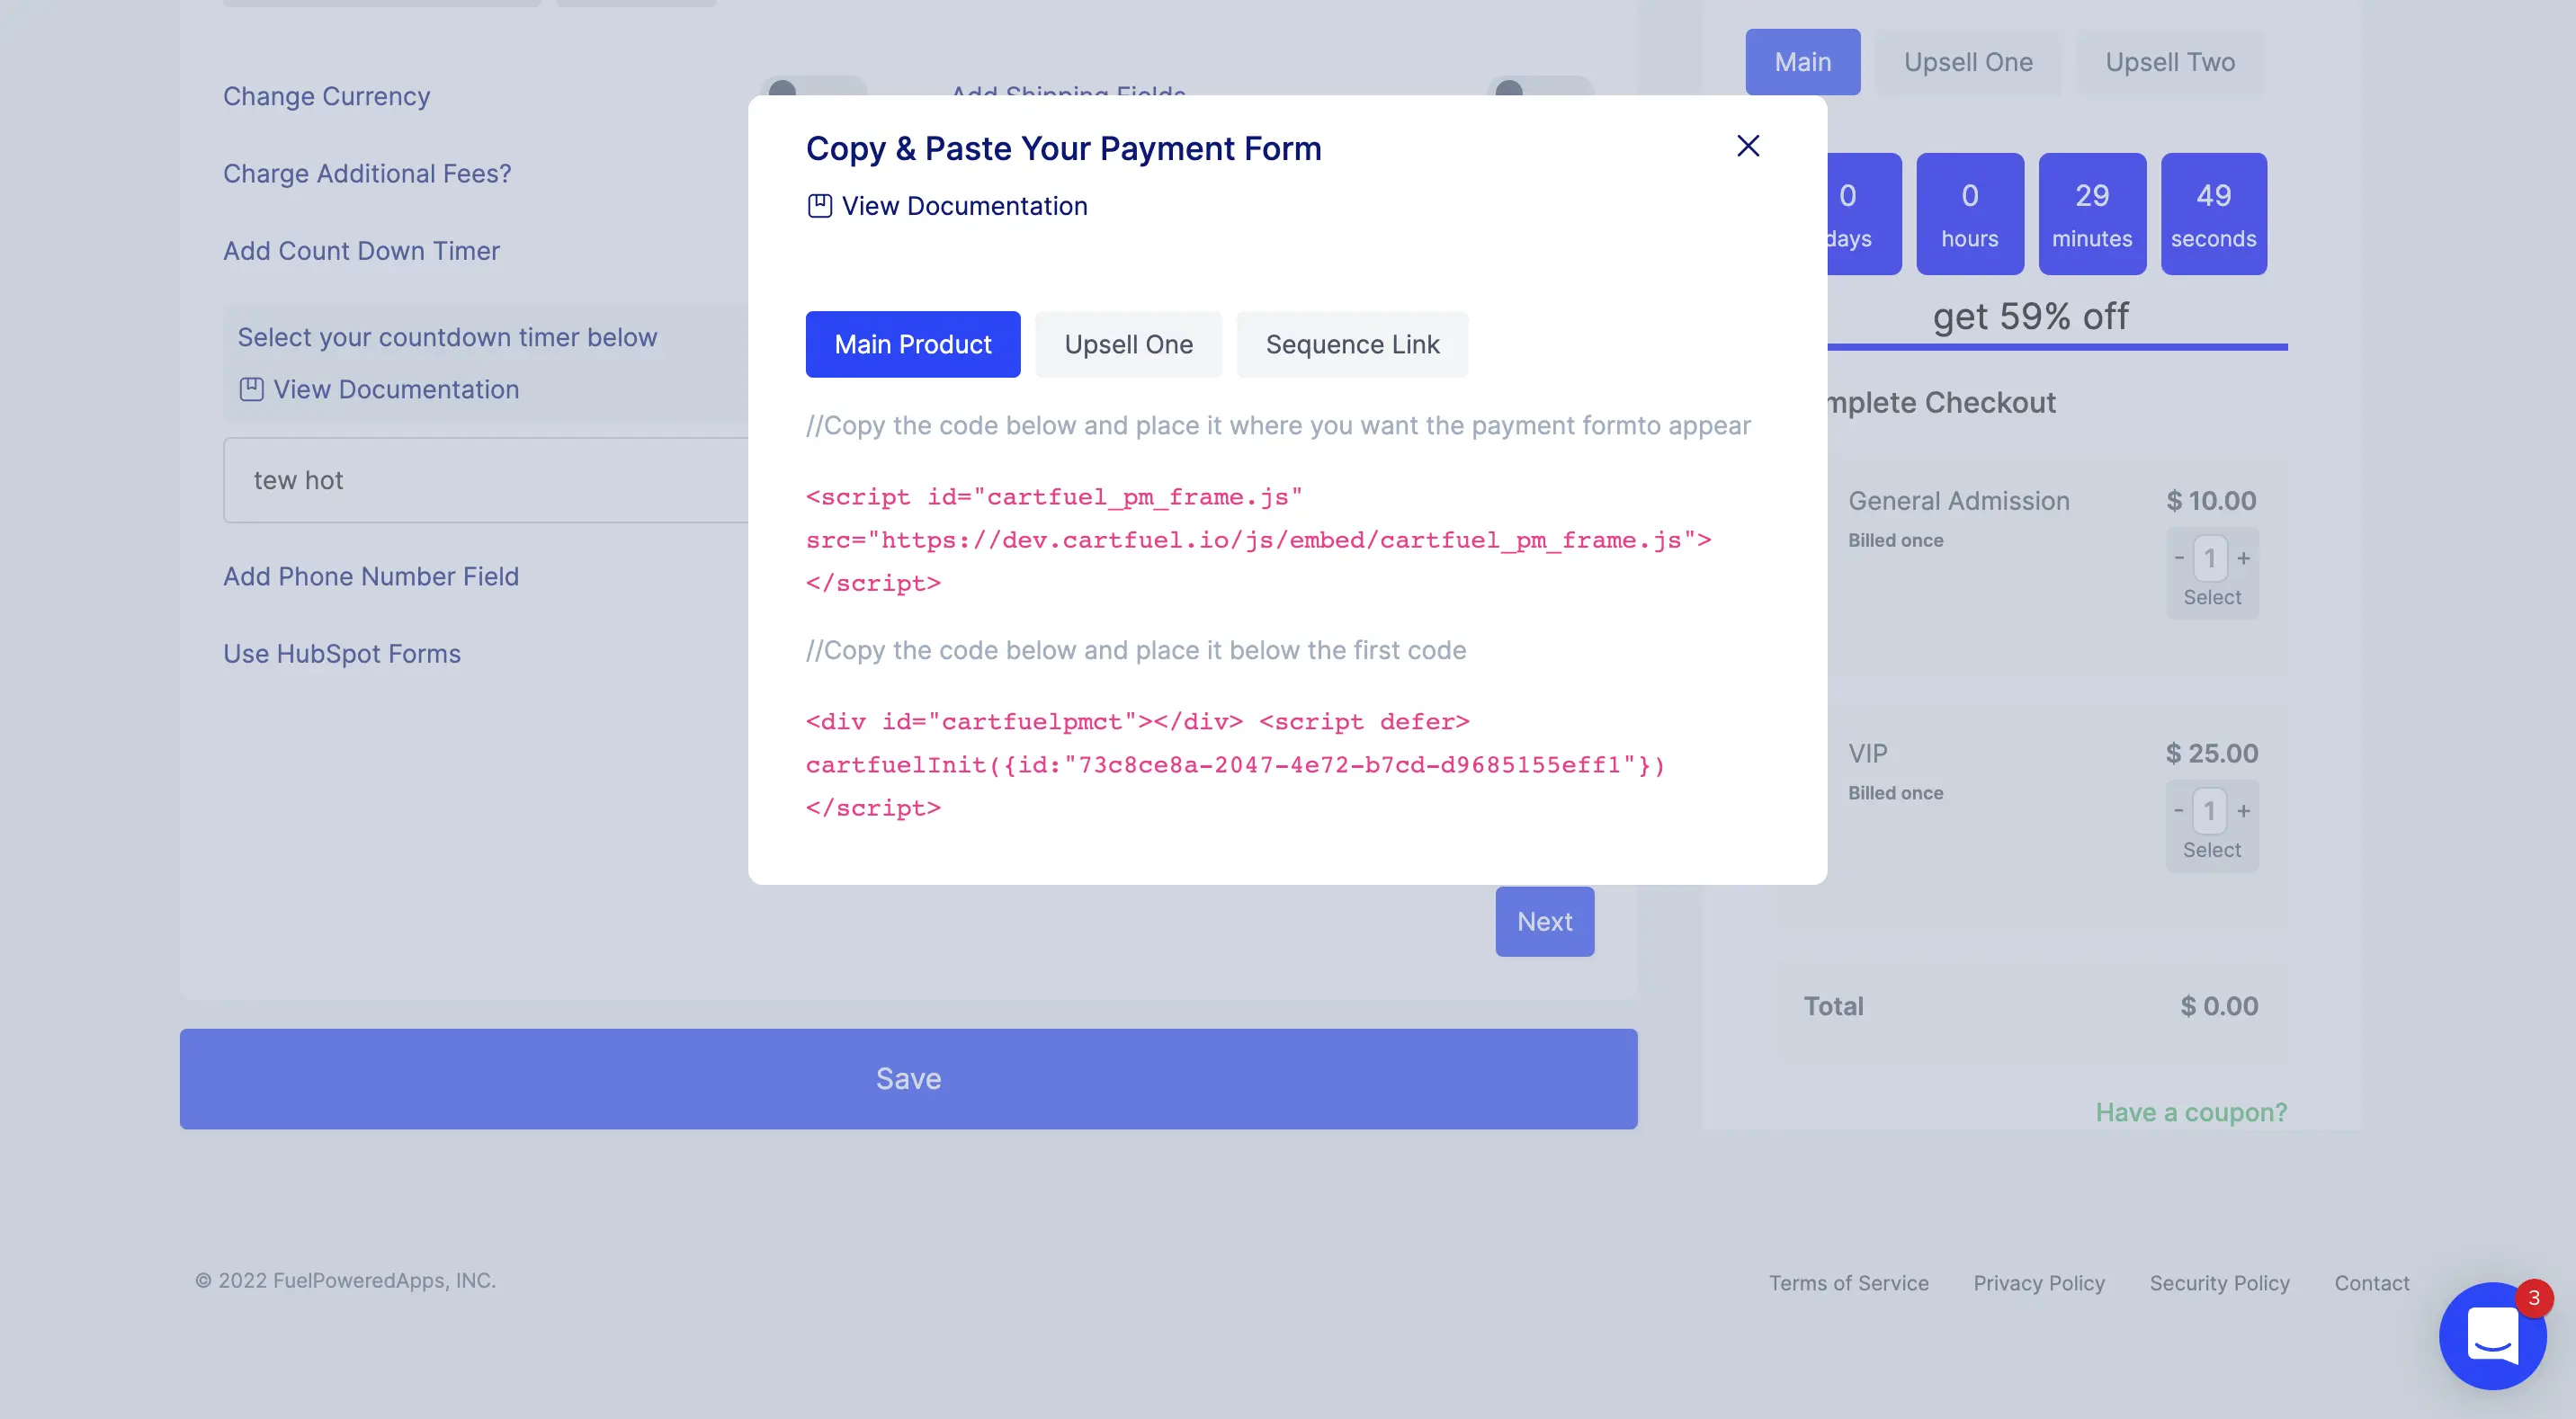
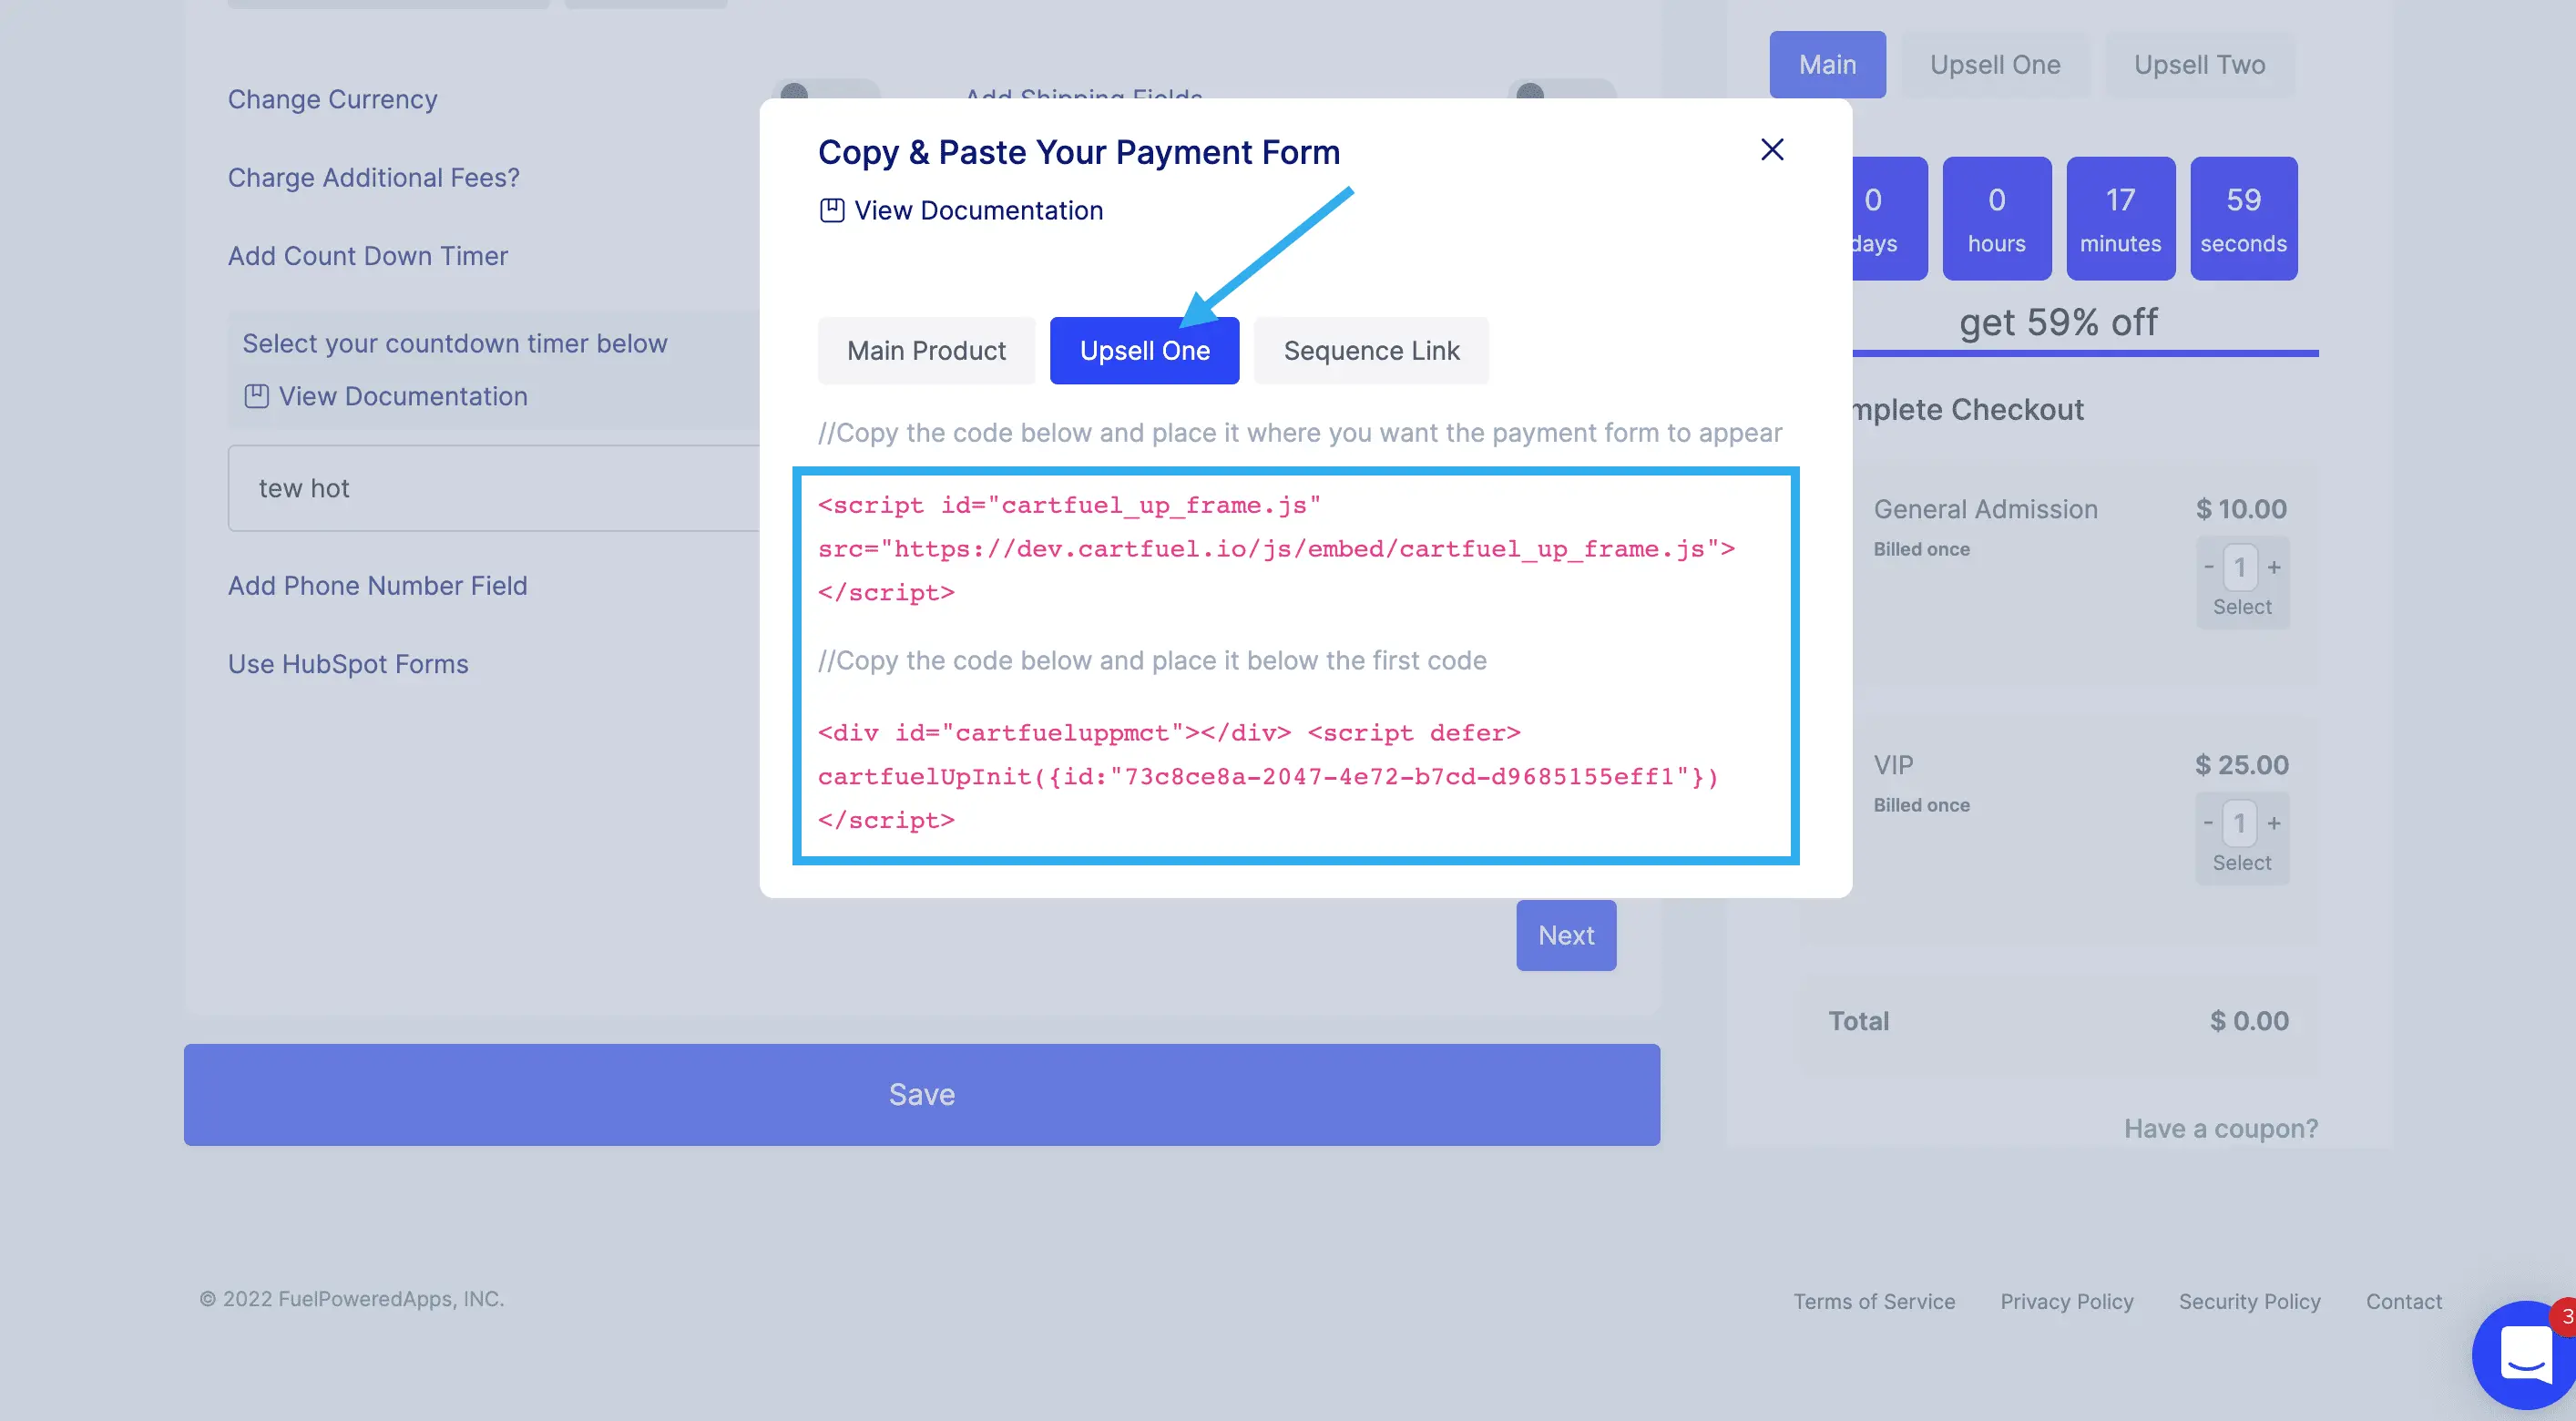
Once you're done setting up your payment form and upsells, click the save button.
This will open a popup modal that includes two sets of code snippets.
One set for the main products (your event tickets)
And another set for your upsells (other packages)
Don't worry. You don't need to know how to code.
Note: Your website will need the ability to add custom code. Most websites allow for embeddable content.
If you're unsure if your website allows for embeddable content, reach out to Cartfuel support for help.
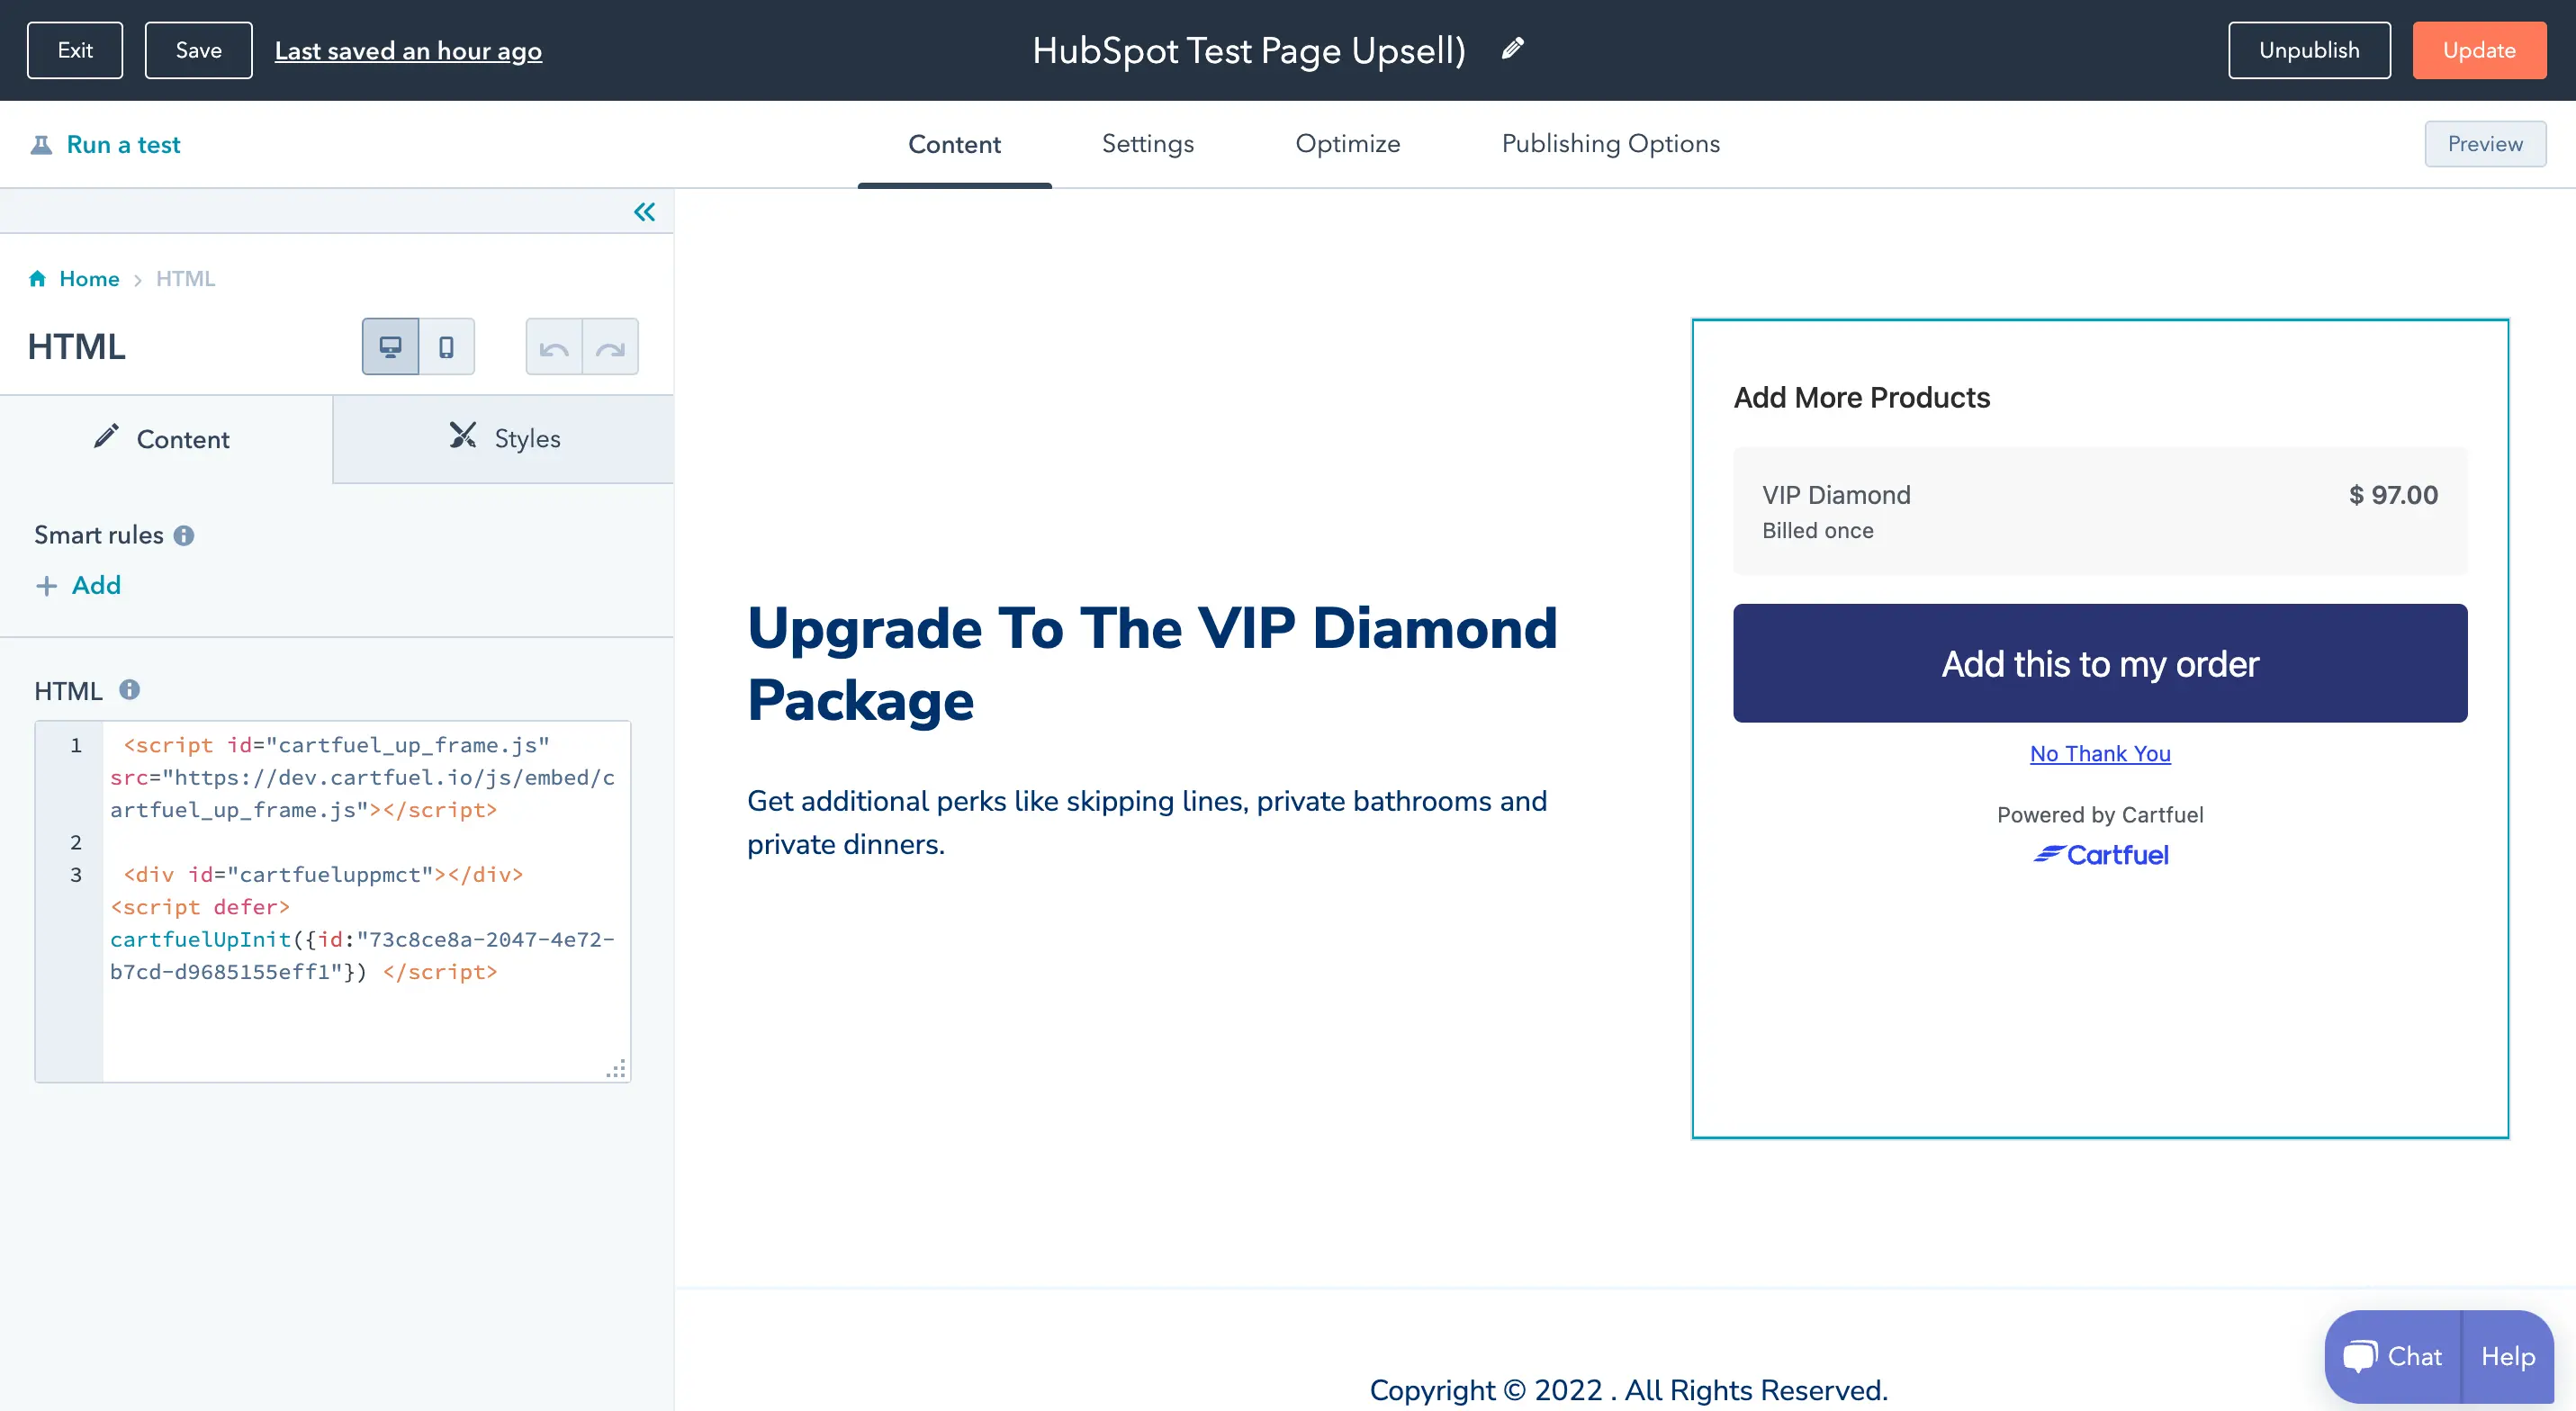
The first group of code snippets is for your main product.
Copy both of the code snippets and paste them onto your website. Once you paste them, they'll appear like this:
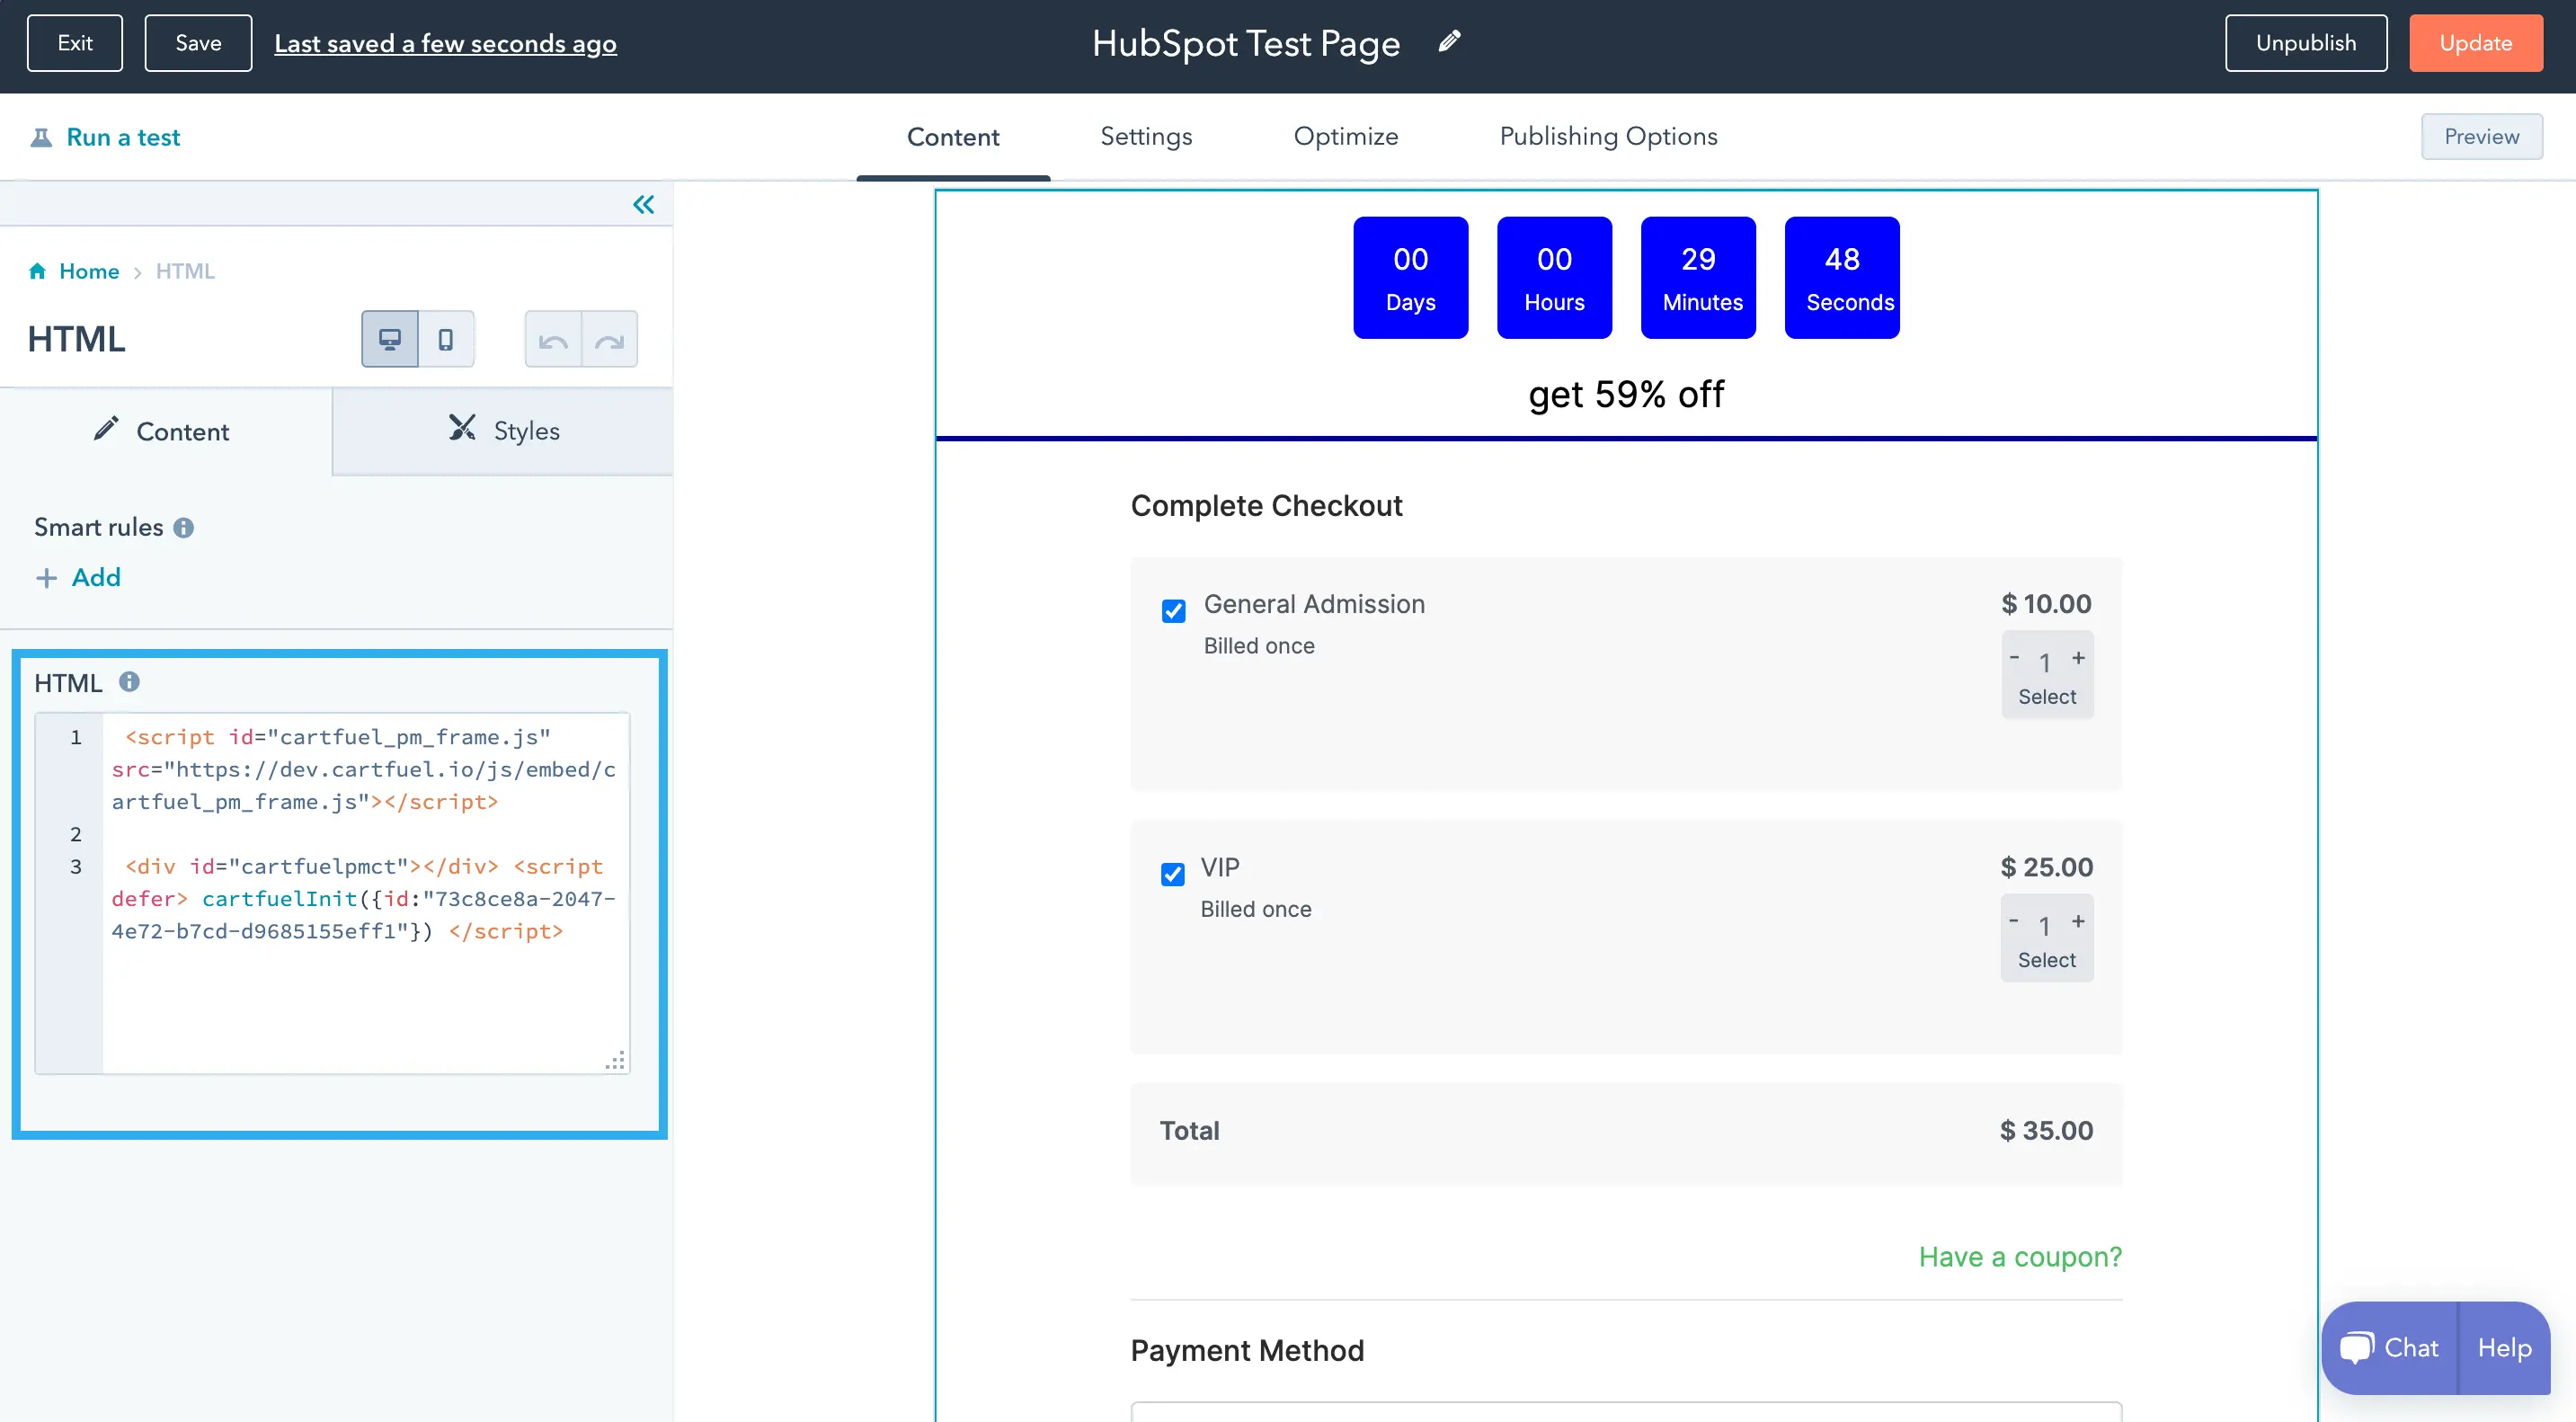

Note: This example uses HubSpot landing pages.
That's it. For the upsell embed, go to your upsell page and repeat the process.
Copy the two code snippets for your upsells and paste them on the upsell page.
The page will now look like this:
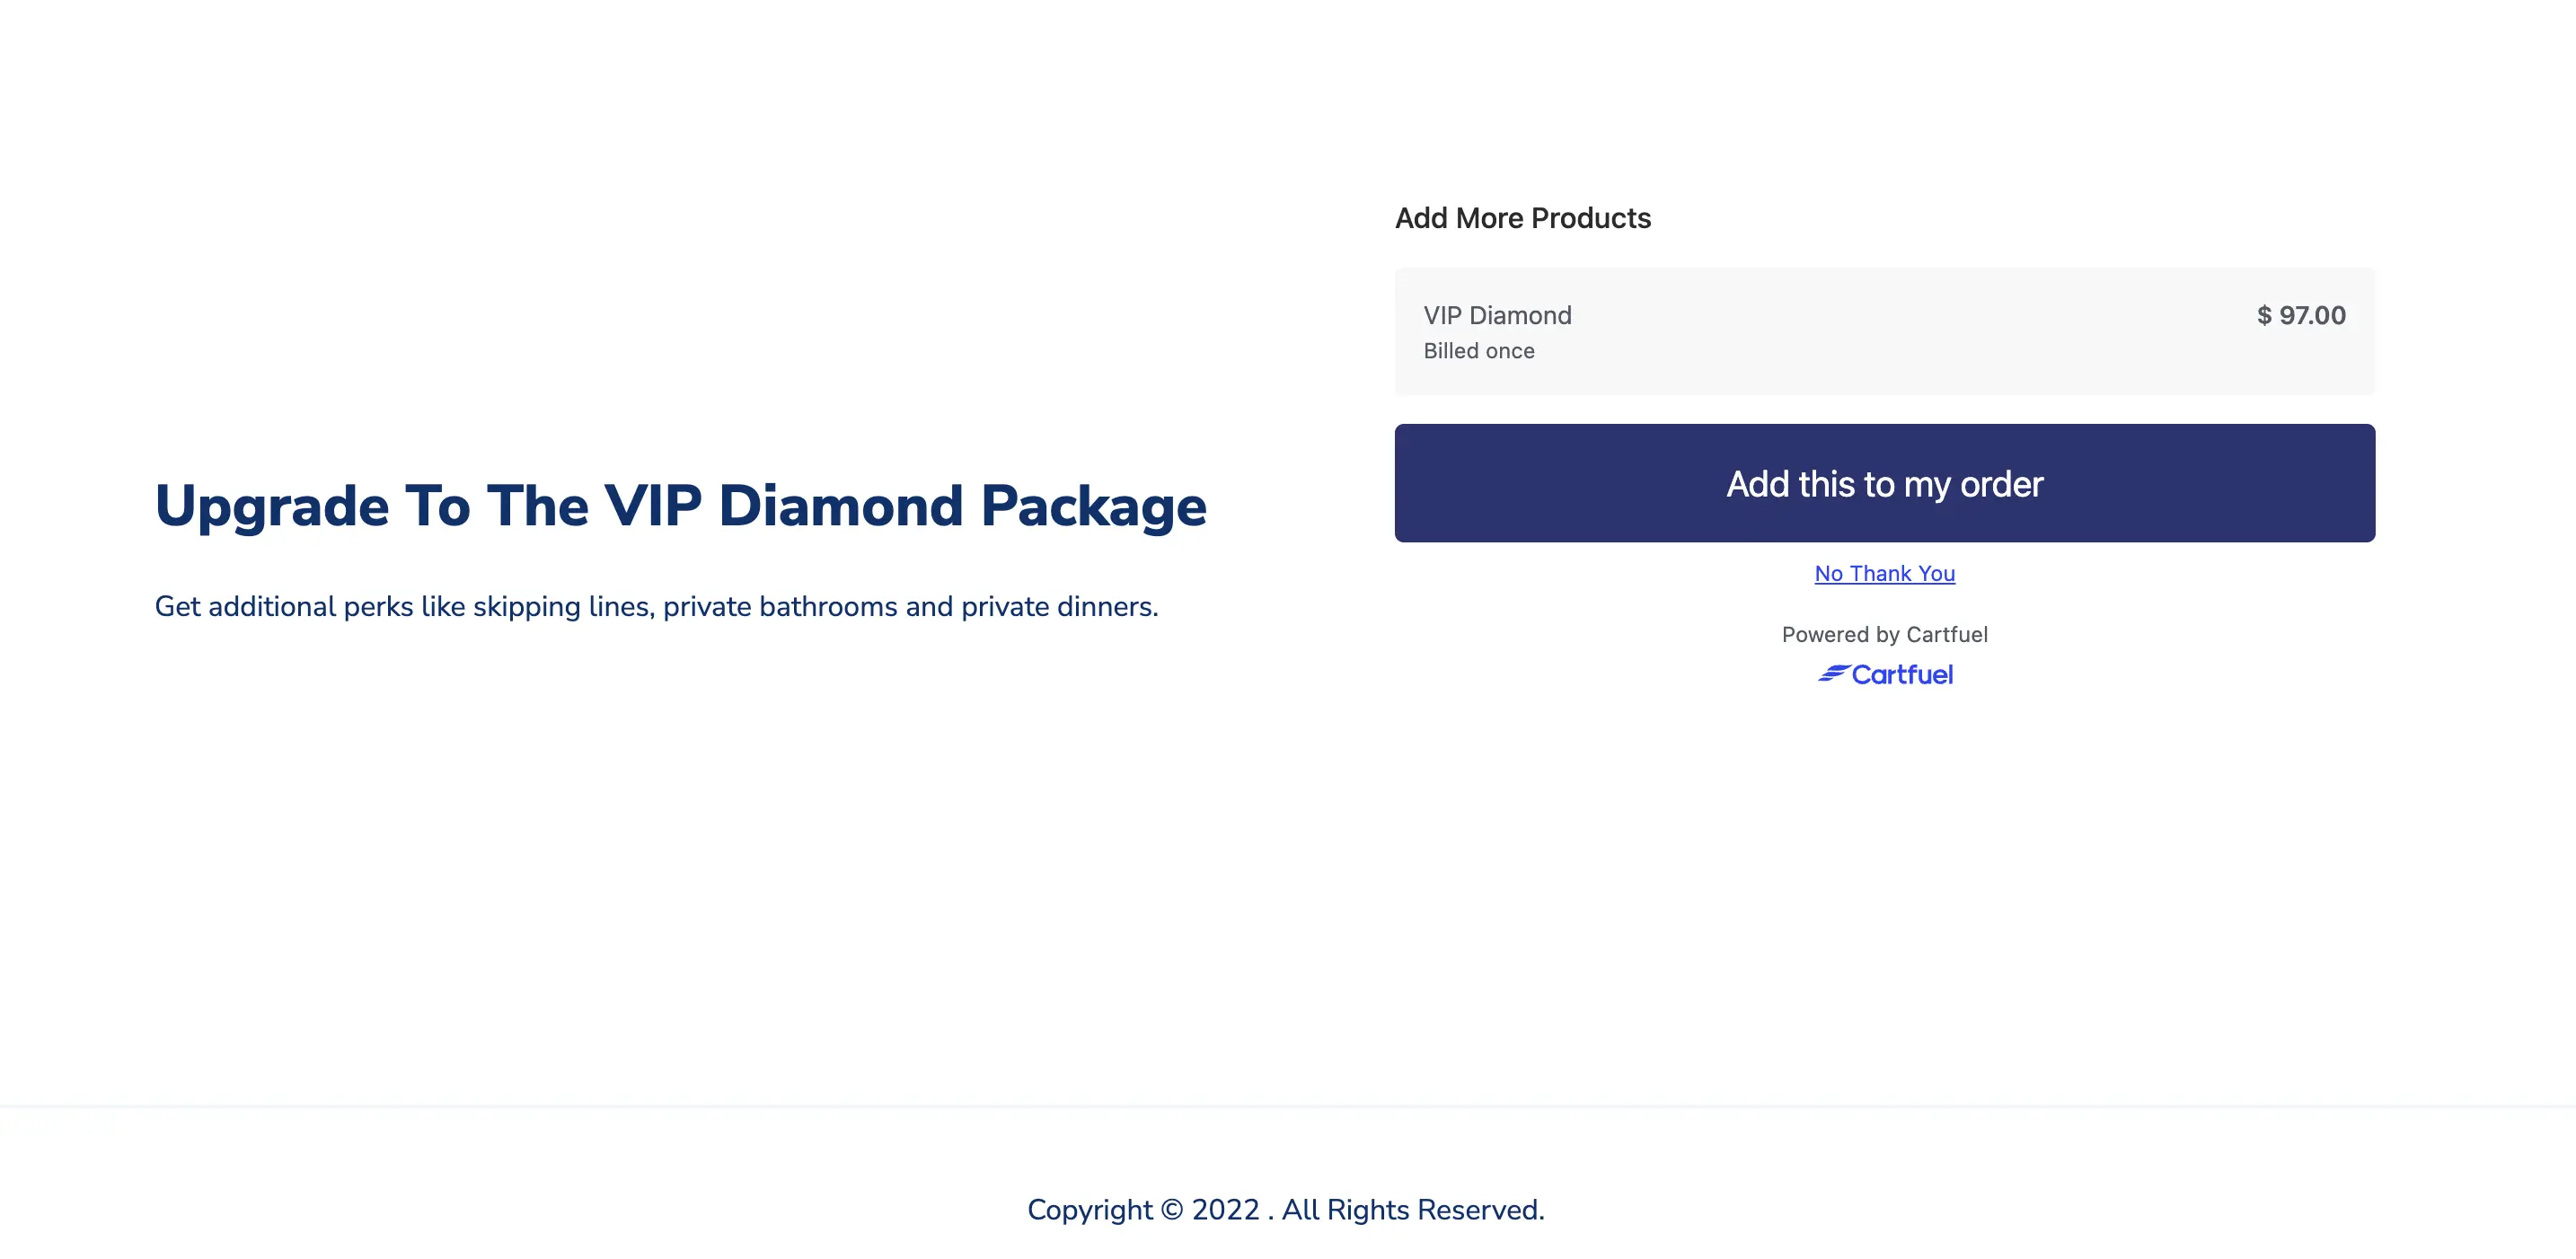
Perfect. Now we're ready to test out our payments.
How To Confirm A Customer Purchased A Ticket For Your Event
Now that we have our payment form for our event and one-click upsells set up, it's time to test it out.
Cartfuel recommends setting your products to $1 and using an actual debit/credit card to test your payment form.
Once you make the test purchase, head to your HubSpot account.
We are now going to confirm that:
- The purchase was successful
- The customer was sent to HubSpot with the appropriate sales data
Click on "Contacts" from the top menu item.
Then click on the contact that made the test purchase; - in this case, it will be you or your employee.
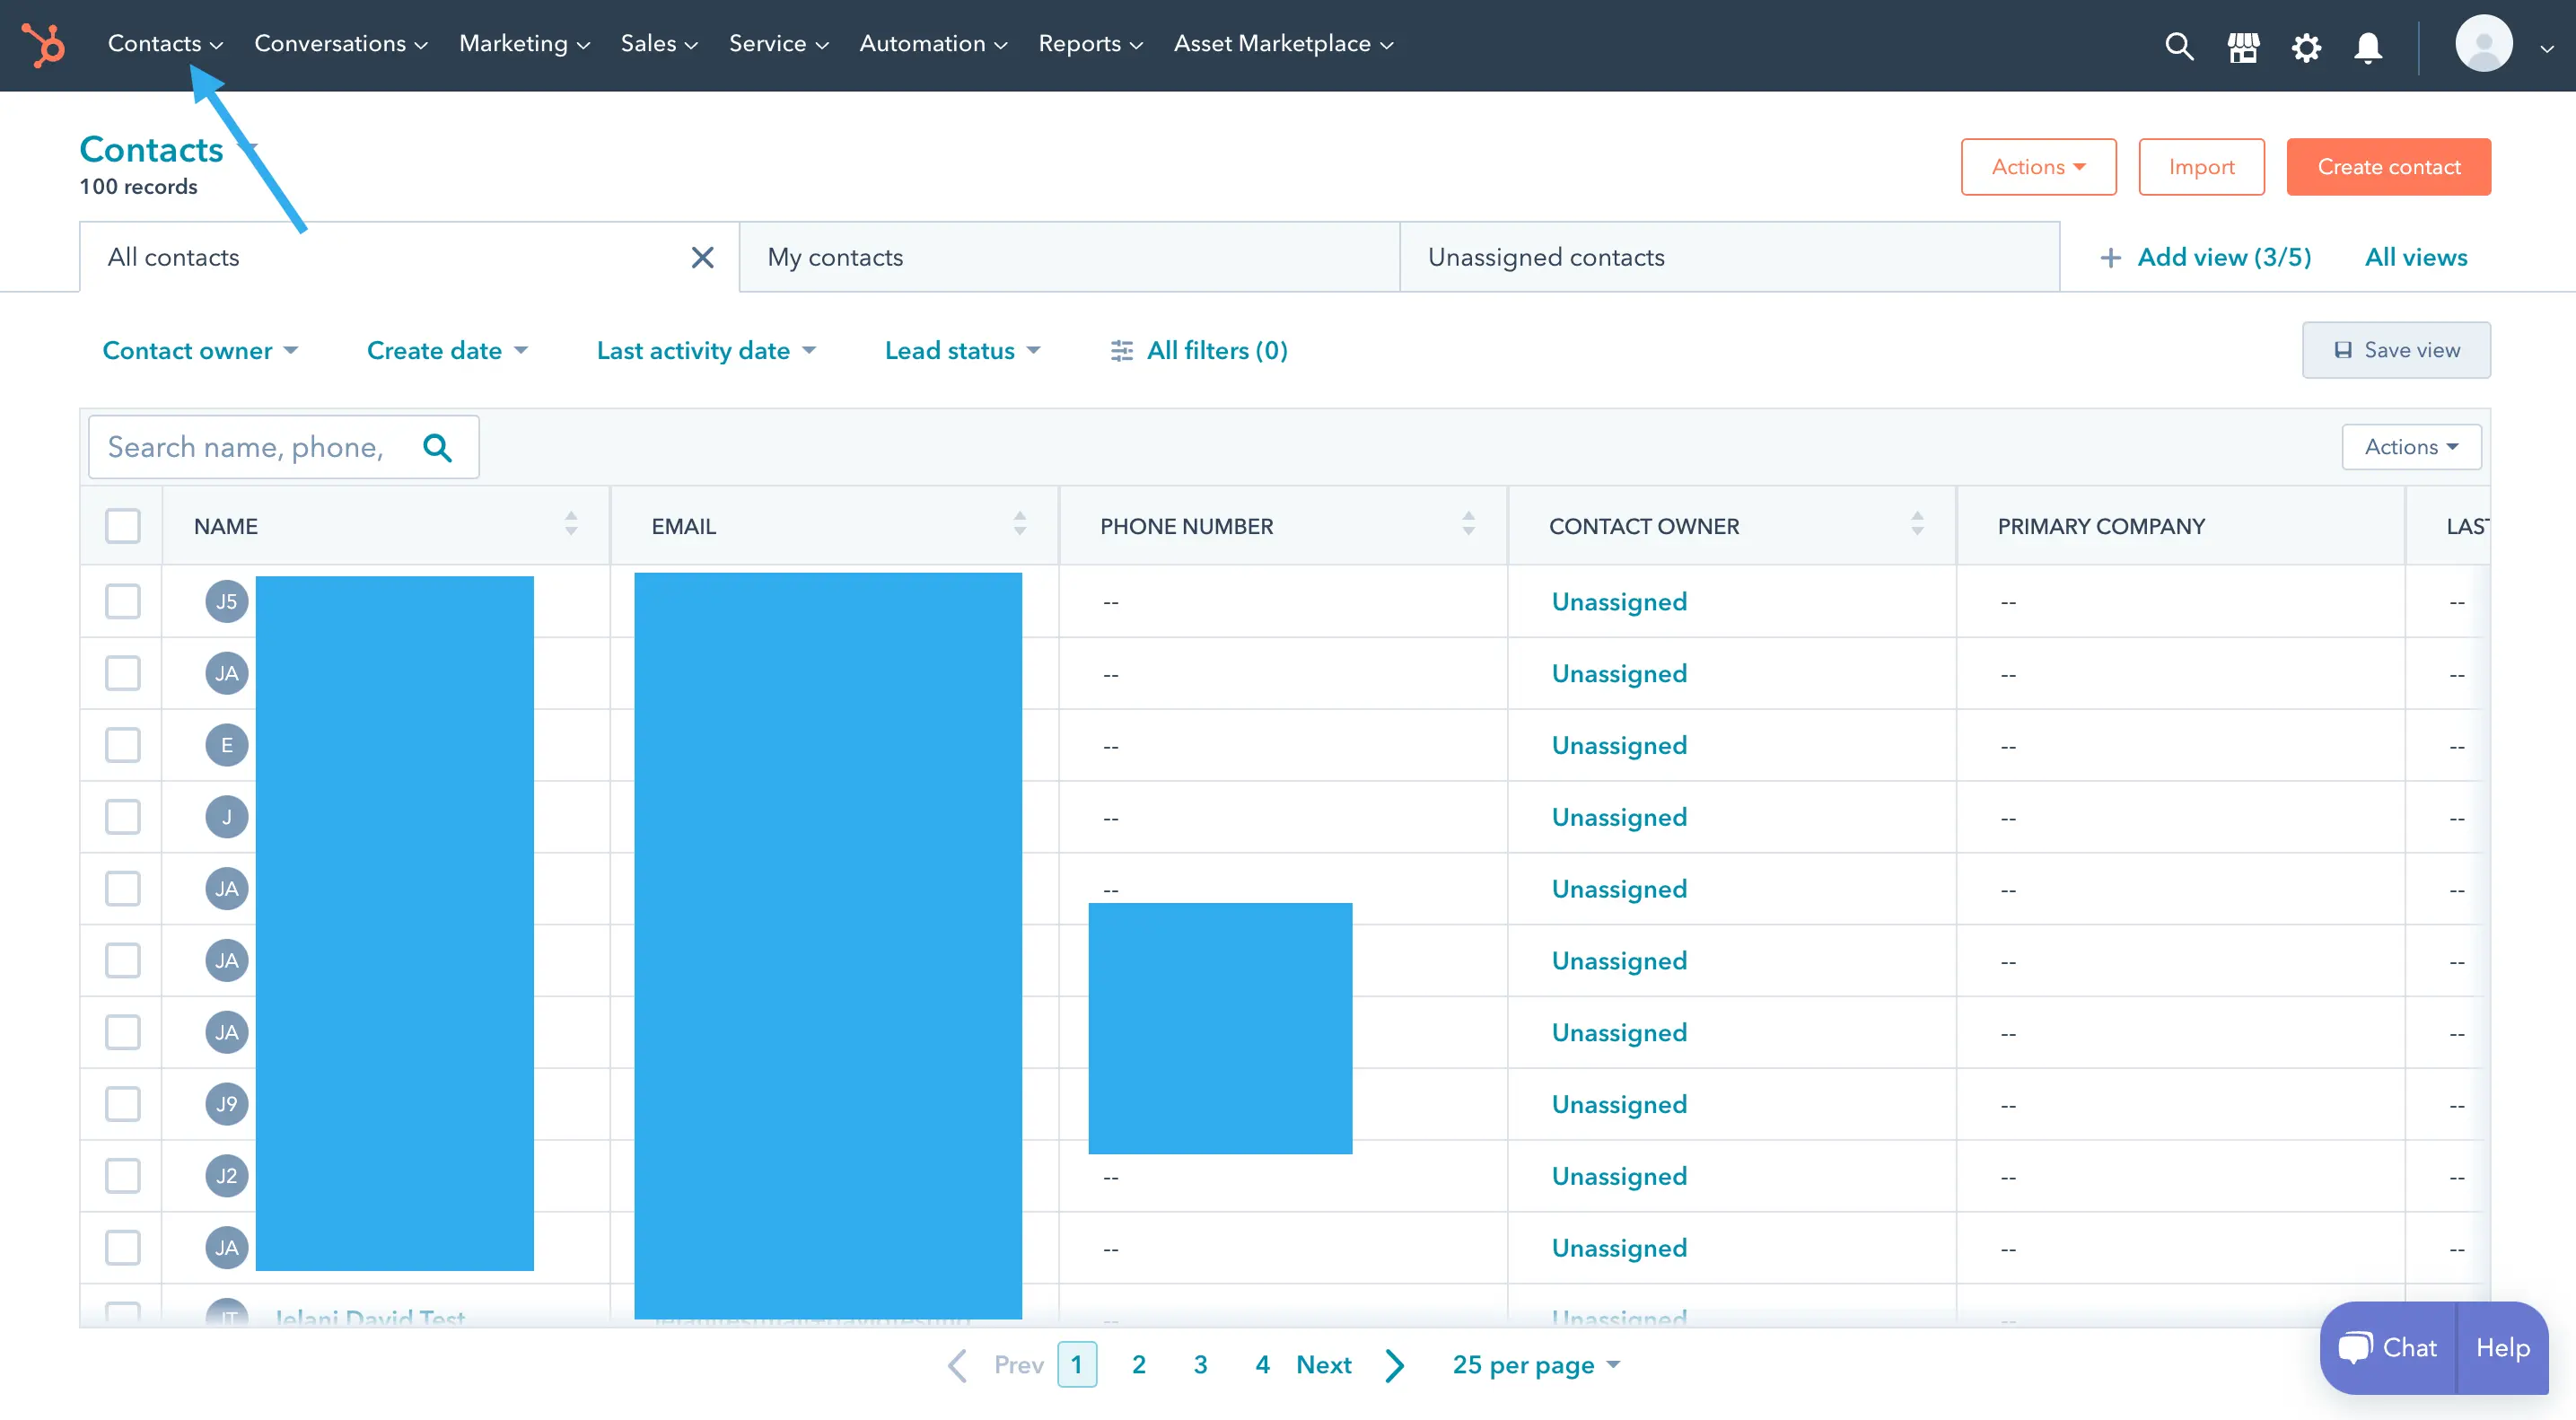
In the HubSpot activity timeline, you should now see the products purchased for that particular customer.
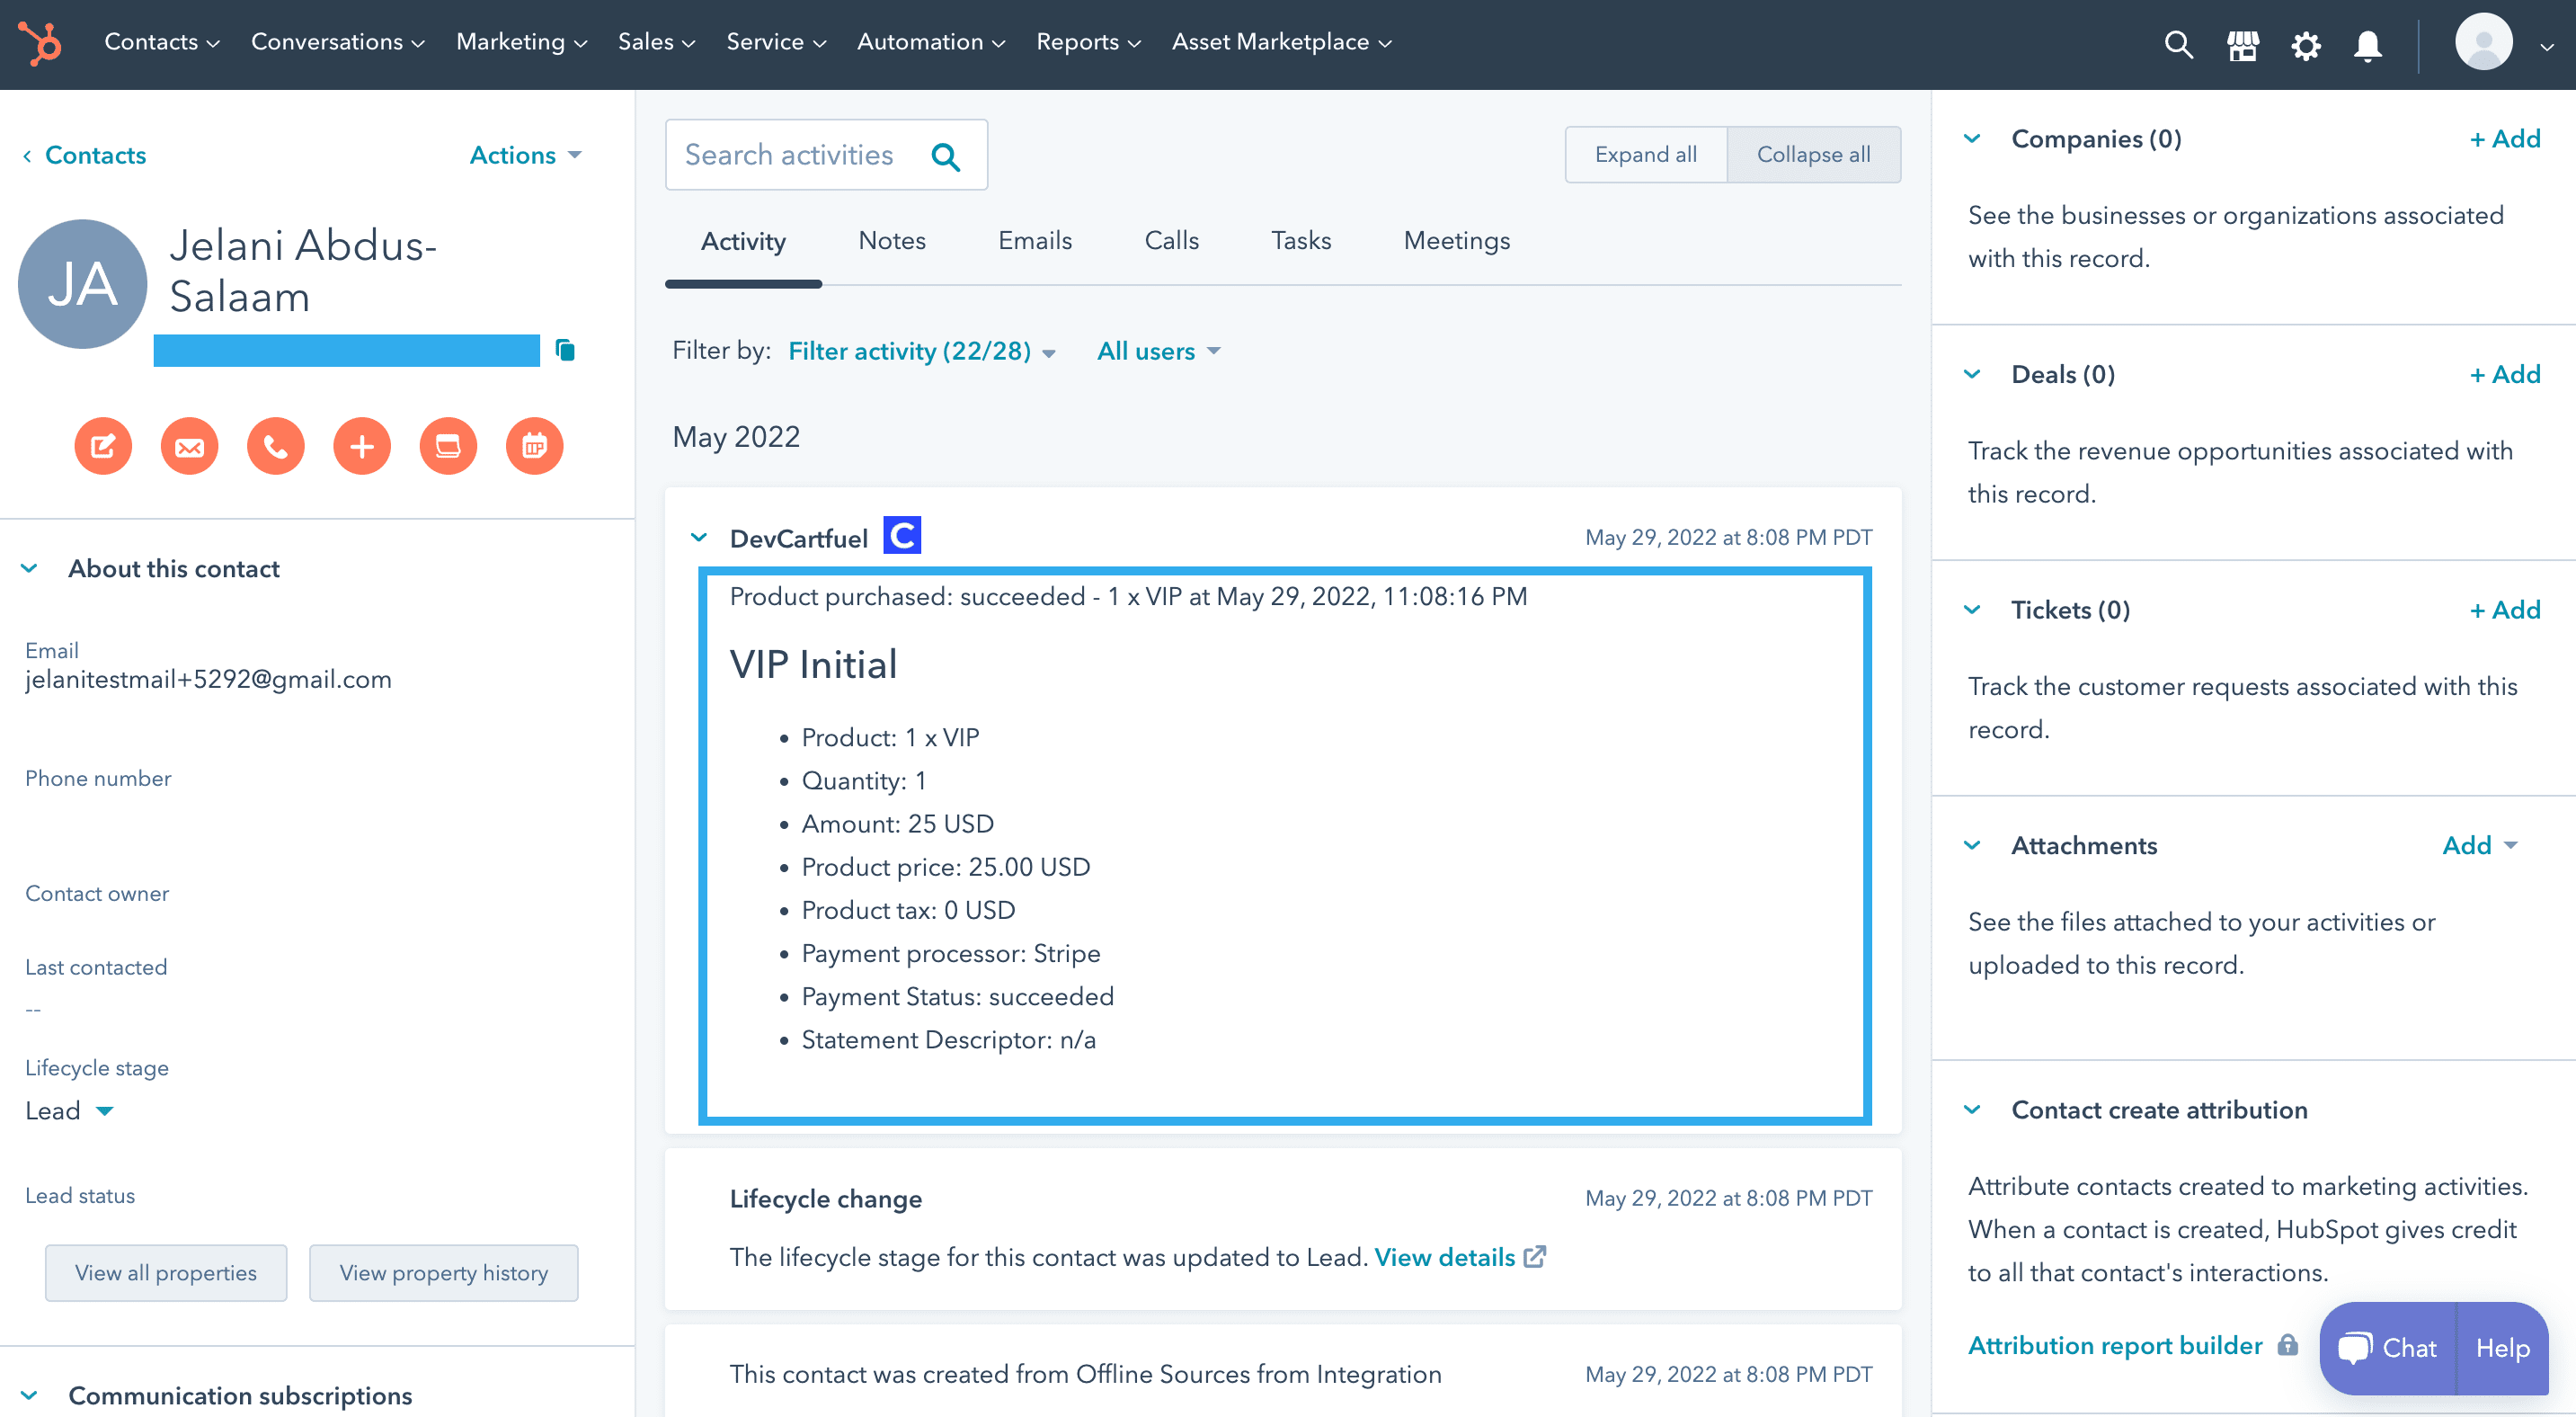
You'll also see if they bought more than one ticket.
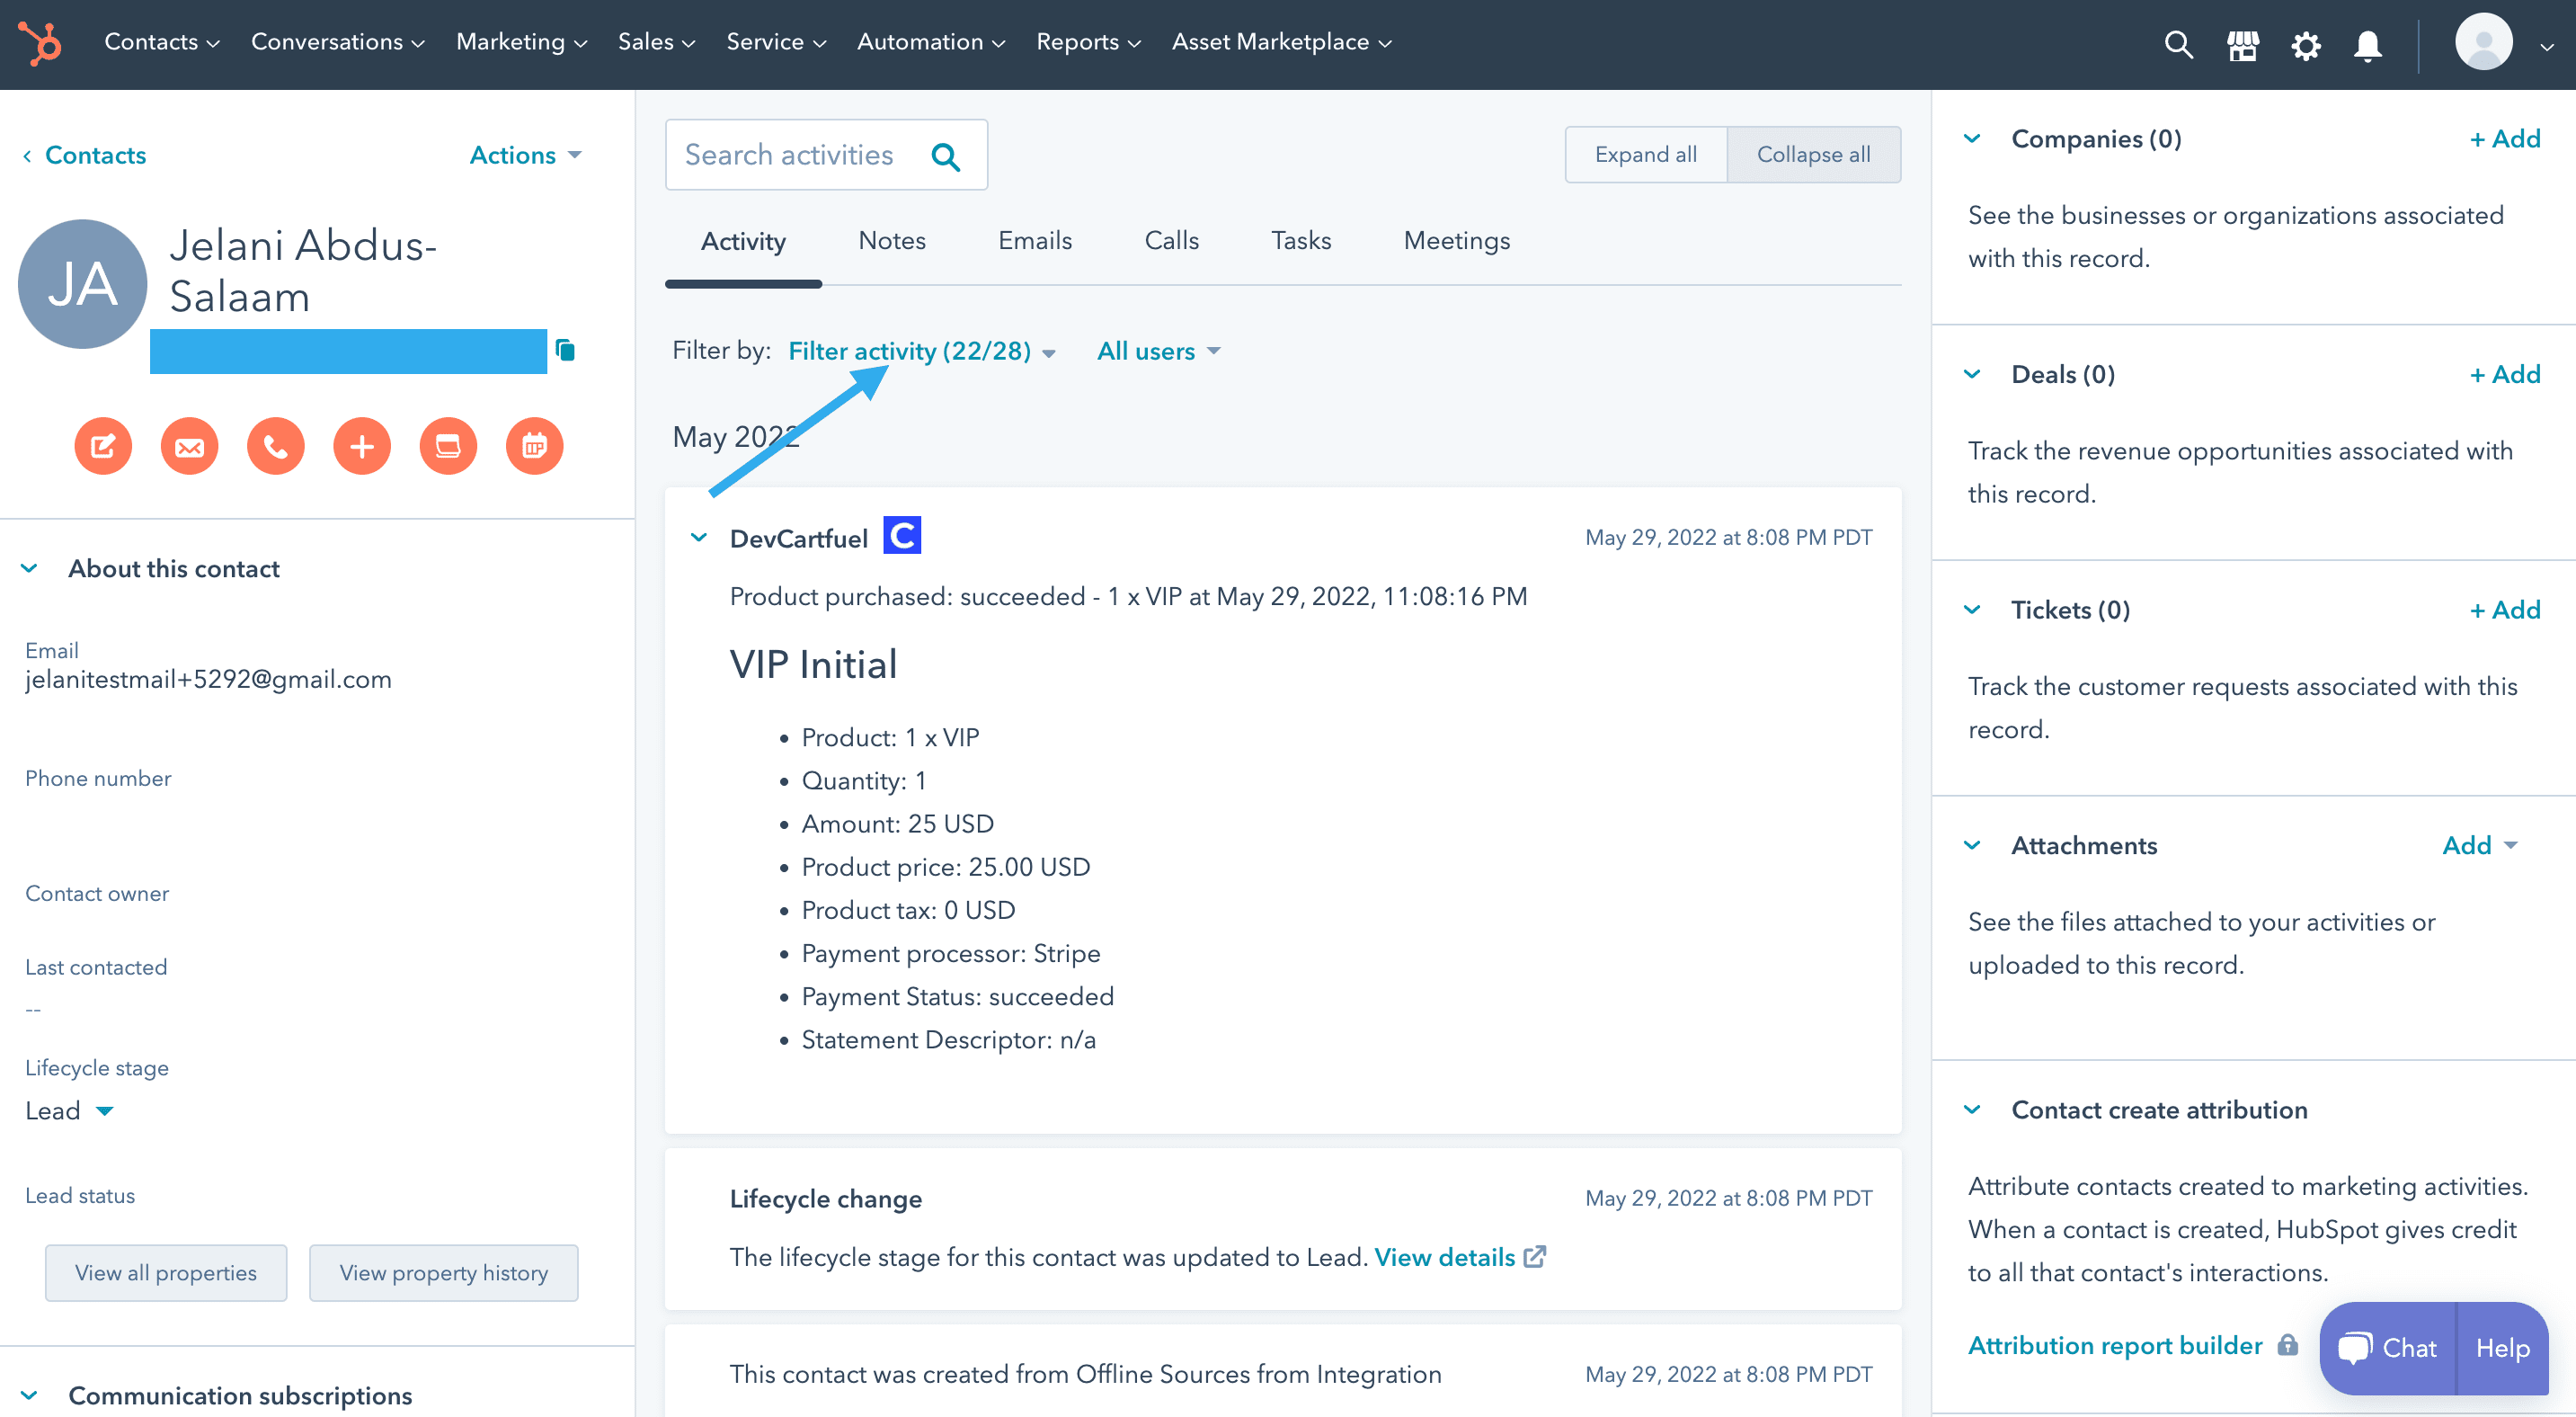
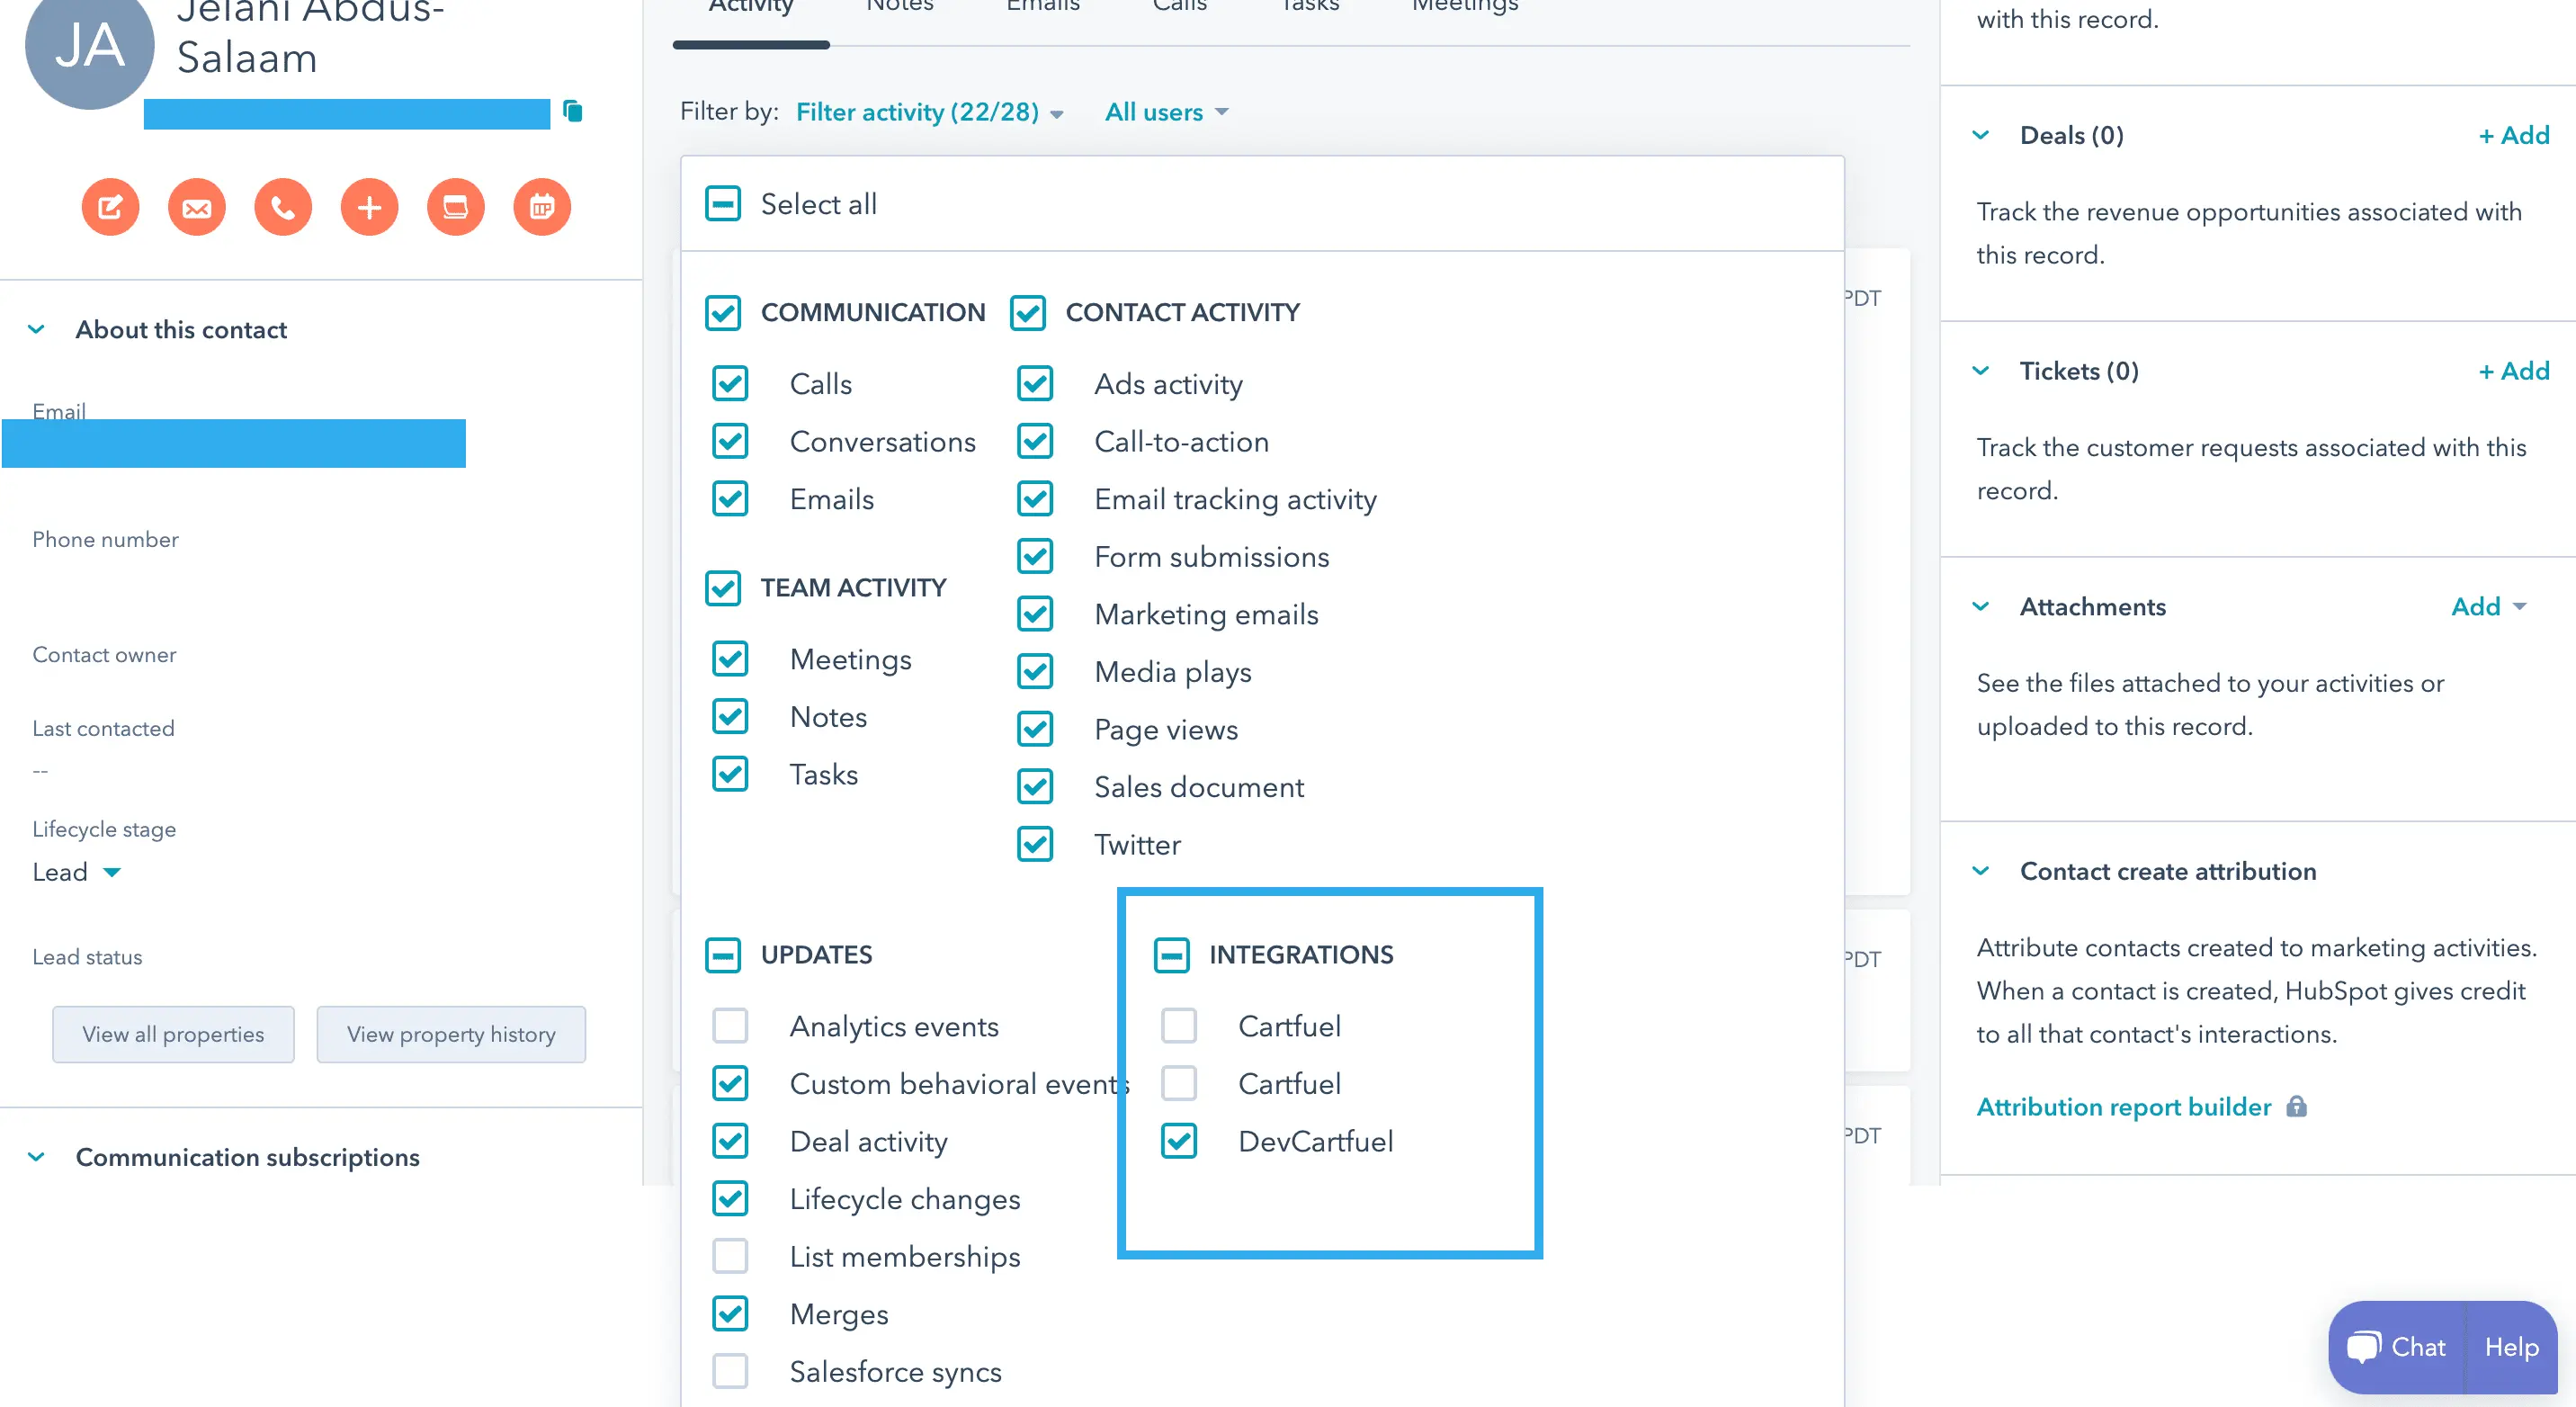
If you don't see the payments in the timeline, you need to click the filter tab and click Cartfuel.
And there you have it. You now have a fully customized payment form on your website that connects with HubSpot so you can start selling tickets to your event.
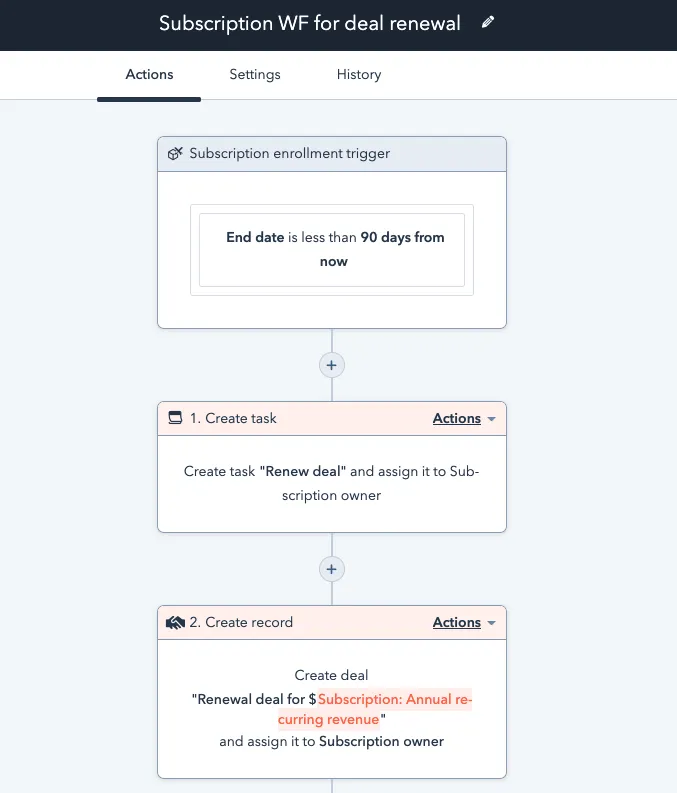
You can even set up automated workflows based on the sales data.
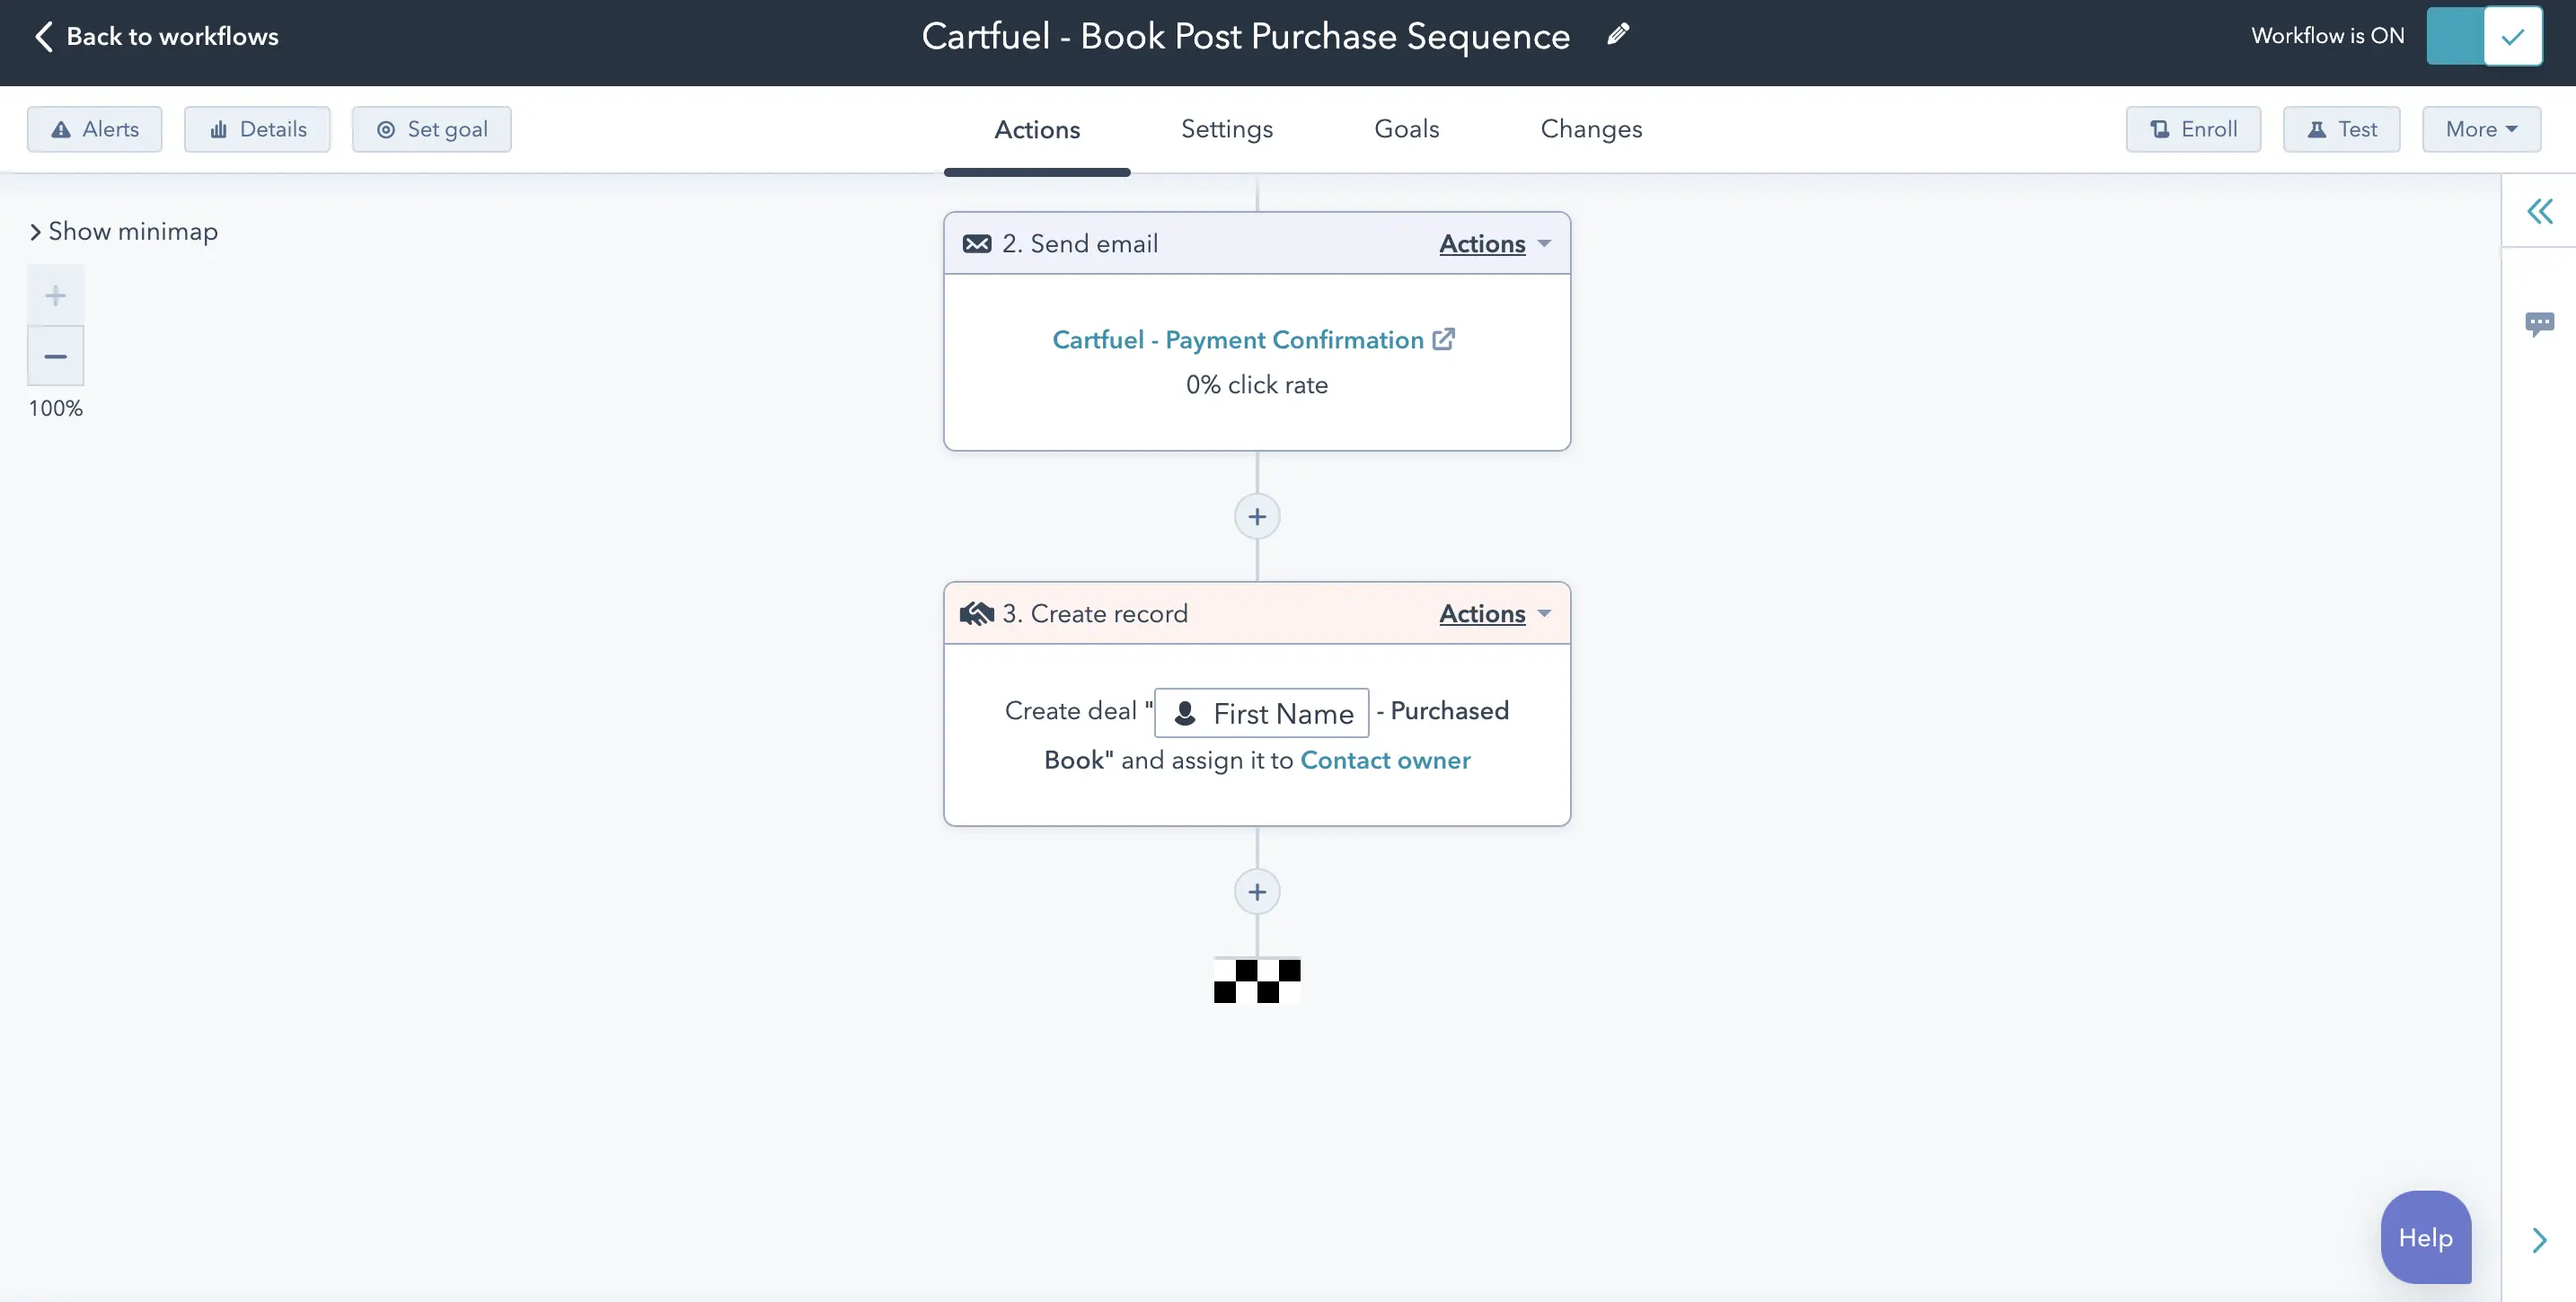
For example, maybe you want to send email automation to those who purchased a VIP package - you can do that by creating a workflow based on the product name.

Then trigger the workflow to send an email every time that product is purchased.
Or you can send those customers who purchased a certain ticket level to a sales pipeline for your sales team to follow up with.
Cartfuel gives you lots of functionality to start selling your tickets to your event, all while ensuring the sales data goes into HubSpot.
If you want to start using Cartfuel with HubSpot, check out our free trial, where all features are unlocked including the HubSpot integration.
Why Use DepositFix with HubSpot for Event Ticket Sales?
Integrating DepositFix with HubSpot offers a seamless solution for managing your event payments directly within your CRM, eliminating the need for complex third-party systems.
DepositFix allows you to accept payments effortlessly while leveraging HubSpot’s automation, segmentation, and marketing tools to create a unified experience for both you and your attendees. Here's why using DepositFix with HubSpot can significantly enhance your event management and ticket sales process:
- Streamlined Payments in HubSpot: Keep your attendees on your site from registration to payment. DepositFix allows you to collect payments directly through HubSpot forms, eliminating the need for external payment pages. More convenience means higher conversion rates and fewer drop-offs.
- One-Click Upsells for Increased Revenue: DepositFix enables easy upsell opportunities like VIP tickets, merchandise, or post-event recordings during the purchase process. With HubSpot’s automation and DepositFix’s flexible checkout features, attendees can upgrade their tickets or add-ons with just one click, maximizing revenue with minimal effort.
- Automated Workflows & Follow-Ups: Automate everything—from confirmation emails to post-event follow-ups. DepositFix and HubSpot together allow you to create smart workflows that trigger personalized communications based on attendee behavior. No manual tracking, just flawless automation that saves you time and increases engagement.
- Enhanced Attendee Insights: With all your payment and registration data in one place, you can easily track attendee behavior, segment your audience based on purchase patterns, and tailor your marketing efforts. You’ll have a complete overview of your event funnel, making it easier to optimize your ticket sales strategy.
How to Maximize Ticket Sales and Engagement with HubSpot
When selling event tickets, it's not just about setting up a payment form and waiting for the sales to roll in. To truly maximize your ticket sales and engagement, you need to leverage the full potential of HubSpot's CRM and marketing automation tools. Here's how:
1. Use Segmented Email Campaigns to Target Different Audience Groups
Once your payment form is live and sales start coming in, use HubSpot's email marketing features to create highly targeted email campaigns. Segment your audience based on ticket levels, previous event attendance, or interaction with your marketing emails.
For example, you can:
- Send early-bird ticket offers to a select group of loyal customers or attendees from past events.
- Create exclusive VIP offers for high-value prospects who purchased premium packages.
- Automate reminders for people who abandoned the checkout process, urging them to complete their purchase before tickets sell out.
2. Upsell Ticket Holders with Personalized Offers
One of the most effective ways to increase revenue from event tickets is through upselling. Using HubSpot workflows, you can automatically send follow-up offers to customers who have already purchased a ticket. Consider offering:
- VIP package upgrades for standard ticket holders.
- Group ticket deals for attendees who might want to bring colleagues or friends.
- Exclusive post-event experiences such as access to special networking events or one-on-one time with keynote speakers.
With a third-party app like Depositfix, you can set up one-click upsell offers directly on your website after someone completes their initial ticket purchase.
3. Automate Post-Purchase Communication
After a customer buys a ticket, the interaction shouldn’t stop. HubSpot allows you to set up personalized thank-you emails that not only confirm their purchase but also engage them further with important event information or additional offers.
For example:
- Send personalized itineraries or event agendas based on the ticket type they purchased.
- Offer event-day upgrades or add-ons, such as exclusive breakout sessions, merchandise, or access to premium content.
- Encourage attendees to join a dedicated event community (e.g., via Slack or Facebook) to increase pre-event engagement and foster networking.
4. Retarget Website Visitors Who Didn’t Purchase
Not every visitor who lands on your event registration page will purchase a ticket on their first visit. With HubSpot's retargeting capabilities, you can create ads specifically for people who visited your registration page but didn’t complete the purchase. Consider offering them a limited-time discount or emphasizing the unique aspects of your event to capture their interest and drive them back to complete the sale.
5. Leverage Analytics to Refine Your Strategy
Finally, HubSpot's analytics tools can give you valuable insights into your ticket sales strategy. You can track how different segments of your audience are responding to your campaigns, see which upsell offers are converting best, and identify any bottlenecks in your sales process.
Use this data to:
- Refine your email copy and offers to better resonate with your target audience.
- Adjust pricing or offer additional incentives if certain ticket levels aren’t selling as expected.
- Optimize your upsell strategy based on real-time data.
By using HubSpot’s CRM, email marketing, automation, and analytics features, along with powerful integrations like Depositfix, you can create a highly efficient event ticket sales funnel that not only increases your revenue but also enhances attendee engagement. Also, take your event promotion to the next level with an editable event flyer that showcases your event's unique features and attracts more attendees.
FAQ
How do you connect HubSpot to stripe?
You can connect your Stripe account to HubSpot by searching for Stripe in the HubSpot marketplace.
But it's important to note that the native Stripe integration for HubSpot only does invoices.
Does HubSpot integrate with PayPal?
HubSpot does not integrate with PayPal. But, if you want to use PayPal with HubSpot, you can check out Cartfuel's payment integration.
How can you use the Eventbrite integration with HubSpot?
If you want to use the Eventbrite integration with HubSpot, you can search for "Eventbrite" in the HubSpot marketplace.
From there, you can install the app into your account.
Note: Eventbrite is free to use. But, they charge 2% + $0.79 per paid ticket or 3.5% + $1.59 per paid ticket depending on your plan.
Can you automate payment workflows using DepositFix with HubSpot?
Yes! DepositFix allows you to automate your entire payment workflow within HubSpot. This includes creating invoices, processing payments, and sending automated follow-up emails—all from one platform. By streamlining these processes, you save time and reduce manual errors, improving the overall customer experience.